# Low-code buy button (/guides/low-code-buy-button)
Accept PayPal payments with no backend. Generate a Buy Button in your PayPal dashboard and paste it straight into your site.
The Buy Button is PayPal's low-code checkout experience. Set up your product and price in the [PayPal dashboard](https://www.paypal.com/signin?returnUri=https%3A%2F%2Fwww.paypal.com%2Fncp%2Flinks%2Fcreate), paste the generated embed code onto your page, and let customers pay on a secure PayPal-hosted checkout page. No backend, no SDK, no API required.
The Buy Button supports PayPal, Pay Later, Venmo, Apple Pay, and major debit and credit cards. It's available in more than 200 countries and regions, supports multiple languages, and accepts more than 23 currencies.
## Prerequisites [#prerequisites]
You need a [PayPal Business account](https://www.paypal.com/us/business). The Buy Button feature isn't available on personal accounts.
> **Note:** If you have a personal account, you can upgrade to Business for free from your PayPal account settings. There's no need to create a new account.
## Create your Buy Button [#create-your-buy-button]
Complete these steps to build your button in the PayPal dashboard, then copy the generated code onto your page.
### Step 1: Sign in [#step-1-sign-in]
Log into your [PayPal Business account](https://www.paypal.com/signin).
### Step 2: Start the button creator [#step-2-start-the-button-creator]
Choose one of these entry points:
#### Option 1
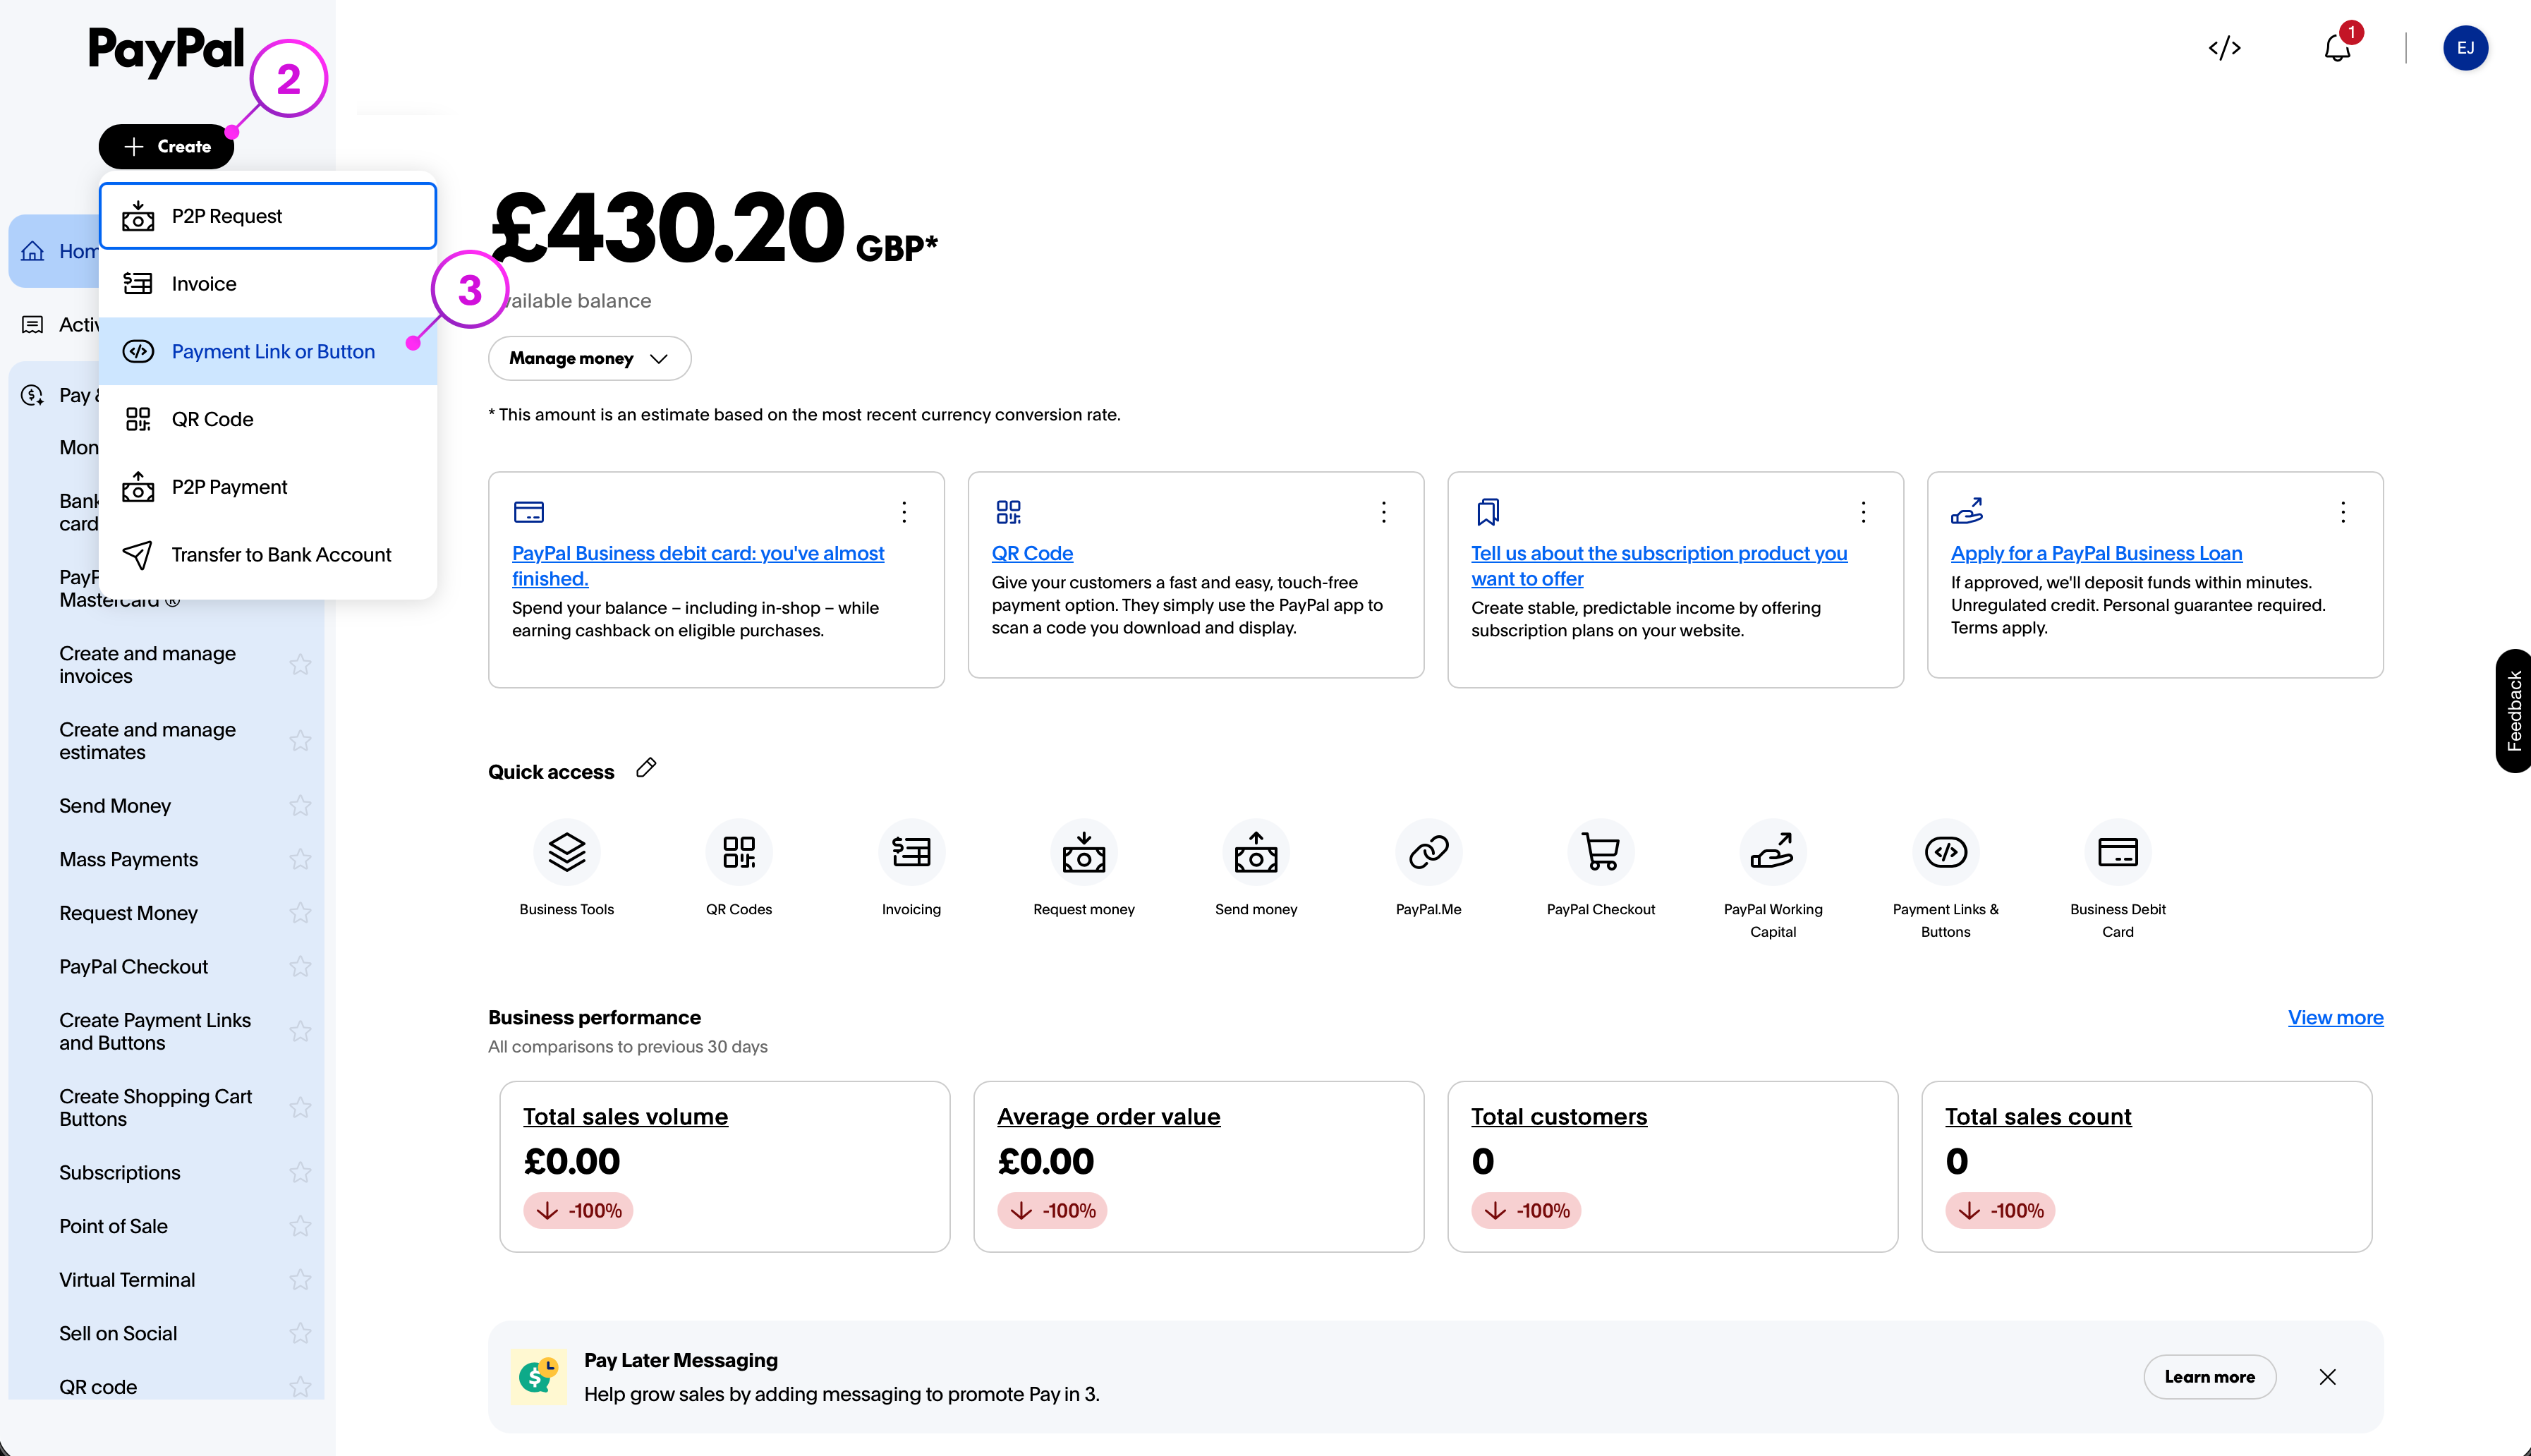 From **+ Create**, select **Payment Link or Button**.
#### Option 2
From **+ Create**, select **Payment Link or Button**.
#### Option 2
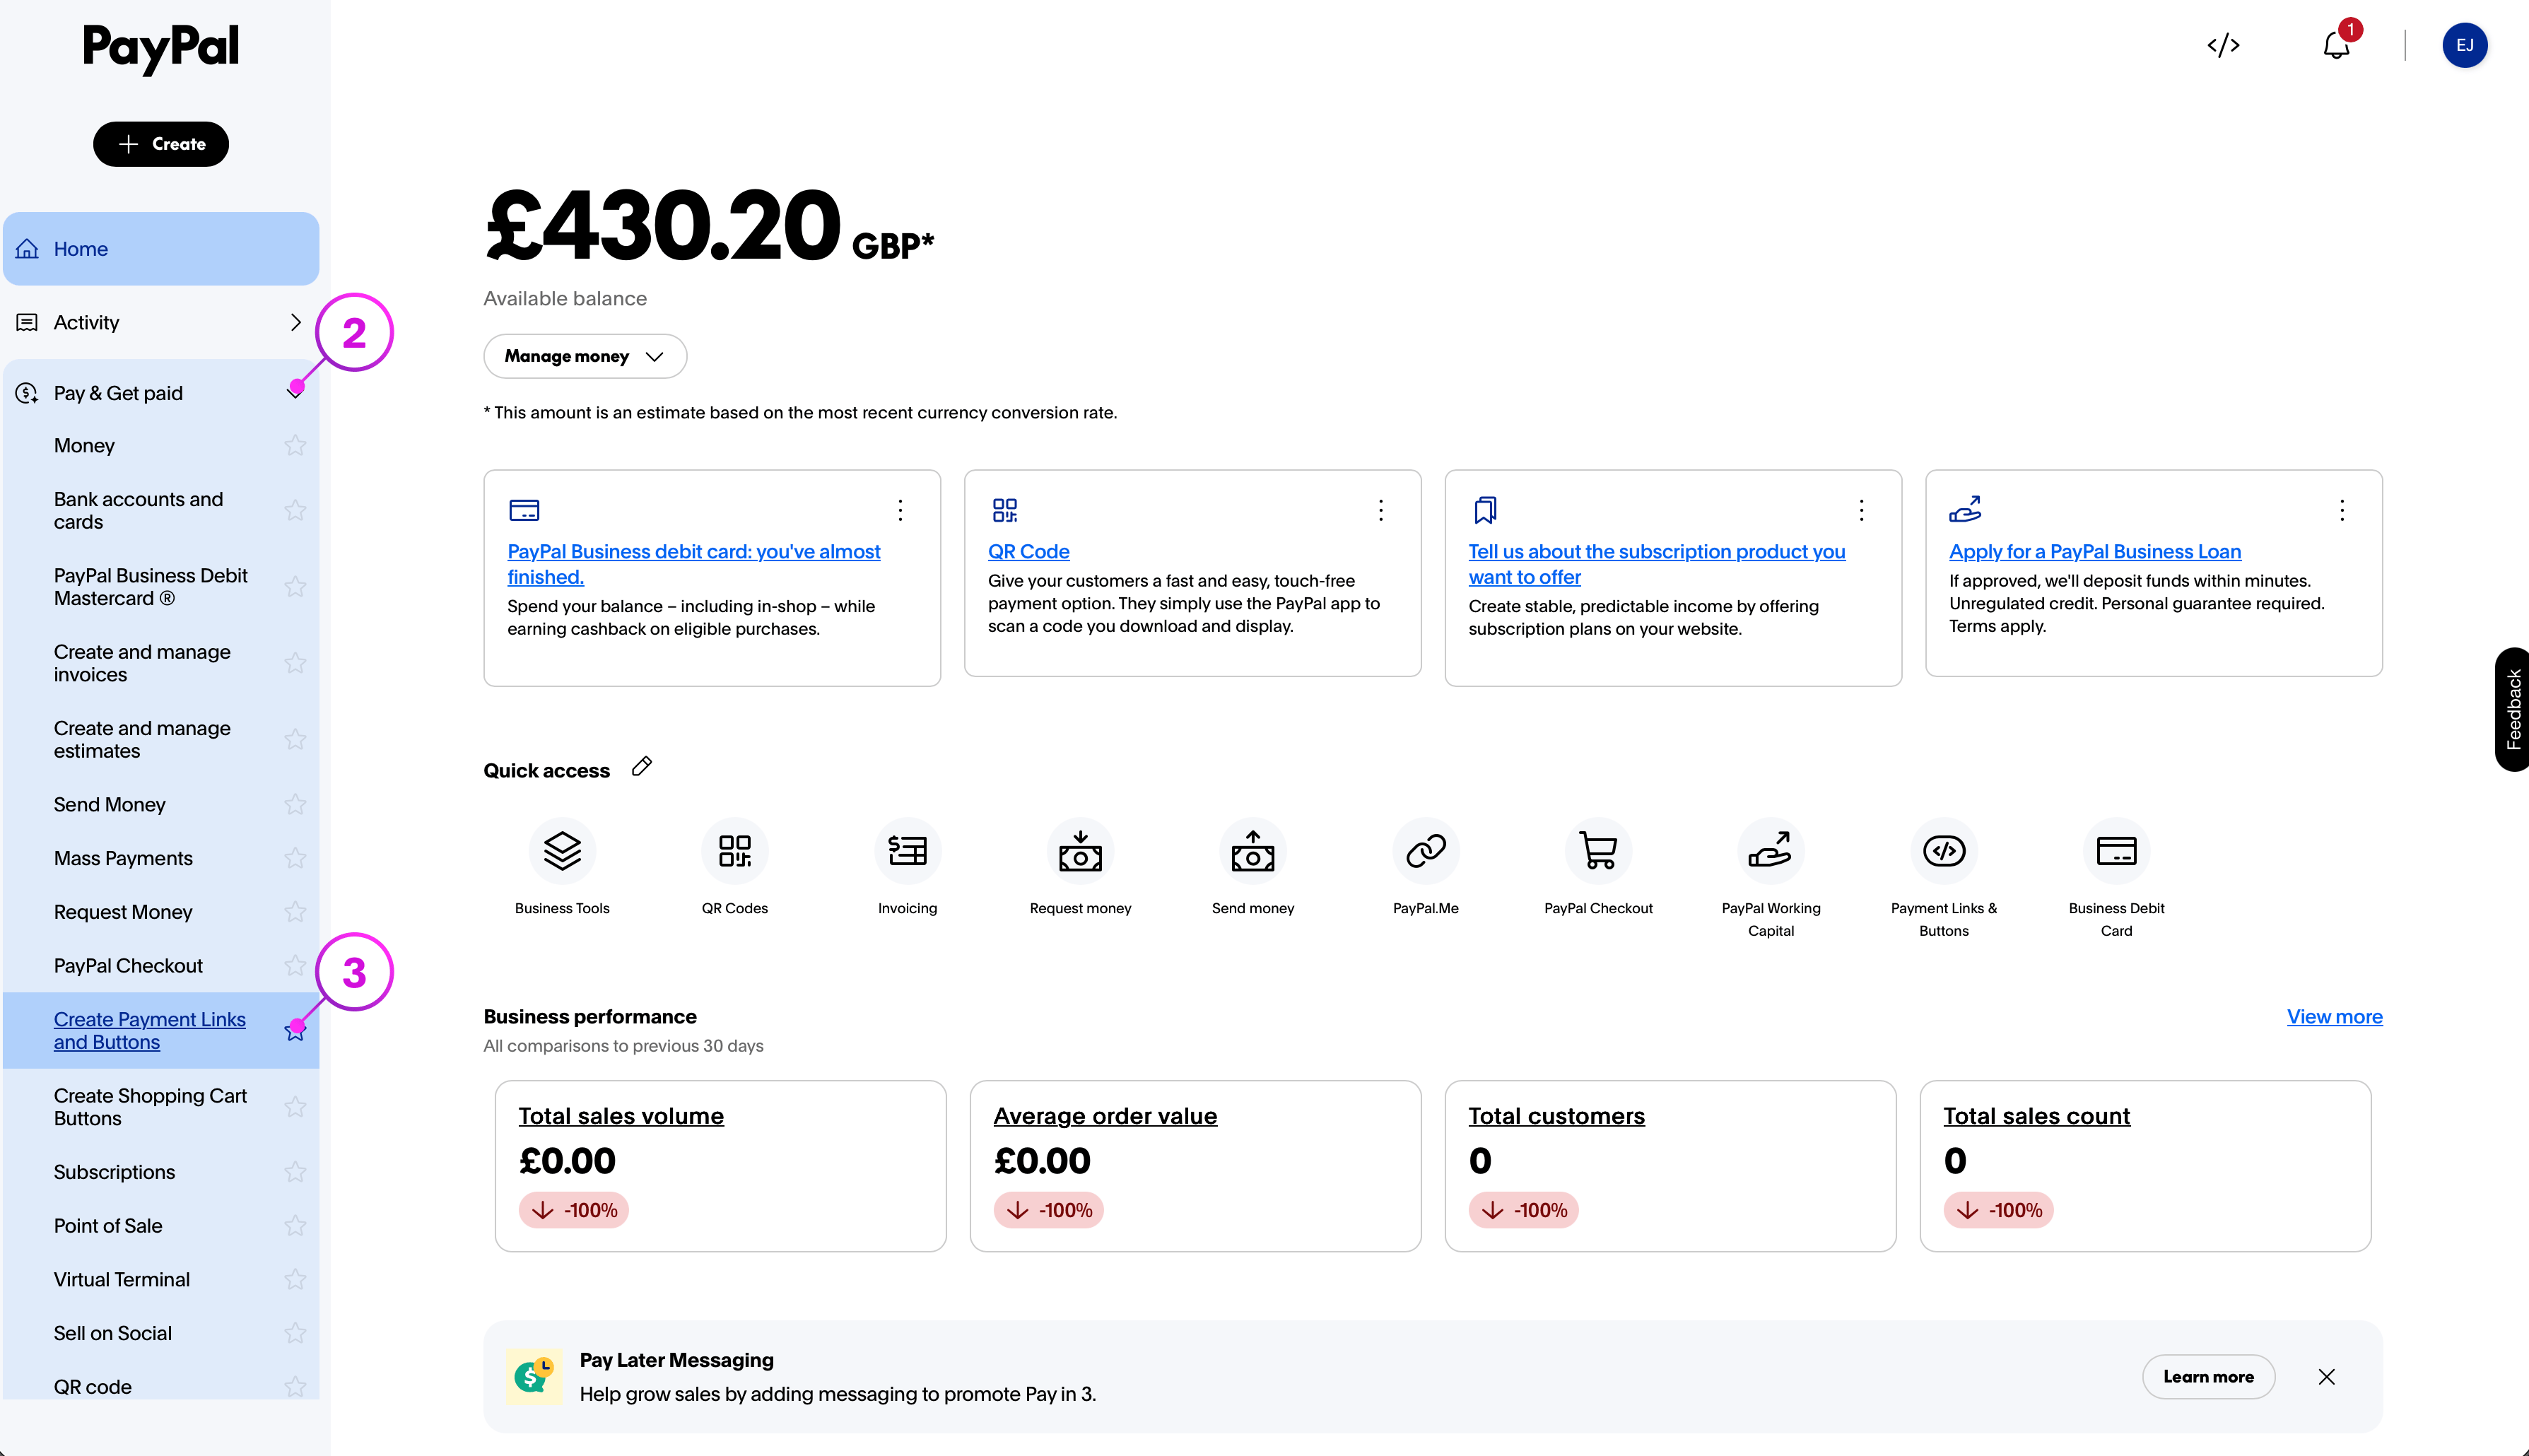 Select **Pay & Get Paid**, then **Create Payment Links and Buttons**.
### Step 3: Select Payment buttons [#step-3-select-payment-buttons]
Open the [Build Your Payment Links and Buttons](https://www.paypal.com/ncp/links/create) page and select **Payment buttons**.
### Step 4: Enter the product details [#step-4-enter-the-product-details]
* **Name:** the product your customer is buying
* **Description** (Optional): a brief product summary
* **Price:** enter the amount and currency
Select **Pay & Get Paid**, then **Create Payment Links and Buttons**.
### Step 3: Select Payment buttons [#step-3-select-payment-buttons]
Open the [Build Your Payment Links and Buttons](https://www.paypal.com/ncp/links/create) page and select **Payment buttons**.
### Step 4: Enter the product details [#step-4-enter-the-product-details]
* **Name:** the product your customer is buying
* **Description** (Optional): a brief product summary
* **Price:** enter the amount and currency
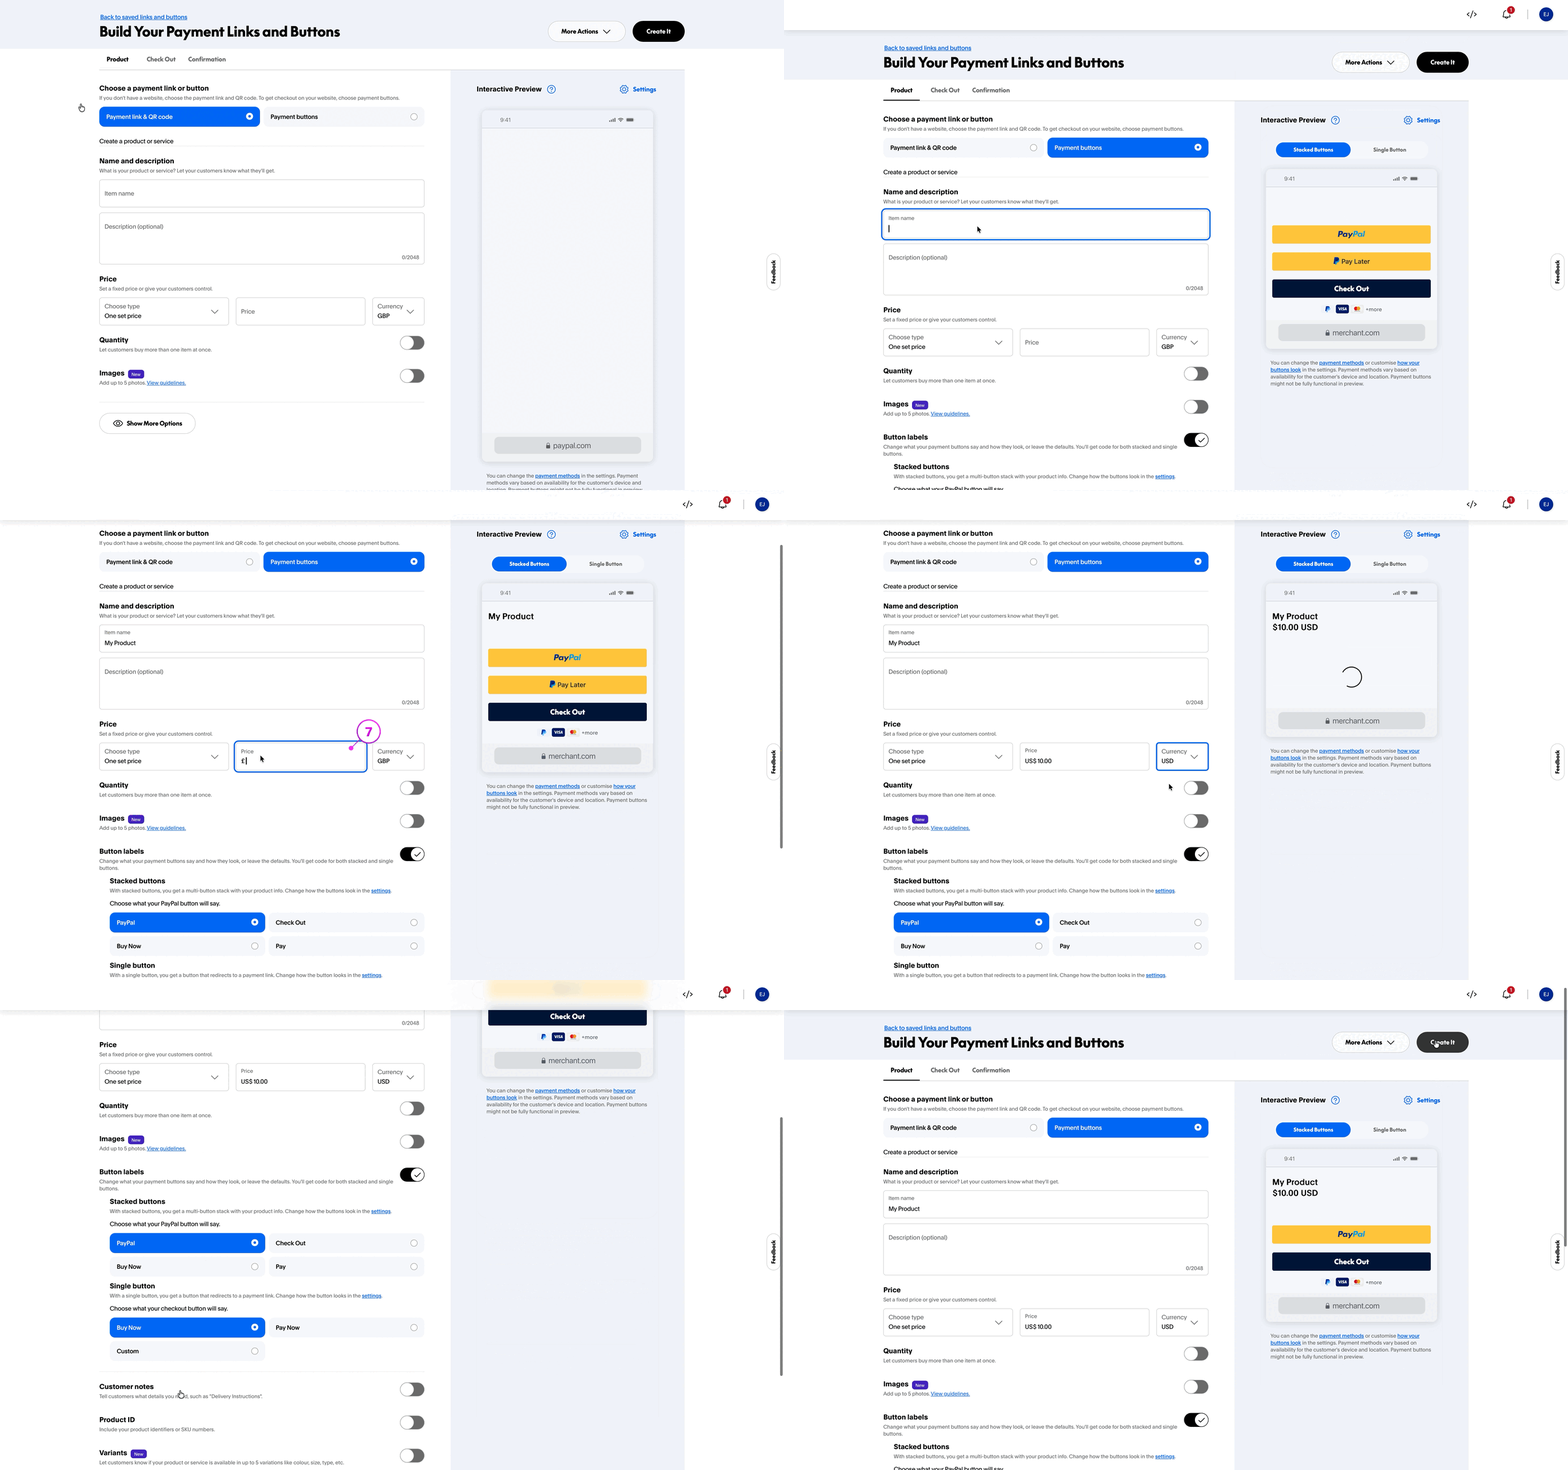 Creating a button: name, description, price, then build.
### Step 5: Create the button [#step-5-create-the-button]
Select **Build it**. Before saving, you can customize the button style and colors, and choose whether checkout opens in-context or in a new window.
### Step 6: Customize your button (optional) [#step-6-customize-your-button-optional]
Use the dashboard tabs to update the button text, style, colors, and checkout flow without writing CSS.
#### Button customization
Creating a button: name, description, price, then build.
### Step 5: Create the button [#step-5-create-the-button]
Select **Build it**. Before saving, you can customize the button style and colors, and choose whether checkout opens in-context or in a new window.
### Step 6: Customize your button (optional) [#step-6-customize-your-button-optional]
Use the dashboard tabs to update the button text, style, colors, and checkout flow without writing CSS.
#### Button customization
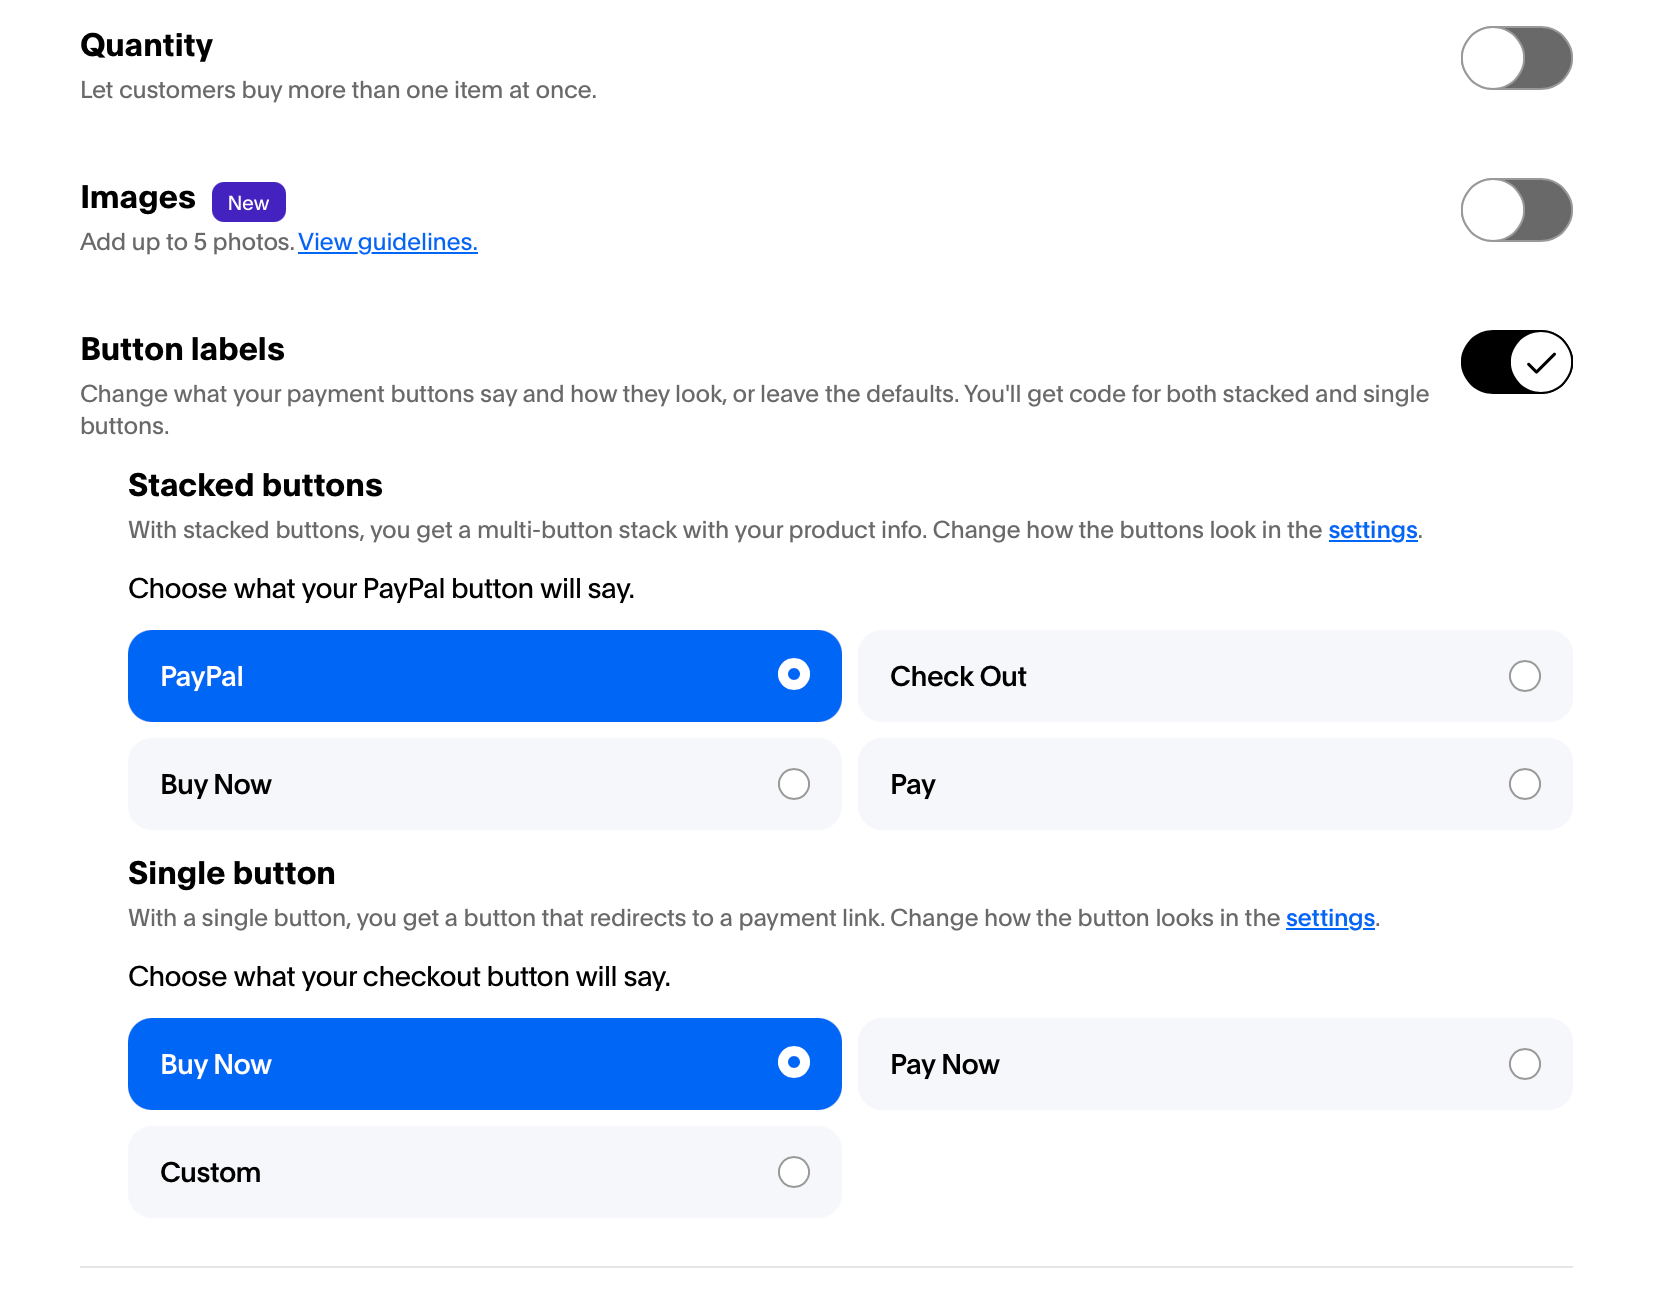 Style tab: button shape and color.
#### More options
Style tab: button shape and color.
#### More options
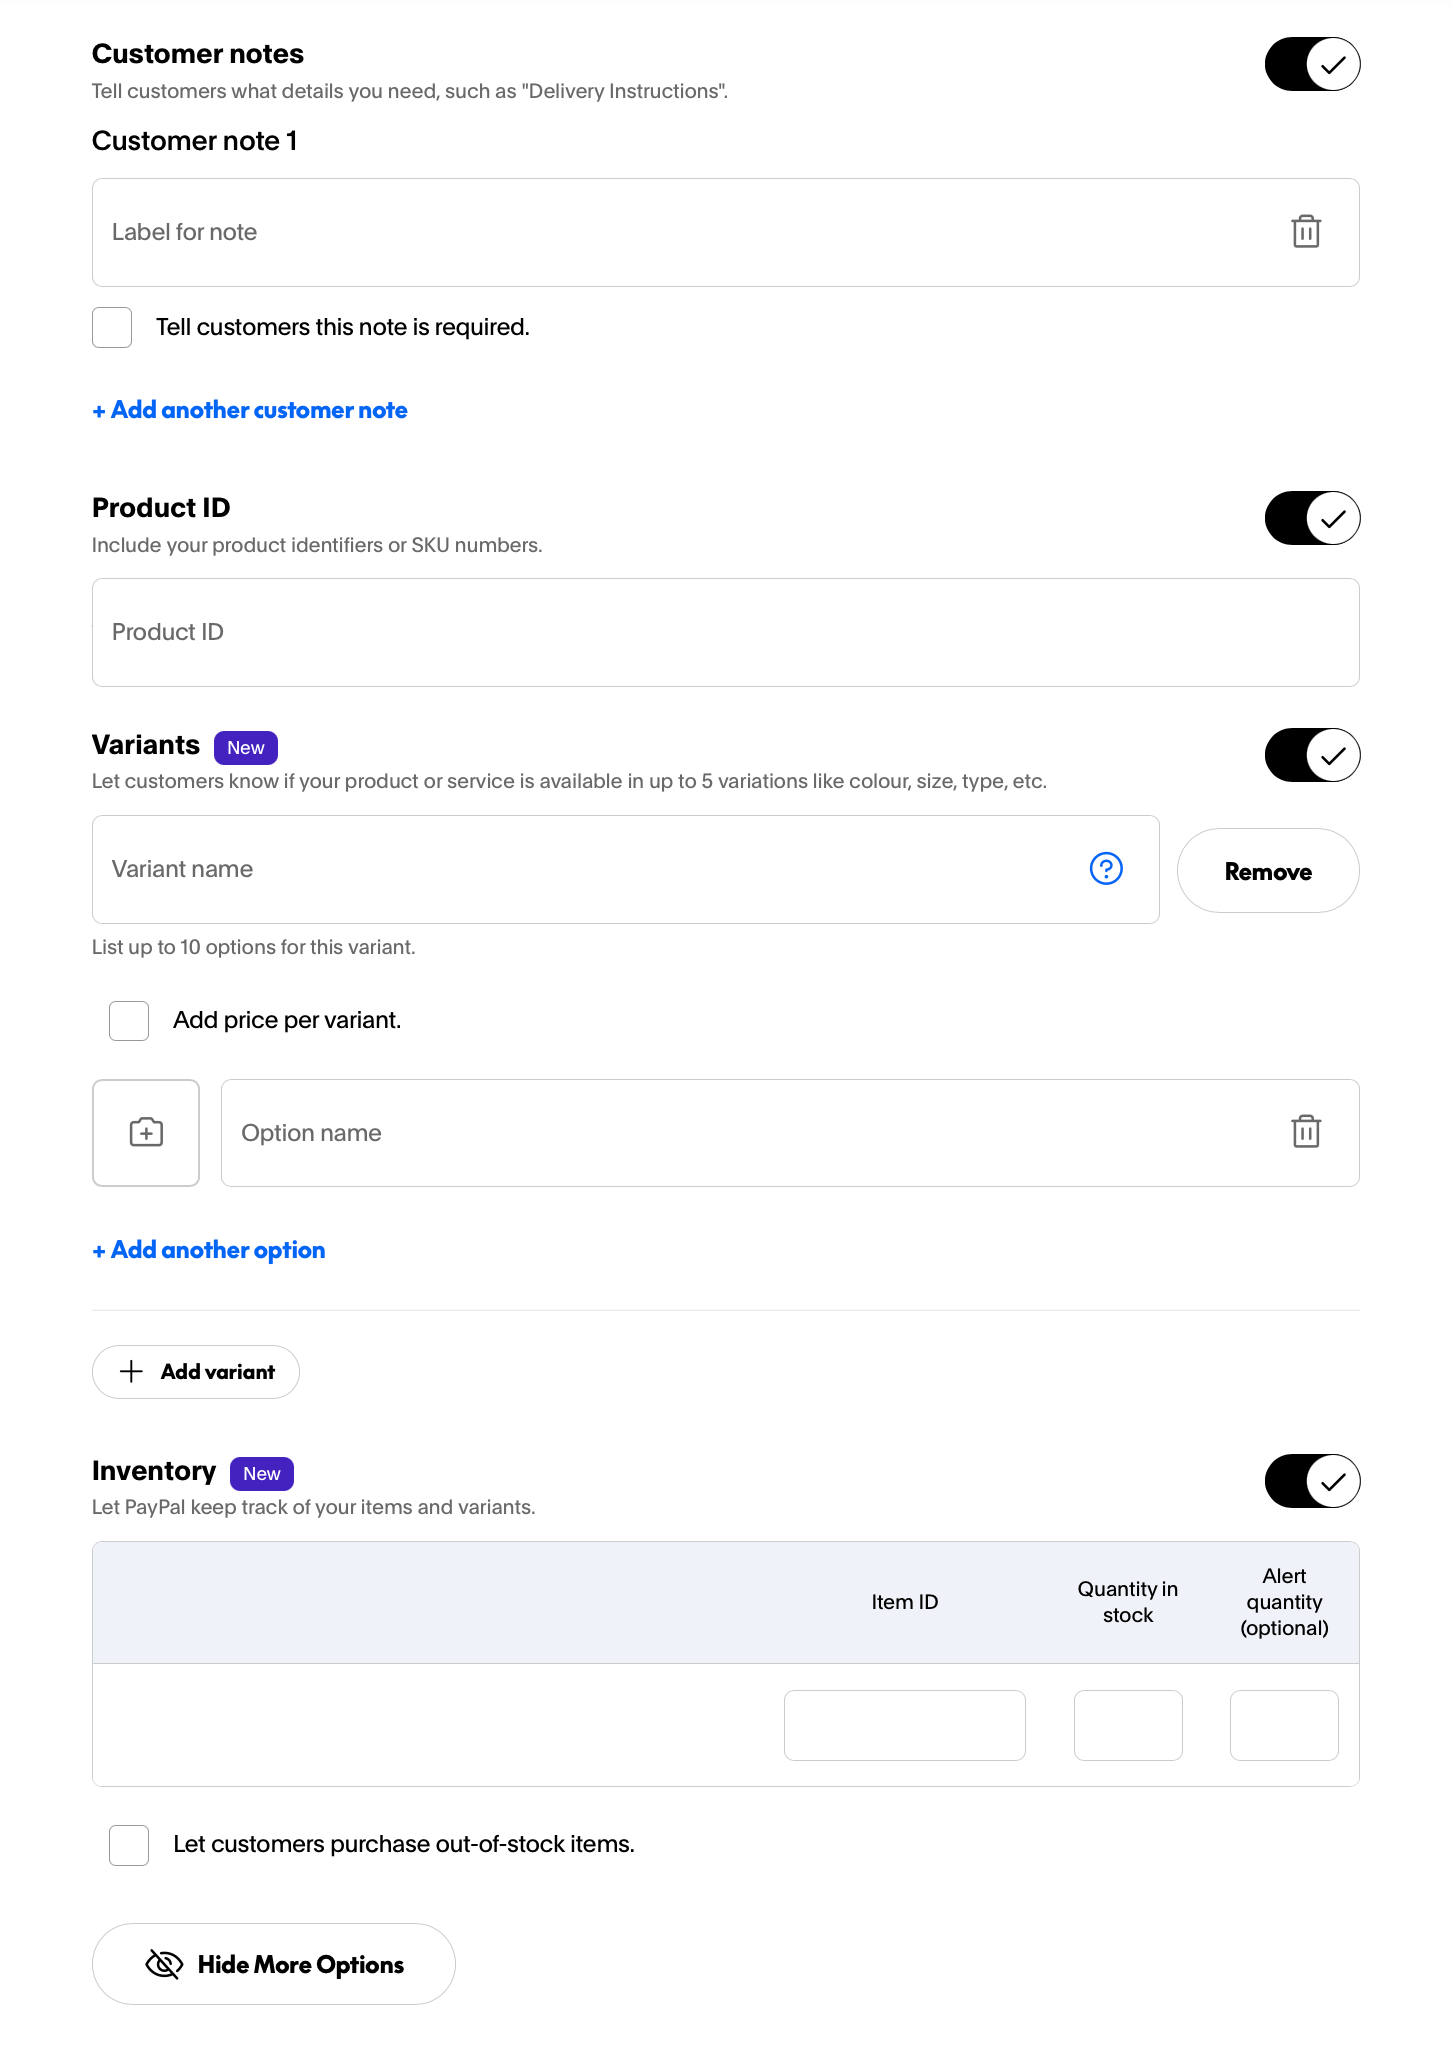 More options: label text and layout.
#### Checkout options
More options: label text and layout.
#### Checkout options
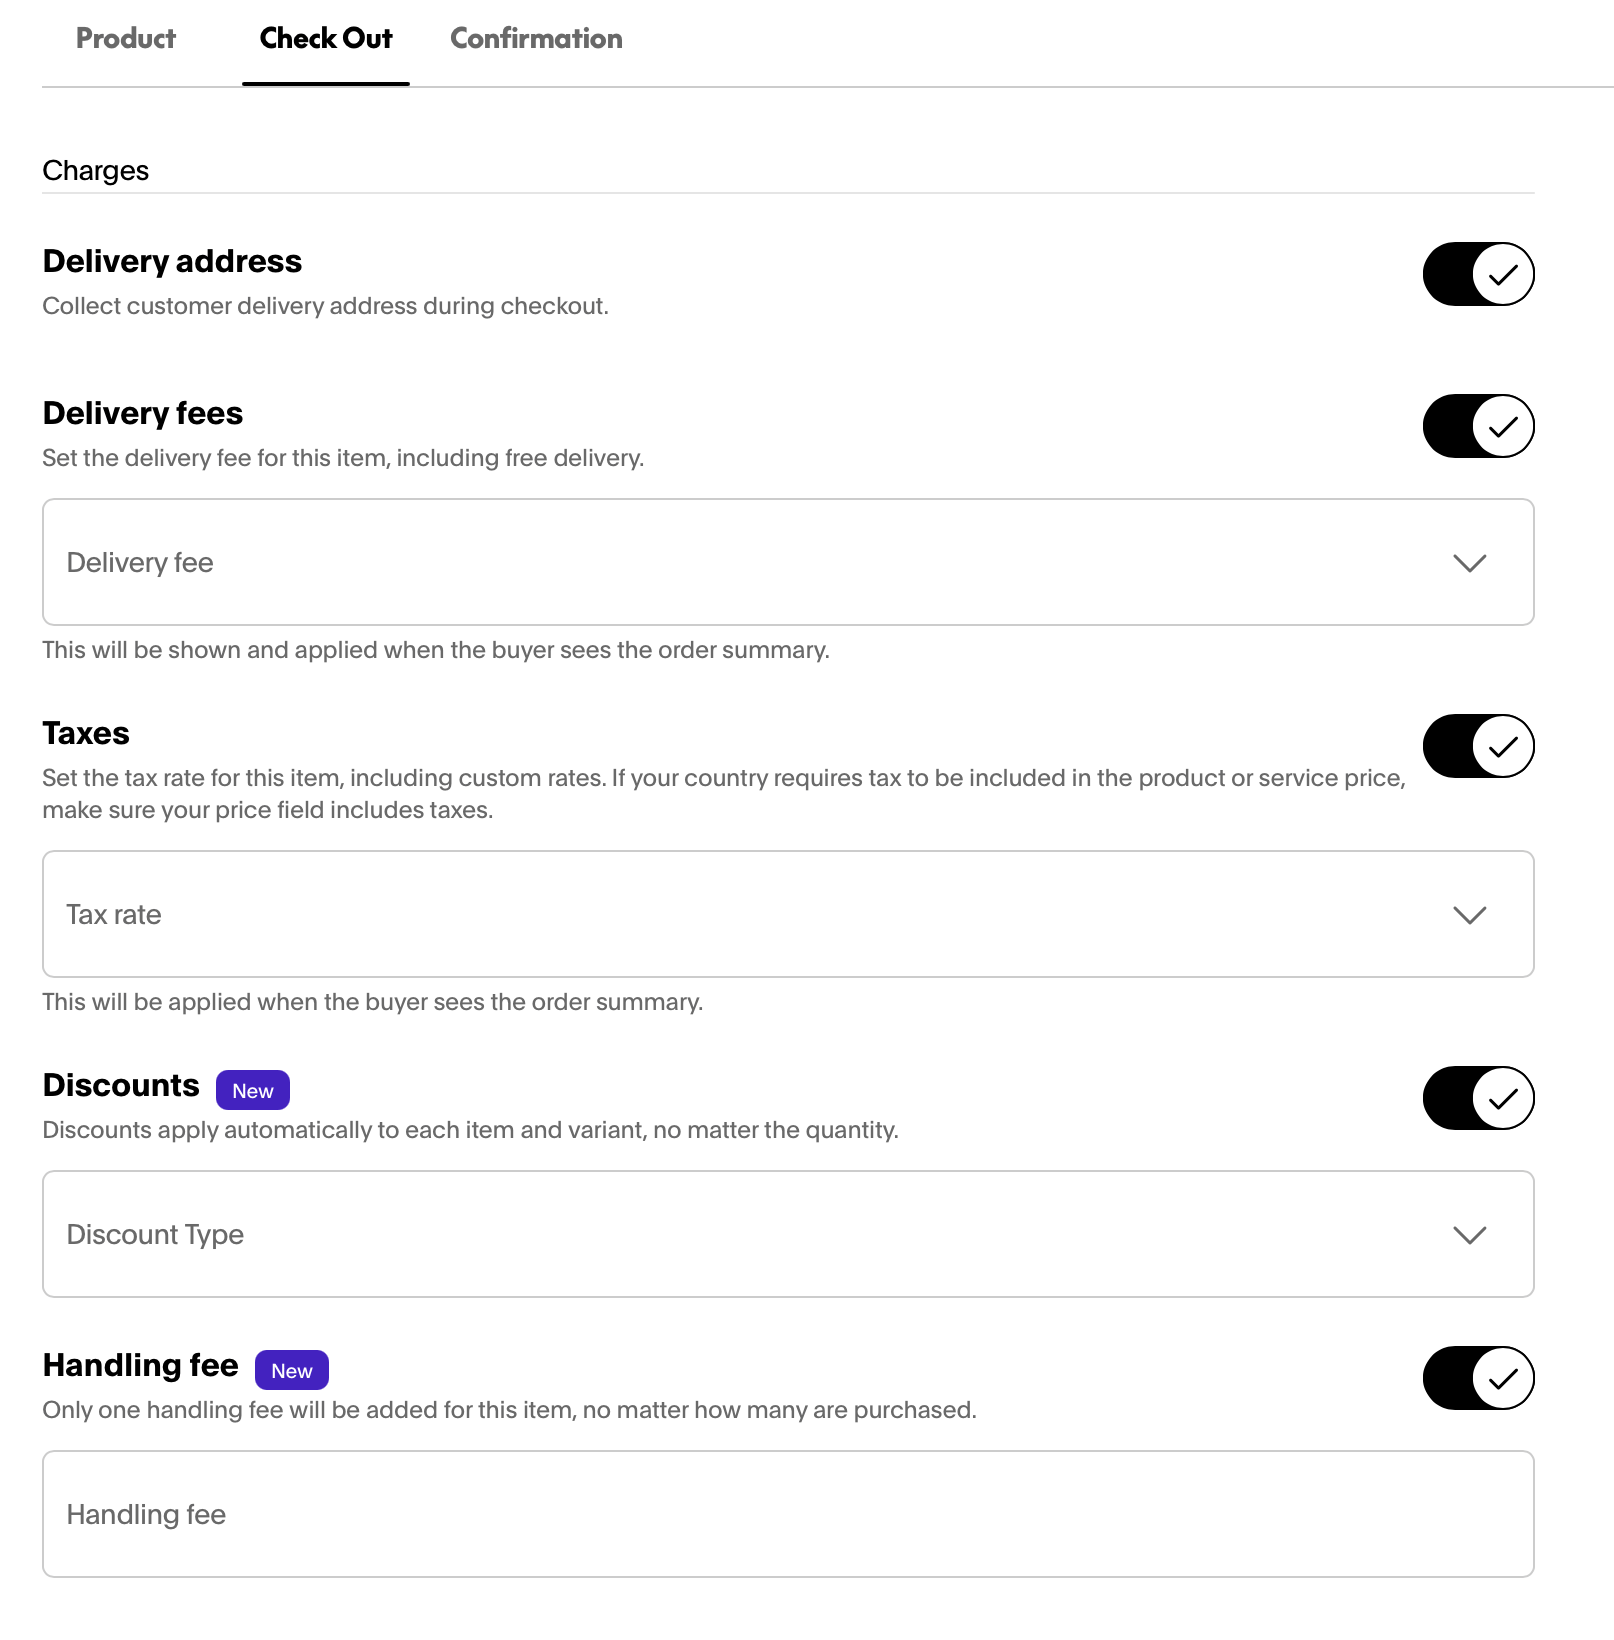 Checkout: open in-context or in a new window.
#### Confirmation
Checkout: open in-context or in a new window.
#### Confirmation
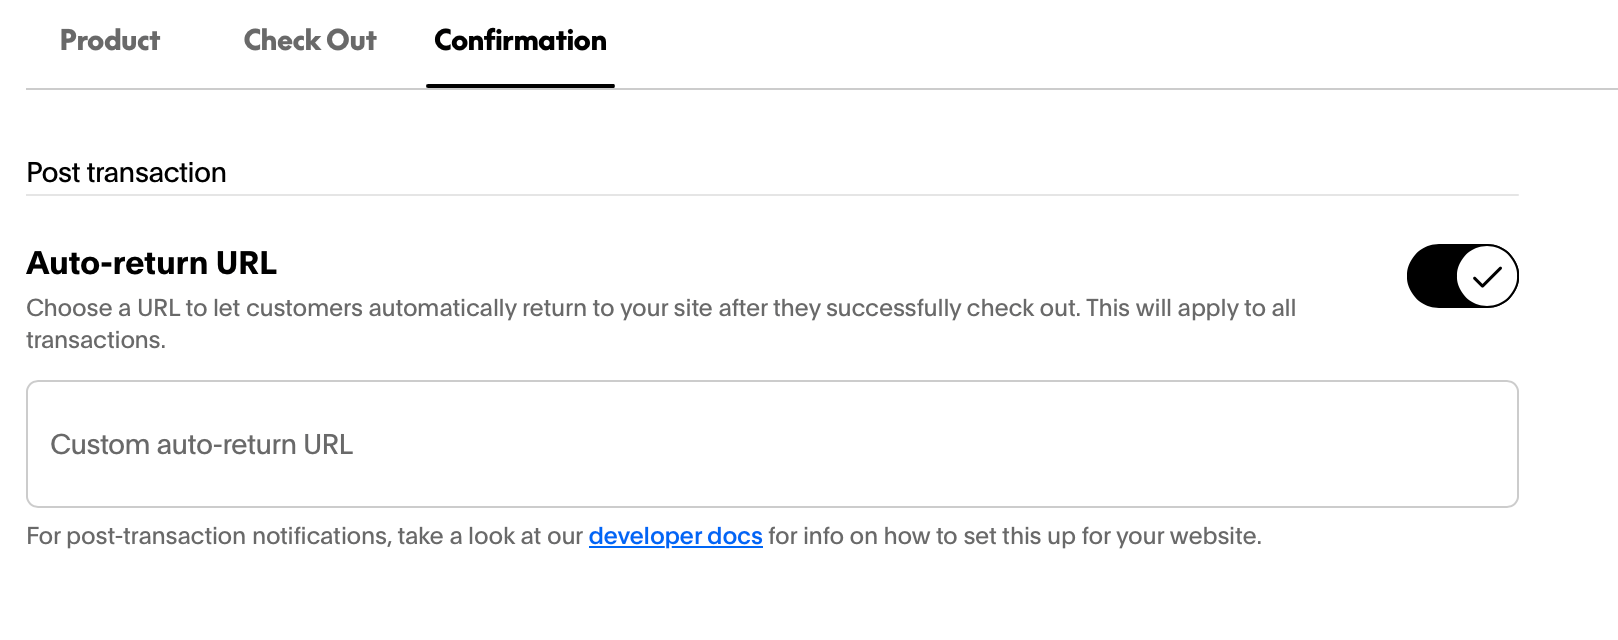 Confirmation: the message customers see after paying.
### Step 7: Embed the button [#step-7-embed-the-button]
PayPal provides two embed formats. Choose the one that works best for your site.
#### Stacked buttons (hosted)
This option loads the PayPal, Pay Later, Venmo, and card buttons from a hosted script. It is the recommended integration and requires two snippets.
**Part 1.** Paste into `` once per page:
```html
```
> **Note:** Do not modify the query parameters. They are generated for your button and account, and changing them will break the integration.
**Part 2.** Paste into ``, near the product:
```html
```
Replace `BUTTON_ID` with the ID from your PayPal dashboard. To display multiple products on one page, repeat Part 2 with each product's unique ID.
> **Note:** If you cannot add code to
>
> ``
>
> , place Part 1 at the top of
>
> ``
>
> , above Part 2. Both snippets must be on the same page for the button to render.
Confirmation: the message customers see after paying.
### Step 7: Embed the button [#step-7-embed-the-button]
PayPal provides two embed formats. Choose the one that works best for your site.
#### Stacked buttons (hosted)
This option loads the PayPal, Pay Later, Venmo, and card buttons from a hosted script. It is the recommended integration and requires two snippets.
**Part 1.** Paste into `` once per page:
```html
```
> **Note:** Do not modify the query parameters. They are generated for your button and account, and changing them will break the integration.
**Part 2.** Paste into ``, near the product:
```html
```
Replace `BUTTON_ID` with the ID from your PayPal dashboard. To display multiple products on one page, repeat Part 2 with each product's unique ID.
> **Note:** If you cannot add code to
>
> ``
>
> , place Part 1 at the top of
>
> ``
>
> , above Part 2. Both snippets must be on the same page for the button to render.
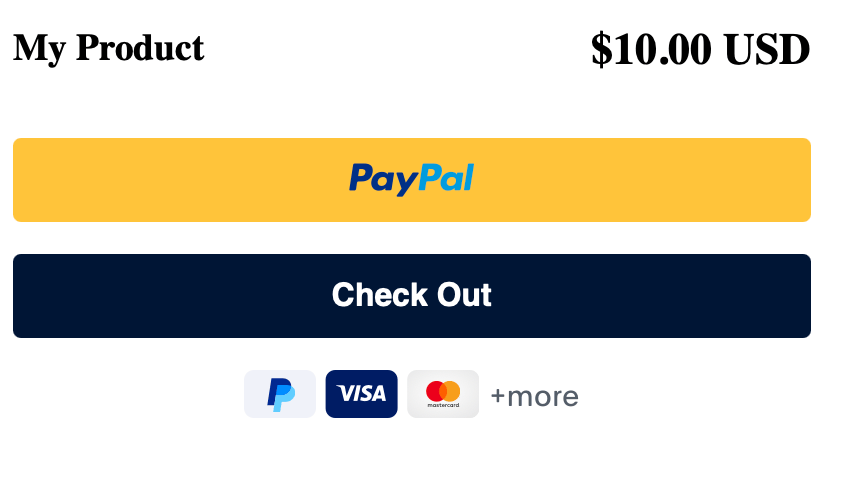 Two Buy Buttons live on a product page.
For more information, see the [PayPal Payment Links and Buttons help article](https://www.paypal.com/us/cshelp/article/what-are-paypal-payment-buttons-and-how-do-i-use-them-help432).
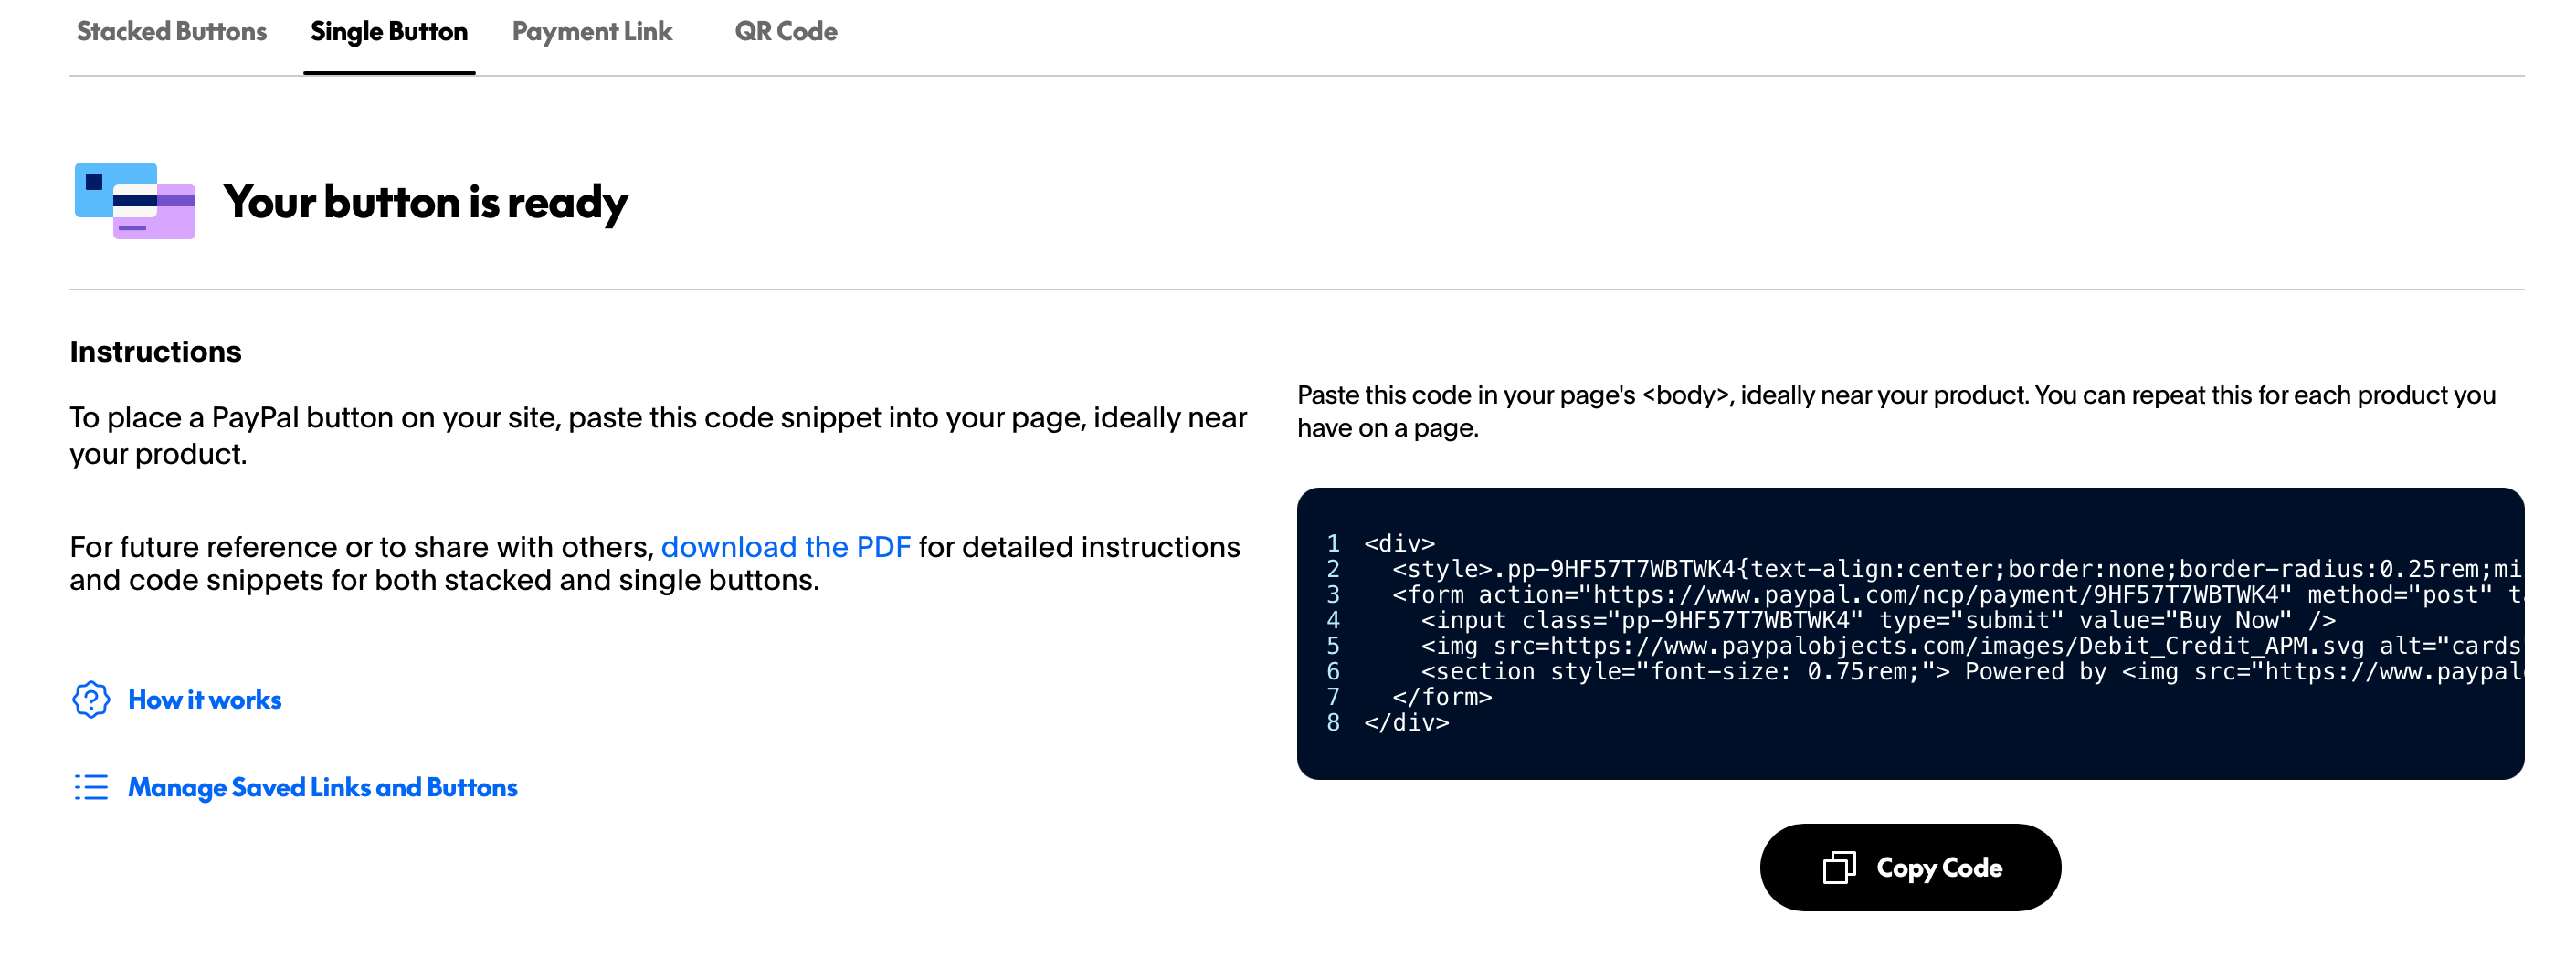
#### Single button (HTML only)
This format is a self-contained HTML form with built-in styles. It requires no script tag.
```html
```
Replace `BUTTON_ID` with your button ID.
> **Tip:** The HTML-only option works anywhere you can paste markup: static sites, email templates, and CMS platforms like Webflow or Squarespace. It has no JavaScript dependency, so it won't block page rendering.
Two Buy Buttons live on a product page.
For more information, see the [PayPal Payment Links and Buttons help article](https://www.paypal.com/us/cshelp/article/what-are-paypal-payment-buttons-and-how-do-i-use-them-help432).
#### Single button (HTML only)
This format is a self-contained HTML form with built-in styles. It requires no script tag.
```html
```
Replace `BUTTON_ID` with your button ID.
> **Tip:** The HTML-only option works anywhere you can paste markup: static sites, email templates, and CMS platforms like Webflow or Squarespace. It has no JavaScript dependency, so it won't block page rendering.
 The Single Button rendered from pasted HTML.
Two Buy Buttons live on a product page.
For more information, see the [PayPal Payment Links and Buttons help article](https://www.paypal.com/us/cshelp/article/what-are-paypal-payment-buttons-and-how-do-i-use-them-help432).
## Add multiple buttons to one page [#add-multiple-buttons-to-one-page]
You can add multiple buttons to a single page, one per product. Use the following guidelines:
* Each button must use a **unique `hostedButtonId`**. Reusing the same ID will cause only the first button to render.
* All buttons on one page must use the **same currency**. Mixing currencies causes buttons after the first to fail silently.
Find each button's ID in your PayPal dashboard under the button details.
> **Warning:** Mixed currencies on a single page fail silently. No error is shown, and only the first button will render. Keep every button on the page in the same currency.
## Troubleshooting [#troubleshooting]
**The Buy Button option is missing from my account**
**Cause:** The feature is Business-only.
**Fix:** Upgrade to a PayPal Business account.
**My button code looks out of date after editing**
**Cause:** PayPal saves changes on the server automatically.
**Fix:** Copy the code again only if you changed the currency.
**Not all payment methods show for my customer**
**Cause:** Available payment methods depend on the customer's country and eligibility.
**Fix:** This is expected behavior.
**Some buttons don't render when I have several on one page**
**Cause:** Duplicate IDs, or mixed currencies.
**Fix:** Use a unique ID per button and keep them all in the same currency.
The Single Button rendered from pasted HTML.
Two Buy Buttons live on a product page.
For more information, see the [PayPal Payment Links and Buttons help article](https://www.paypal.com/us/cshelp/article/what-are-paypal-payment-buttons-and-how-do-i-use-them-help432).
## Add multiple buttons to one page [#add-multiple-buttons-to-one-page]
You can add multiple buttons to a single page, one per product. Use the following guidelines:
* Each button must use a **unique `hostedButtonId`**. Reusing the same ID will cause only the first button to render.
* All buttons on one page must use the **same currency**. Mixing currencies causes buttons after the first to fail silently.
Find each button's ID in your PayPal dashboard under the button details.
> **Warning:** Mixed currencies on a single page fail silently. No error is shown, and only the first button will render. Keep every button on the page in the same currency.
## Troubleshooting [#troubleshooting]
**The Buy Button option is missing from my account**
**Cause:** The feature is Business-only.
**Fix:** Upgrade to a PayPal Business account.
**My button code looks out of date after editing**
**Cause:** PayPal saves changes on the server automatically.
**Fix:** Copy the code again only if you changed the currency.
**Not all payment methods show for my customer**
**Cause:** Available payment methods depend on the customer's country and eligibility.
**Fix:** This is expected behavior.
**Some buttons don't render when I have several on one page**
**Cause:** Duplicate IDs, or mixed currencies.
**Fix:** Use a unique ID per button and keep them all in the same currency.