# Create and set up filters (/platforms/checkout/advanced/customize/fraud-protection/fraud-protection-advanced/filters)
Filters are the rules that decide whether Fraud Protection Advanced (FPA) approves, rejects, or puts a transaction into a review queue.
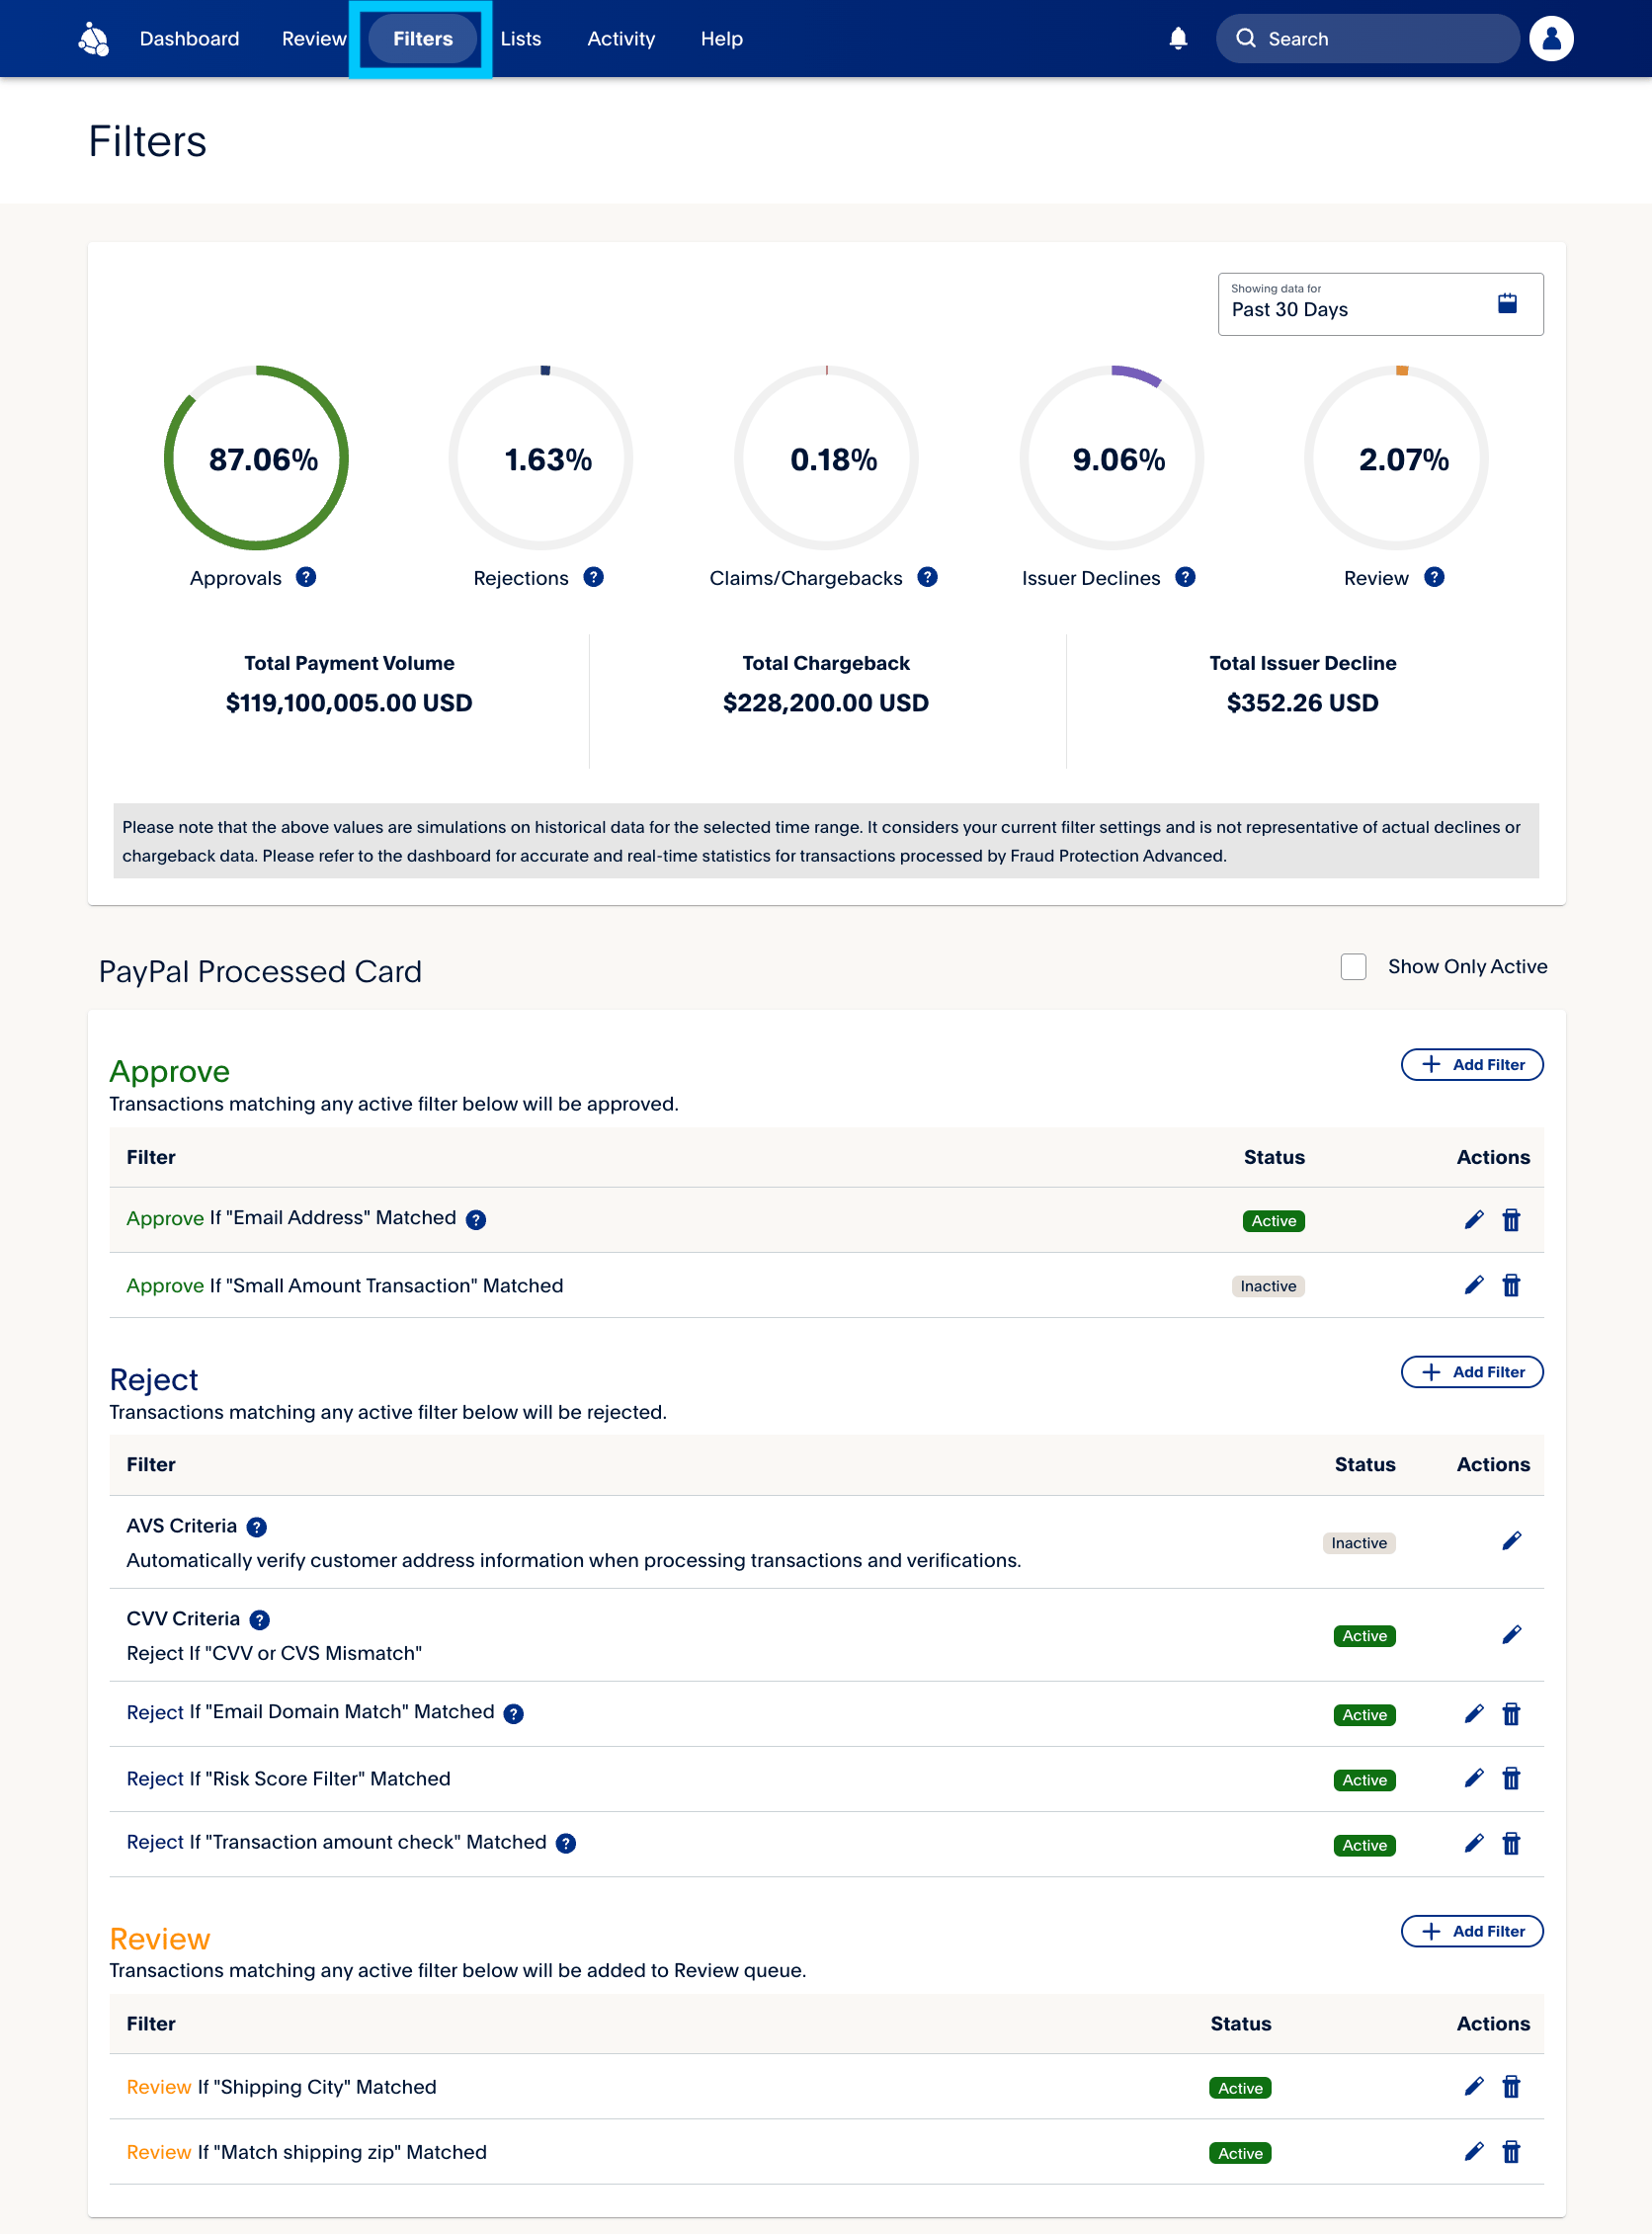
The **Filters** tab shows customized filters that merchants can enable, adjust, or create as needed. Your merchants can also see simulations based on the current filter settings applied to their historical data for a selected time period.
> **Info:** All customized filter recommendations are disabled by default. To activate them for fraud detection, your merchants must manually enable relevant filter suggestions.
 ## Create a new filter [#create-a-new-filter]
To add a new filter, your merchant should use the following steps:
1. Select **Add Filter**on the **Filters** tab. A popup window will open.
2. Enter the **Filter Name** and provide a **Description** for the filter. The **Decision Label** will automatically be set to one of the following options based on the type of filter you create: **Approve**, **Reject** or **Review**.
## Create a new filter [#create-a-new-filter]
To add a new filter, your merchant should use the following steps:
1. Select **Add Filter**on the **Filters** tab. A popup window will open.
2. Enter the **Filter Name** and provide a **Description** for the filter. The **Decision Label** will automatically be set to one of the following options based on the type of filter you create: **Approve**, **Reject** or **Review**.
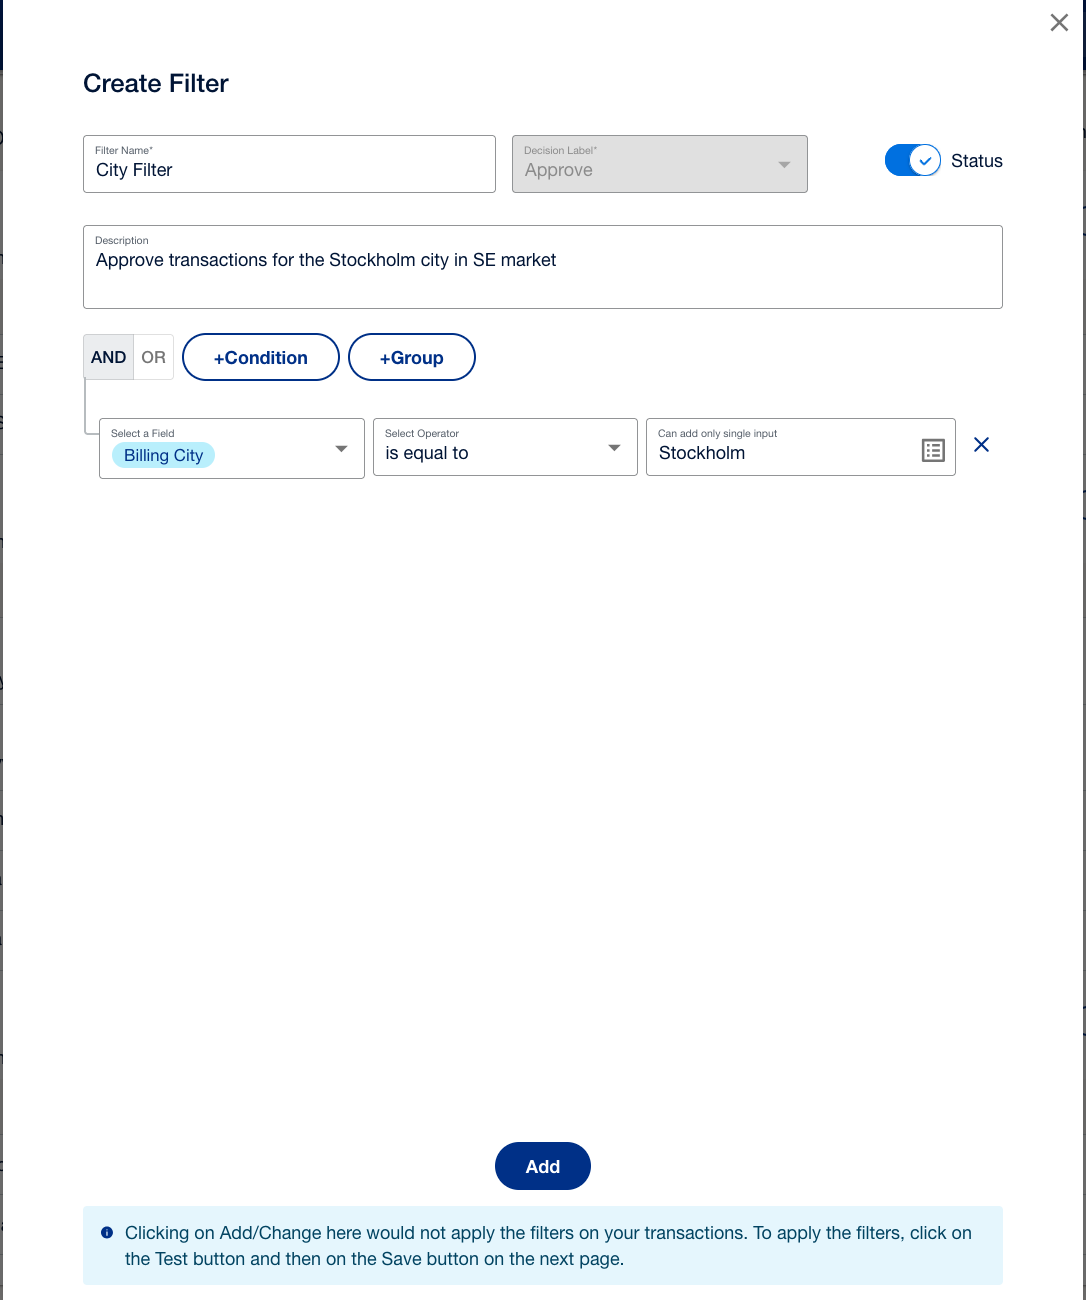 3. To add conditions to the filter, select **+Condition** and specify the desired fields. For example, you can specify conditions on transaction attributes or risk scores.
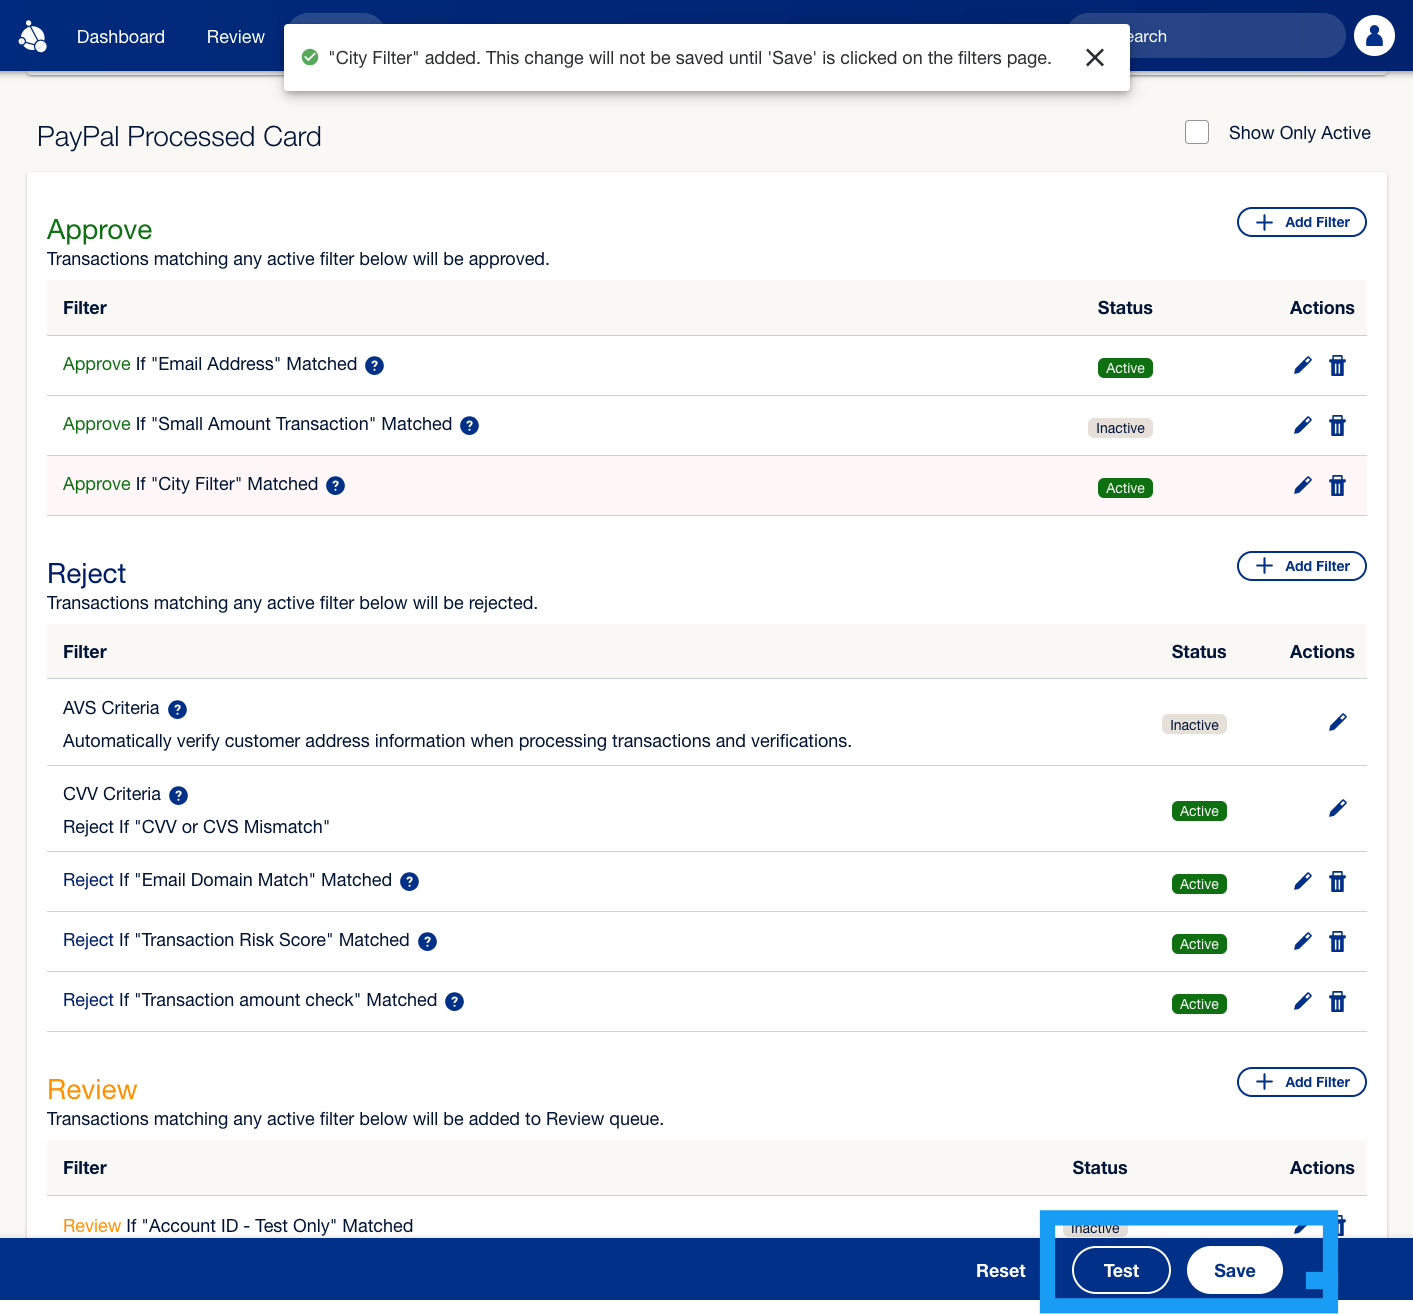
4. Select **Add**. The popup window will close. To apply the filter, you *must* click **Test** and **Save**, else the filter changes will not be saved.
5.
3. To add conditions to the filter, select **+Condition** and specify the desired fields. For example, you can specify conditions on transaction attributes or risk scores.
4. Select **Add**. The popup window will close. To apply the filter, you *must* click **Test** and **Save**, else the filter changes will not be saved.
5.  ## Enable customized filters [#enable-customized-filters]
To enable customized filters, merchants should use the following steps:
1. On the **Filters** tab, locate the filter you want to enable, then select the pencil icon in the **Actions** column. This will open the filter configuration in a popup window for editing.
## Enable customized filters [#enable-customized-filters]
To enable customized filters, merchants should use the following steps:
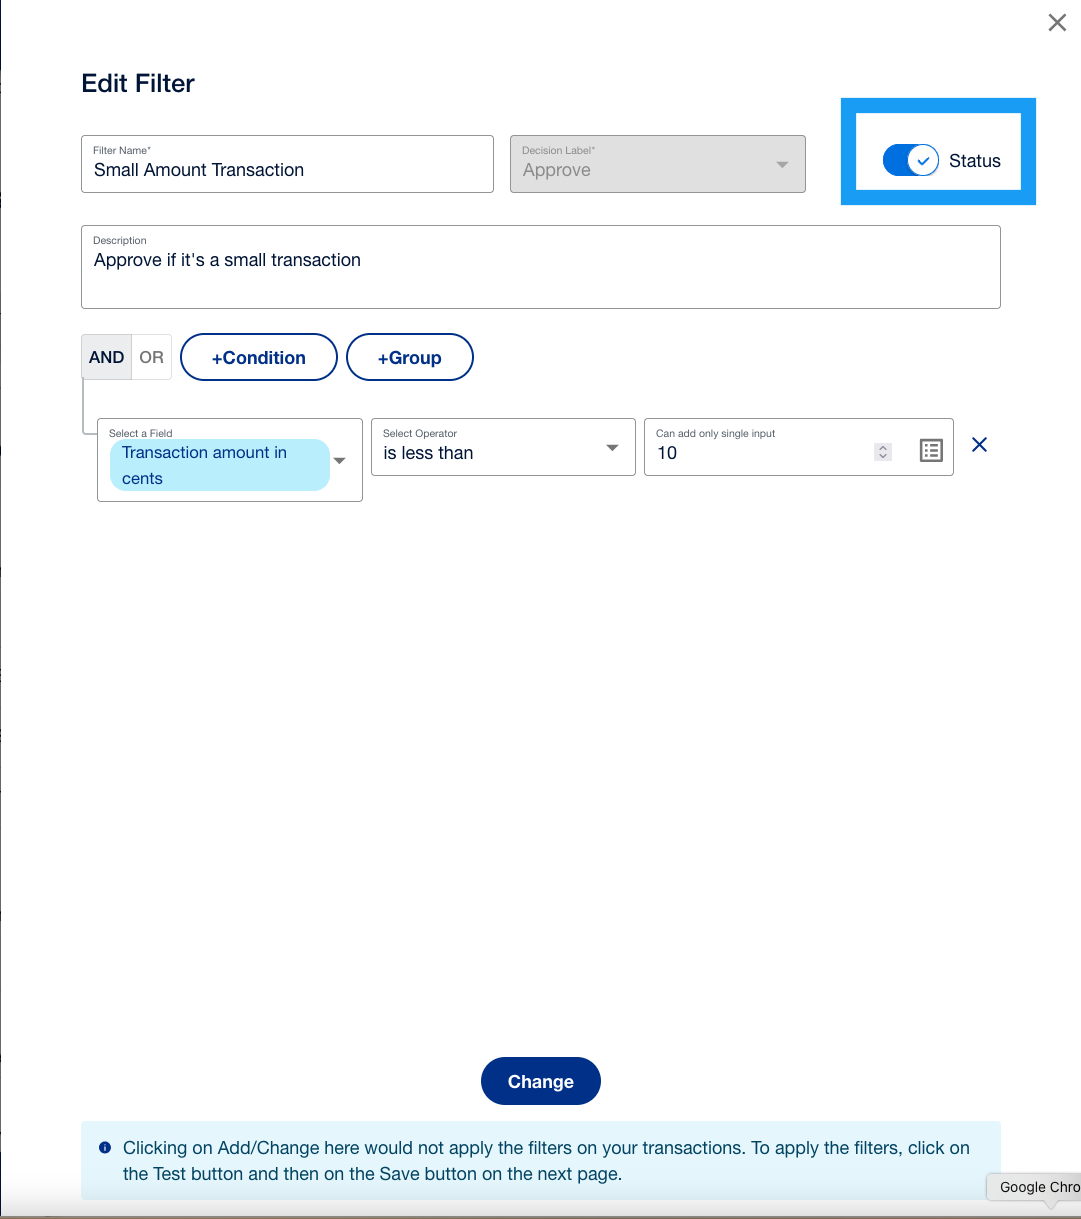
1. On the **Filters** tab, locate the filter you want to enable, then select the pencil icon in the **Actions** column. This will open the filter configuration in a popup window for editing.
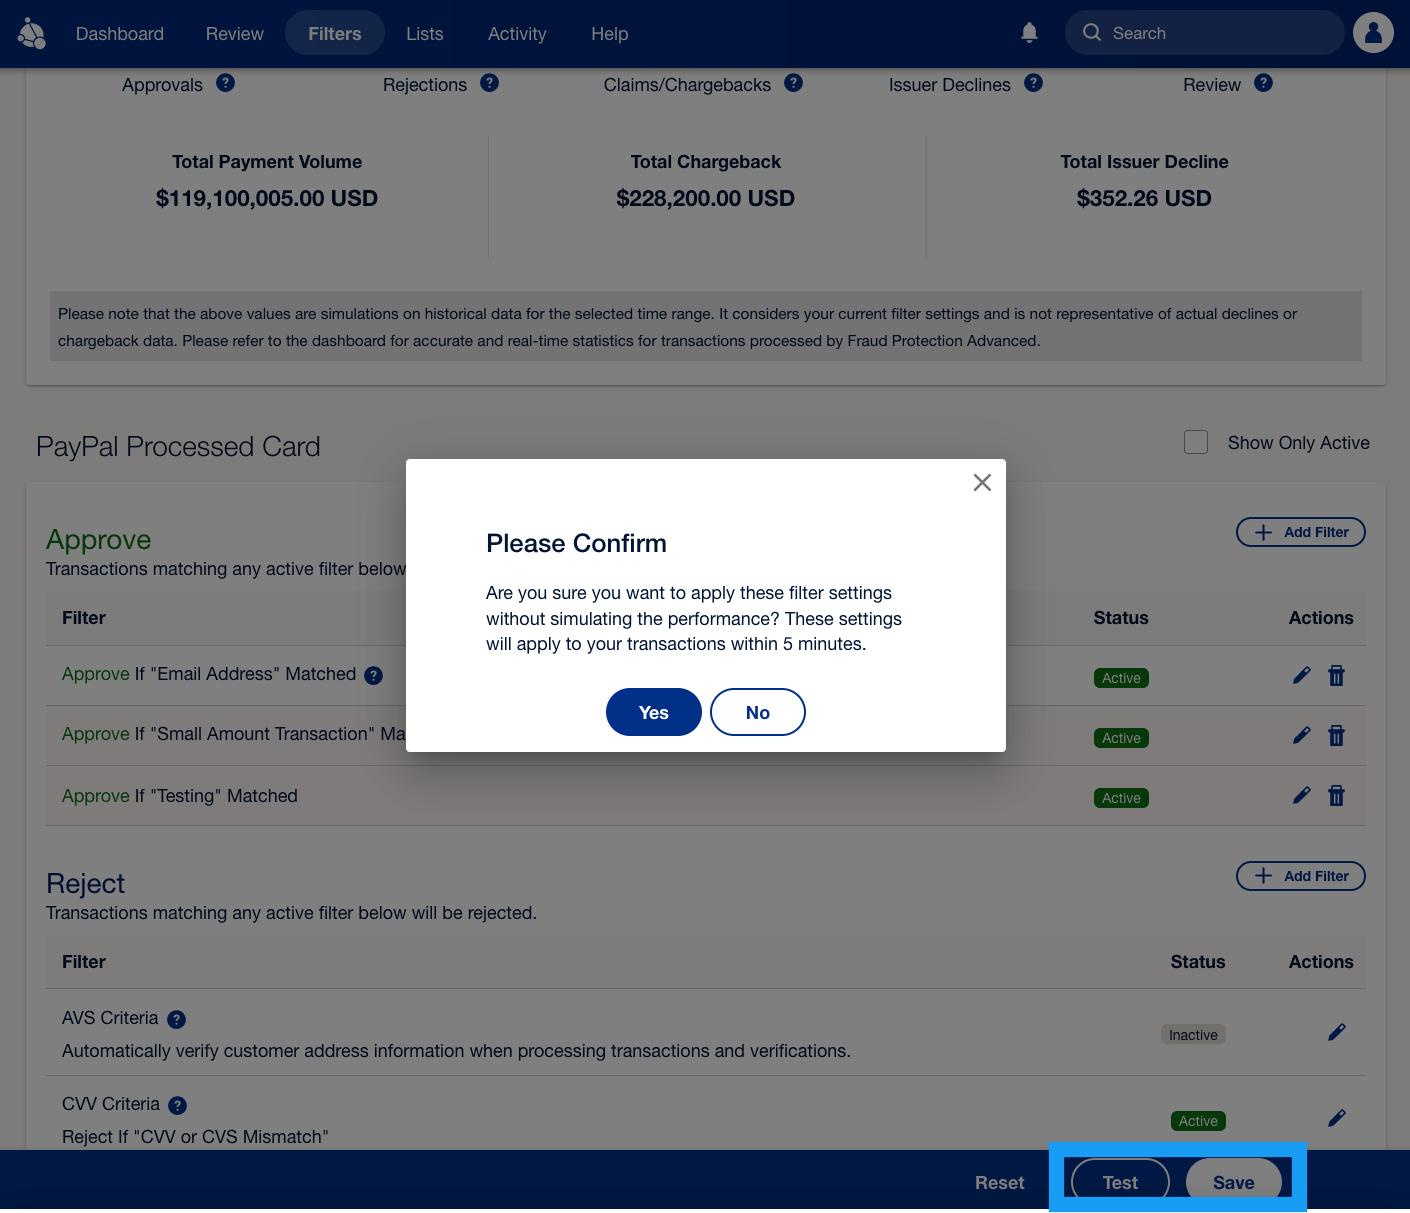
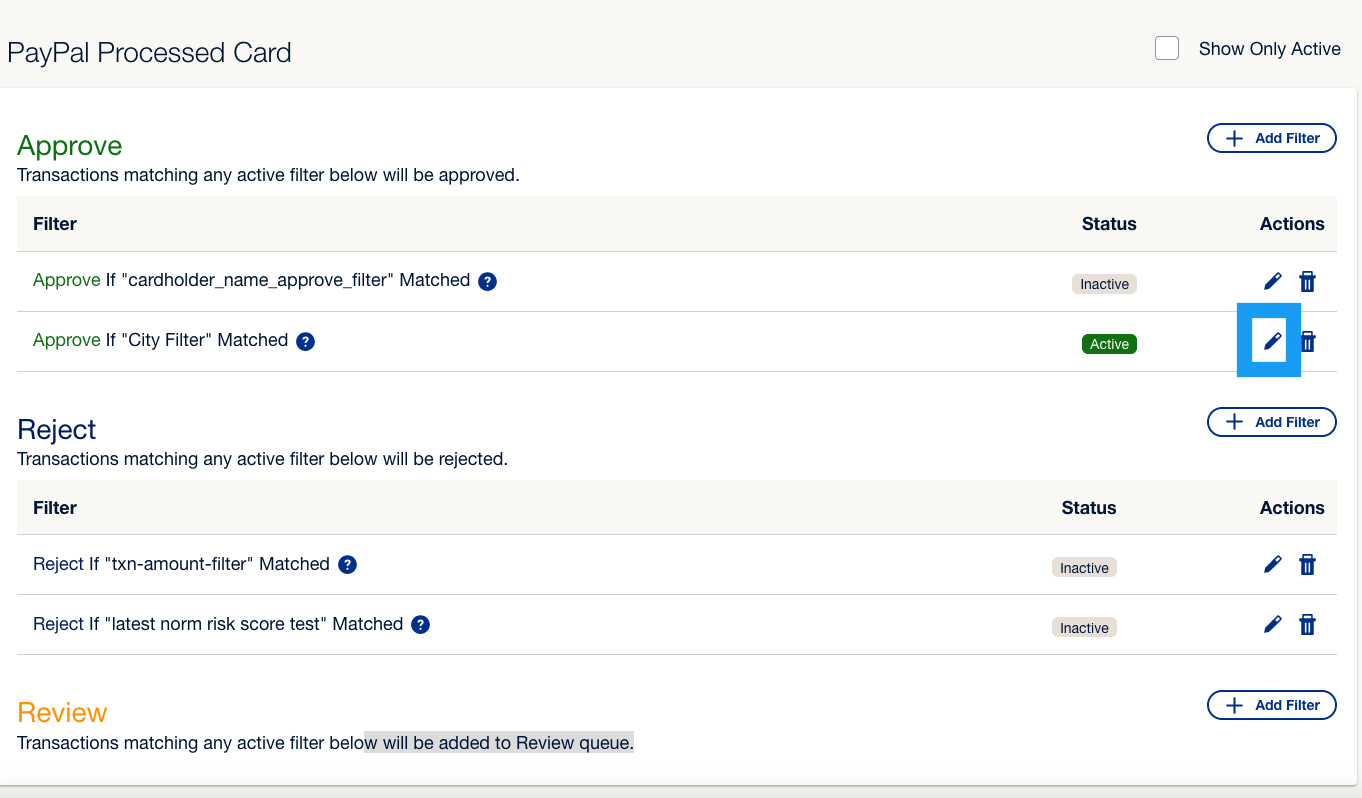 2. Toggle the Status to **On**then select **Change**button. The popup window will close. To apply the change, you *must* select **Save**and then confirm your changes.
3.
2. Toggle the Status to **On**then select **Change**button. The popup window will close. To apply the change, you *must* select **Save**and then confirm your changes.
3.  4.
4.  ## Edit filters [#edit-filters]
1. Select the pencil icon available in the **Actions**column for each filter. The filter configuration will open in a popup window, where you can make changes to the filter. Once done, select **Change**. The pop-up window will close.
2.
## Edit filters [#edit-filters]
1. Select the pencil icon available in the **Actions**column for each filter. The filter configuration will open in a popup window, where you can make changes to the filter. Once done, select **Change**. The pop-up window will close.
2. 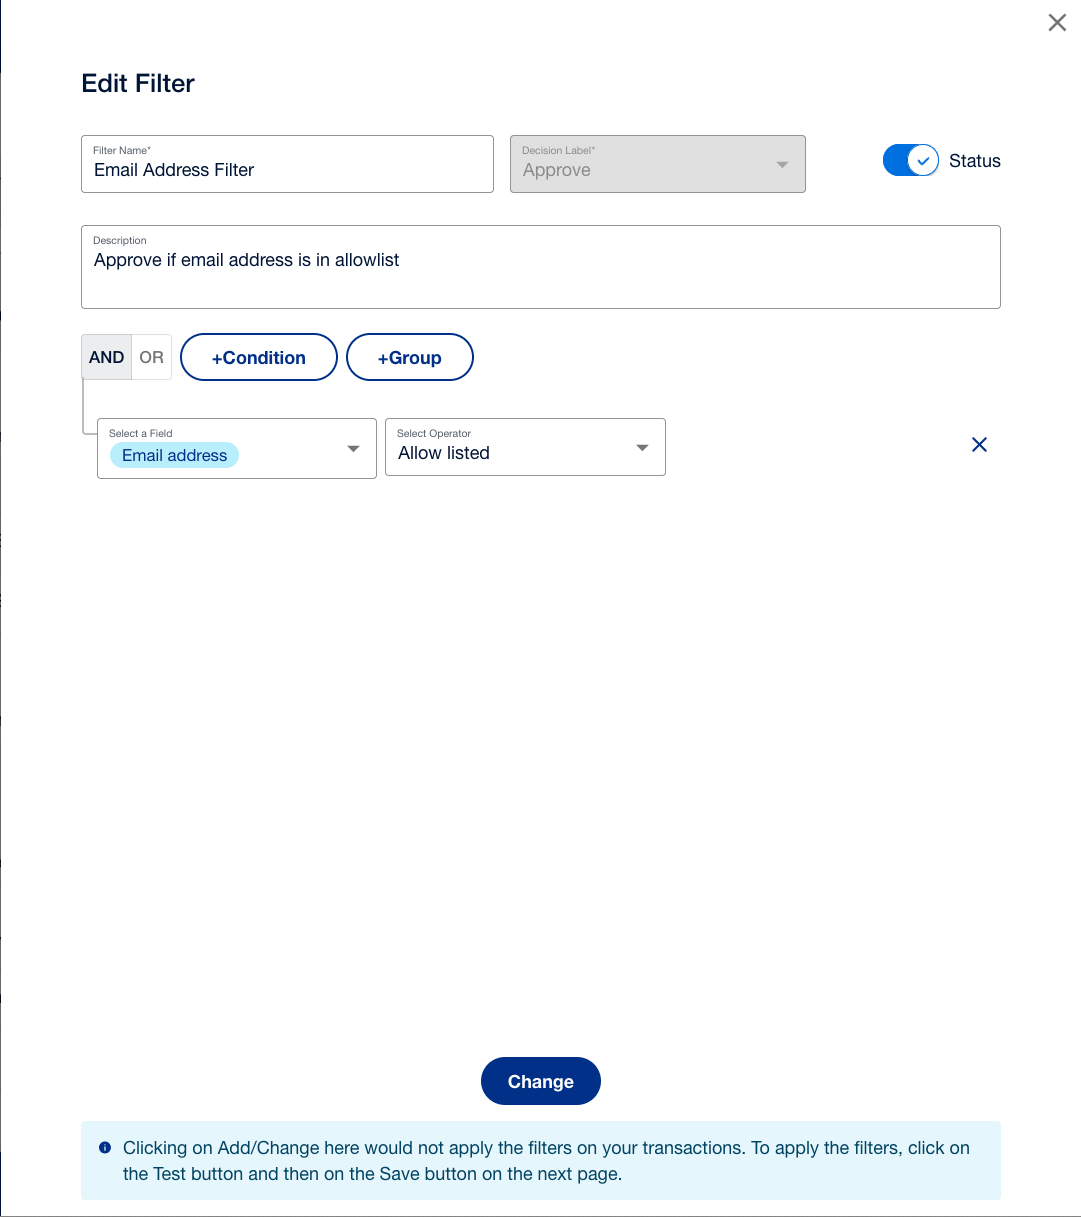 3. To apply the change, you *must* select **Save**and then confirm your changes. If you don't select **Save**, your changes will not be saved as indicated in the message shown in the following screenshot.
4.
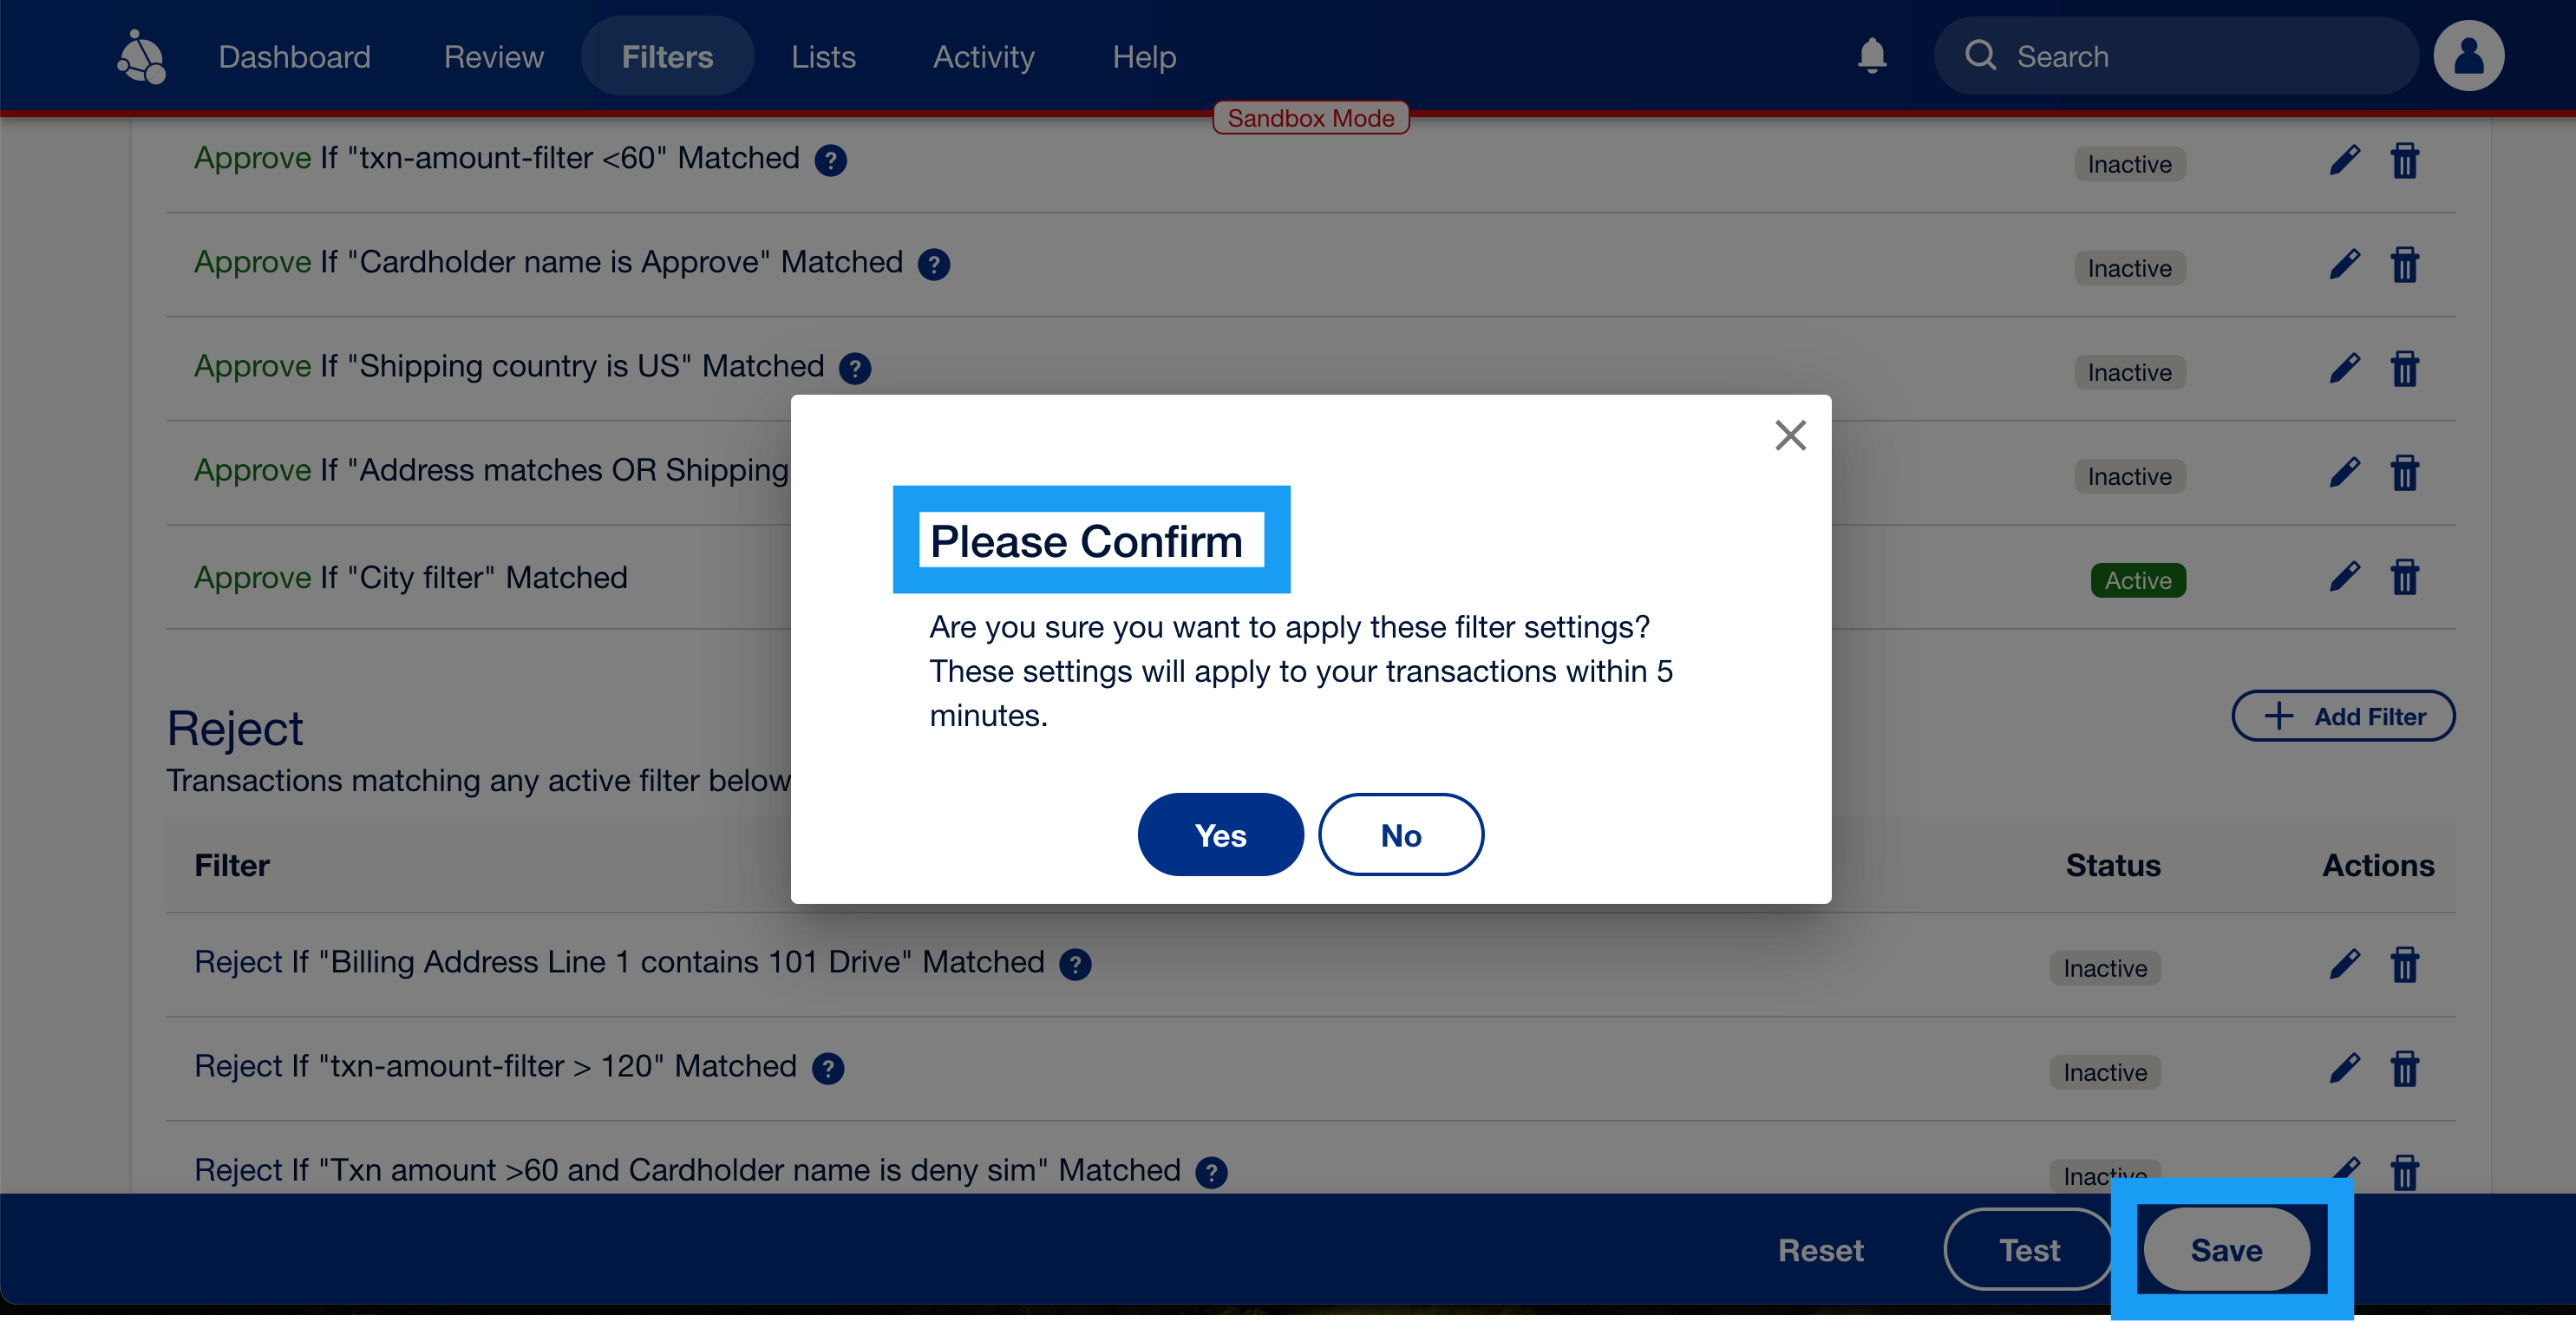
3. To apply the change, you *must* select **Save**and then confirm your changes. If you don't select **Save**, your changes will not be saved as indicated in the message shown in the following screenshot.
4.  5.
5.  ## Related resources [#related-resources]
> **Info:** Manage lists
>
> Use the lists feature to manage information and work with their rules to help prevent fraud.
> **Info:** Review transactions
>
> Review transactions that are flagged for review.
> **Info:** Monitor FPA activity
>
> You can track which users made changes and when these changes occurred in your merchant records.
## Related resources [#related-resources]
> **Info:** Manage lists
>
> Use the lists feature to manage information and work with their rules to help prevent fraud.
> **Info:** Review transactions
>
> Review transactions that are flagged for review.
> **Info:** Monitor FPA activity
>
> You can track which users made changes and when these changes occurred in your merchant records.