Setup Reader
Here are the steps to connect your Dev Kit reader to the internet and to pair it with your Braintree Sandbox Account.
What you will need to get started
Braintree Dev Kit P400 including:
Verifone P400 Reader
Verifone P400 Power Cable
Verifone P400 Multi-Port Cable
Verifone RS232 Cables (for debugging only)
3 Braintree Test Cards
Braintree Sandbox Account configured for Dev Kit testing
WiFi or Ethernet Network
To get up and running quickly, we recommend using the Postman API Client with our Braintree GraphQL - In-Person Postman Collection. You can find the In-Person Collection and setup instructions here.
A cup of coffee and a comfortable desk
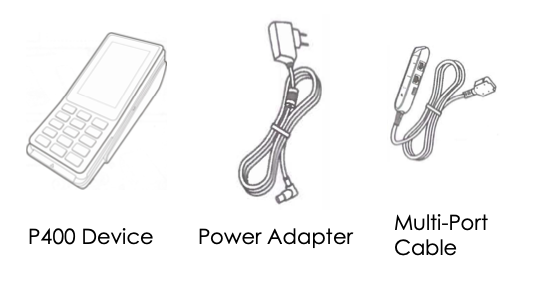
Step 1: Install the Hardware
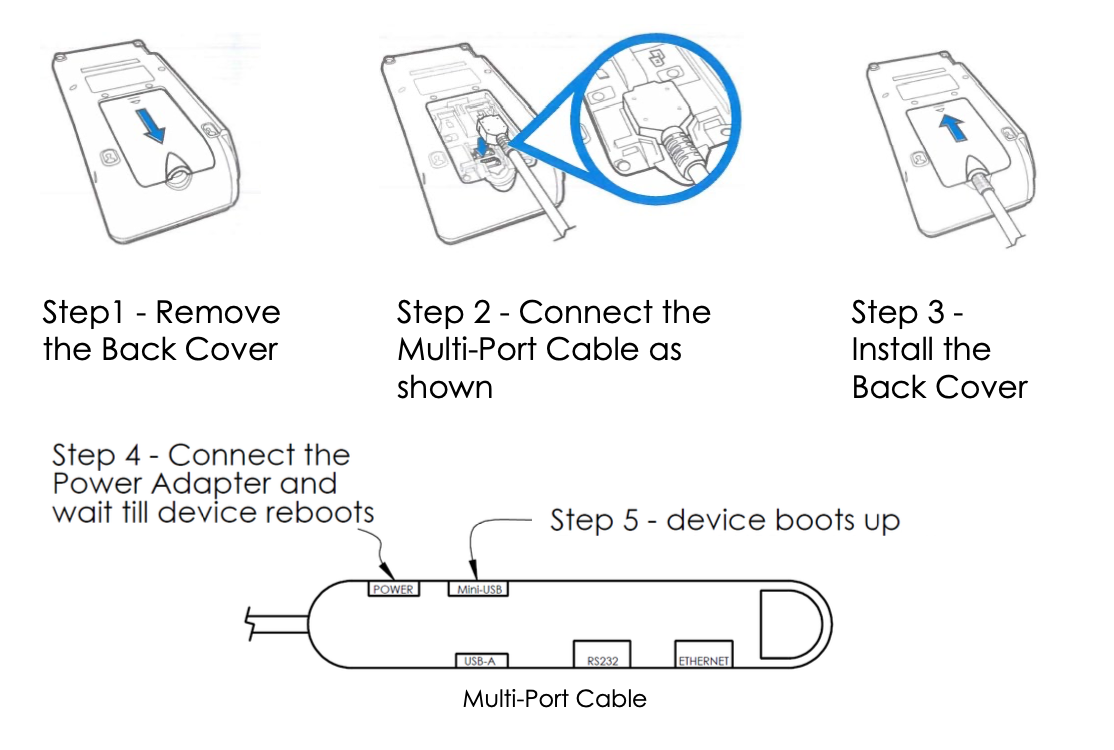
Assembly
Step 1 - Remove the Back Cover
Step 2 - Connect the Multi-Port Cable as shown
Step 3 - Install the Back Cover
Step 4 - Connect the Power Adaptor
Step 5 - Wait until the device starts up
Step 6 (Optional) - Connect an Ethernet cable
After the power is connected, the reader will power up automatically and cycle through a few screens during startup. Wait until the black and white "Start Setup" screen shows up.
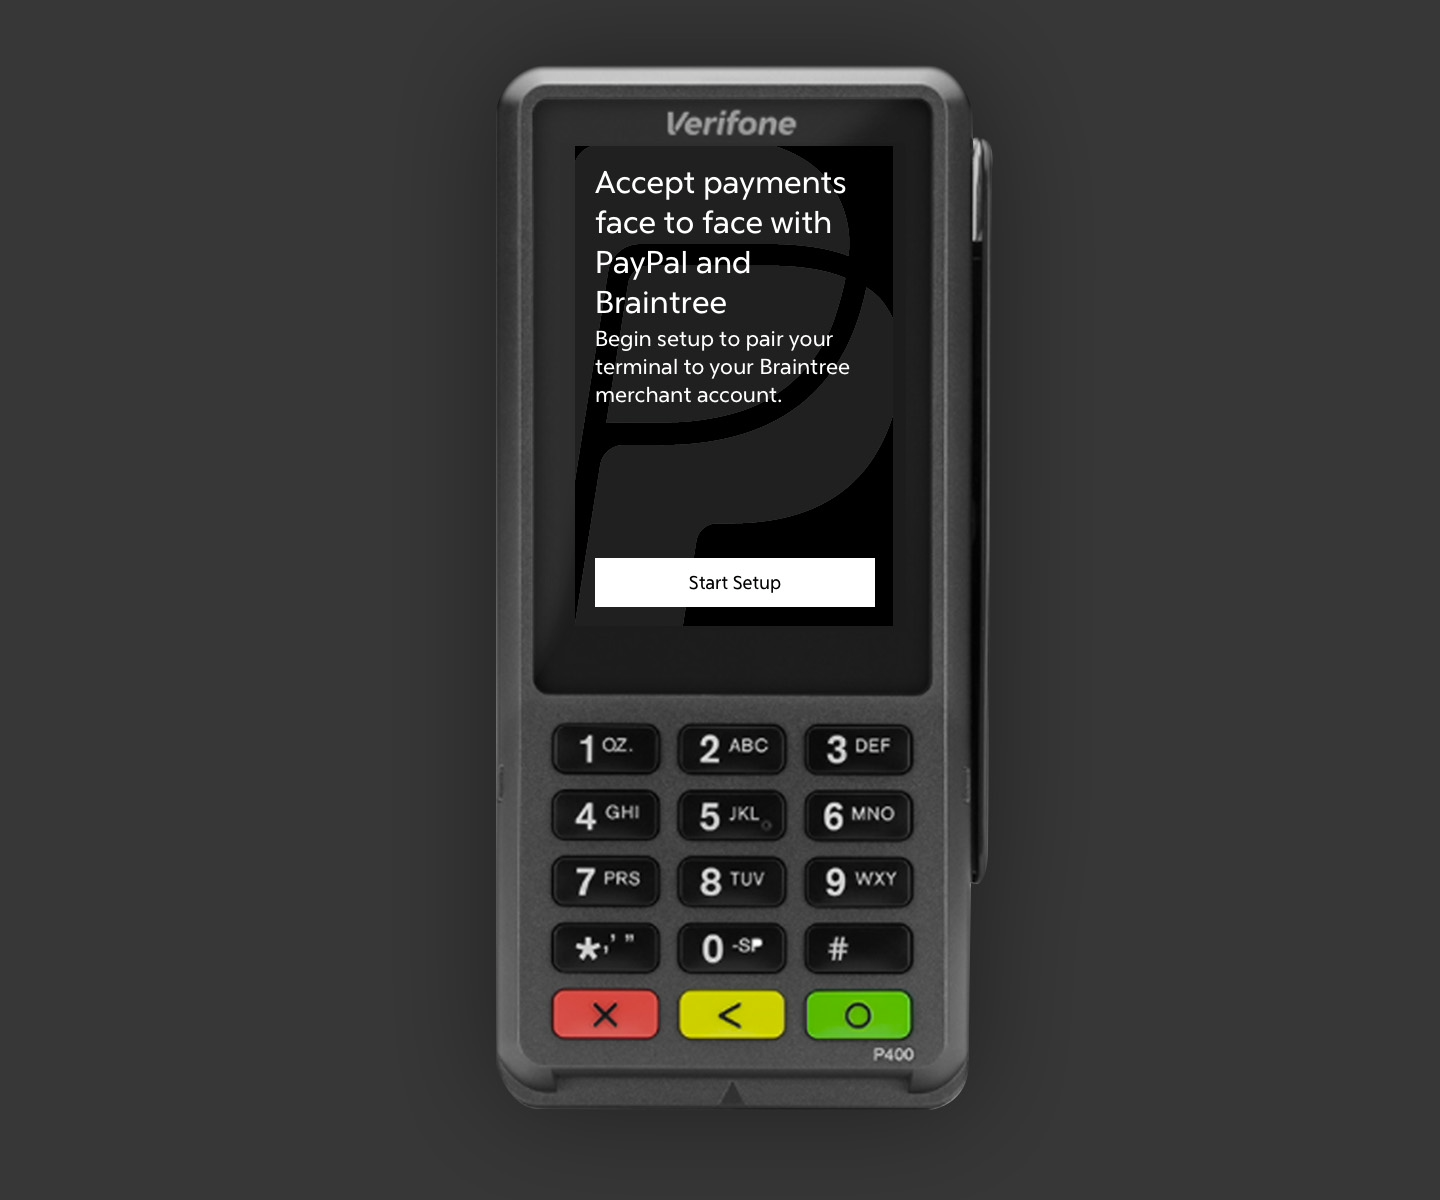
When you are ready, tap the "Start Setup" button.
Step 2: Network Configuration Requirements
For the card readers to function properly in an online setting, they need to have a connection to the internet. This means that if you have a restrictive firewall on your LAN, you will need to ensure that there are rules in place to allow for both incoming and outgoing communication traffic to and from the reader. If needed, you can whitelist the domain endpoints that communicate with the reader.
Braintree Domains to Whitelist
Following is a list of domains to whitelist on your onsite location network. This ensures your firewall does not interfere with incoming or outgoing communication to and from the card reader. There may be additional domains added in future releases. If this does happen, we will update this documentation.
Domain to Whitelist | Environment |
payments.sandbox.braintree-api.com | Sandbox |
reader.sandbox.braintree-api.com | Sandbox |
reader-websocket.sandbox.braintree-api.com | Sandbox |
payments.braintree-api.com | Production |
reader.braintree-api.com | Production |
reader-websocket.braintree-api.com | Production |
pool.ntp.org | Both |
time.google.com | Both |
time.cloudflare.com | Both |
s3.us-east-1.amazonaws.com | Both |
Connect to the Internet
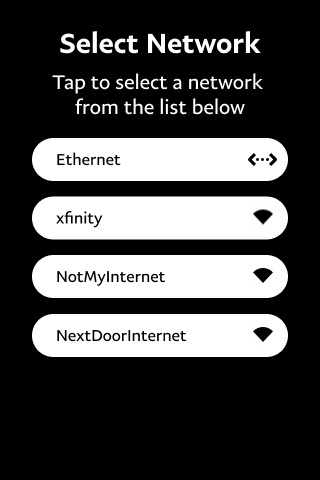
Select a Network
The reader will automatically scan for available WiFi networks and display a list when ready to connect. If an Ethernet cable is plugged into the device via the Multi-Port Cable, an option to connect over Ethernet will also be available on-screen. Tap the touchscreen to select a Network.
You may press the yellow back button at any time during the WiFi setup to return to the previous screen.
Enter WiFi Password
If connecting over WiFi, use the keypad to enter your WiFi password when prompted. Use the key map below as a guide to enter characters with the numeric keypad, then press "Connect to WiFi" to continue.
Key Map
Repeatedly pressing a number on the keypad will cycle through the available character options. Following is a table view of all available characters.
KEYPAD NUMBER | CHARACTERS |
0 |
|
1 |
|
2 |
|
3 |
|
4 |
|
5 |
|
6 |
|
7 |
|
8 |
|
9 |
|
* |
|
# |
|
IP Address Assignment
While connecting to the network, you may assign IP address automatically using DHCP or manually using Static IP. Static IP addresses allow network devices to always retain the same IP address. A network administrator must keep track of each statically assigned device to avoid using that IP address again. If you do not intend to use the Braintree terminal in the offline mode, you should use DHCP.
Configuring Static IP
On the previous screen, if you choose Static IP, you will need to provide the following information -
IP Address
Subnet Mask
Default Gateway
DNS Server 1
DNS Server 2 (Optional)
Each Field must be an IPv4 IP address. Once you have populated above fields, hit the OK button to finish configuring the Static IP Address.
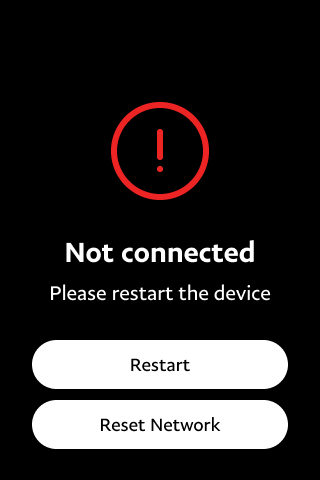
If the device is unable to connect to the internet, a screen will show, giving options to restart the device or reset the network configuration. Resetting the network configuration will cause the device to enter the network pairing flow again upon reboot, allowing you to update connection settings if they were entered incorrectly.
Switching Networks
If you need to switch networks, you can always access the Device Settings
screen after setup. To access this screen,
simultaneously press 2
+
8 while on the PayPal-branded screensaver.
Viewing Network Status
Network status is displayed at the top of the screen, along with a battery indicator if applicable. Following are four possible status bars you may see:
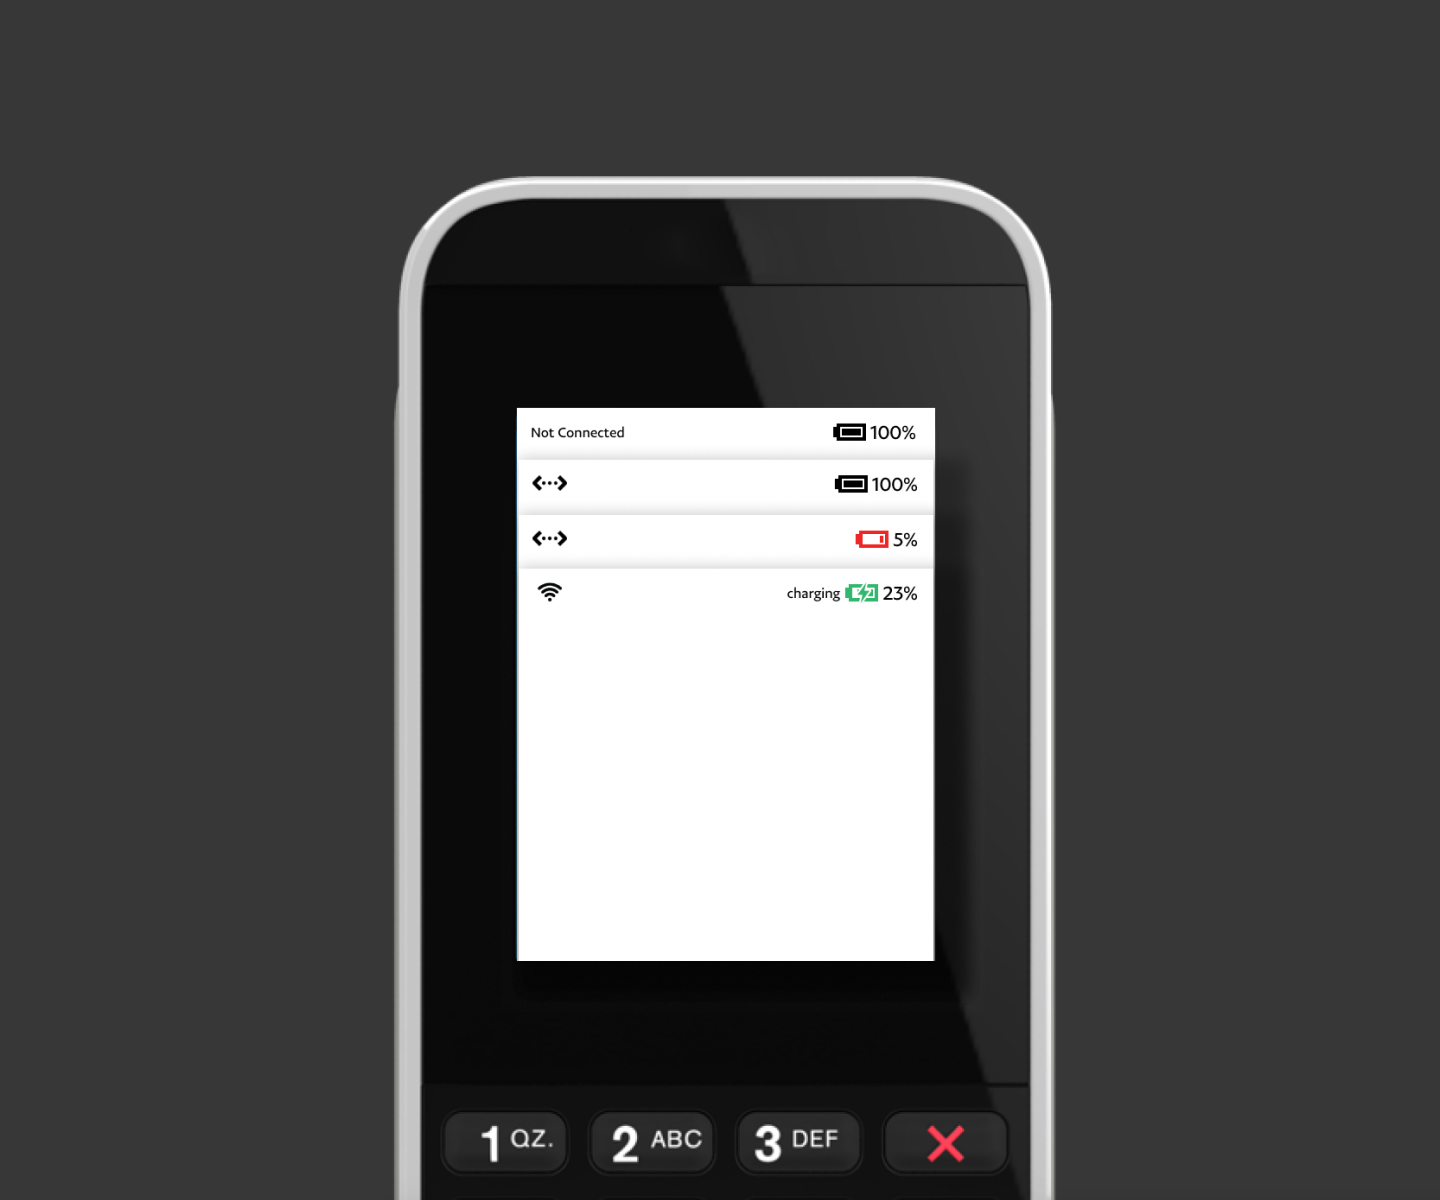
The first status bar shows a reader that is not connected and at a battery level of 100%. The second status bar shows a reader connected to Ethernet and at a battery level of 100%. The third status bar shows a reader connected to Ethernet and at a battery level of 5%. The battery level is critically low, so it is red. The fourth status bar shows a reader is connected to WiFi, at a battery level of 23%, and charging.
On P400 and M400 devices, there are no rechargeable batteries, so status bars will have no battery indicator but will have a network connectivity indicator.
Step 3: Check for Reader Update
Please make sure your reader is on the latest available version. See available versions.
First, open the device settings screen by going to the PayPal branded
screensaver and then
simultaneously press2
+
8
to display the settings screen.
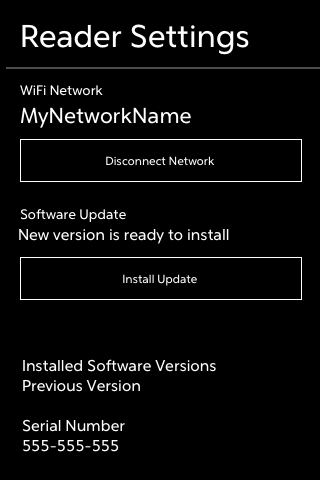
In the middle of the screen, you'll see the available-to-update version number instead of the New version placeholder.
Towards the bottom of the screen, you'll see the installed version number
instead of the
Installed Software Version placeholder. If you're already on the
latest version, you're ready to move on to the next step. If there's an
update available to install, you'll see a button that says
Install Update. Press that button and follow the on-screen
prompts to update your reader.
Step 4: Connect to Sandbox
To get up and running quickly, we recommend using the Postman API Client with our Braintree GraphQL - In-Person Postman Collection. You can find the In-Person Collection and setup instructions here. If you don't plan to integrate these APIs for reader management you may also use the Reader Management System (RMS) tool in the Braintree Control Panel.
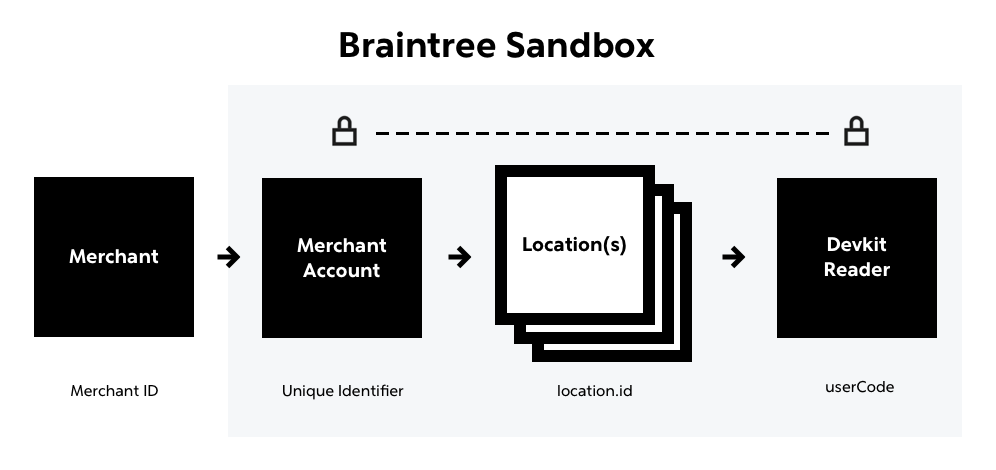
For advanced setups, please contact a solutions engineer to enable additional features like "multi-merchant account" if needed.
Create Location ID
Before pairing a reader, you must have at least one location defined. A location can have any number of readers attached, and you can reassign readers to new locations at any time.
Do not lose your location.id. We suggest saving it in a safe place immediately.
- GraphQL Mutation
- GraphQL Variables
- Sample API Response
mutation CreateInStoreLocation($input: CreateInStoreLocationInput!) {
                  createInStoreLocation(input: $input) {
                    location {
                      id
                      name
                      internalName
                      address {
                        streetAddress
                        region
                        locality
                        postalCode
                        countryCode
                      }
                      geoCoordinates {
                          latitude
                          longitude
                      }
                    }
                  }
}internalName
field when creating your location ID
Pair Reader to a Location ID
Once you are connected to WiFi, you will see the "Pair your Reader" screen. The reader is now in pairing mode and checking for a response from the Braintree Platform.
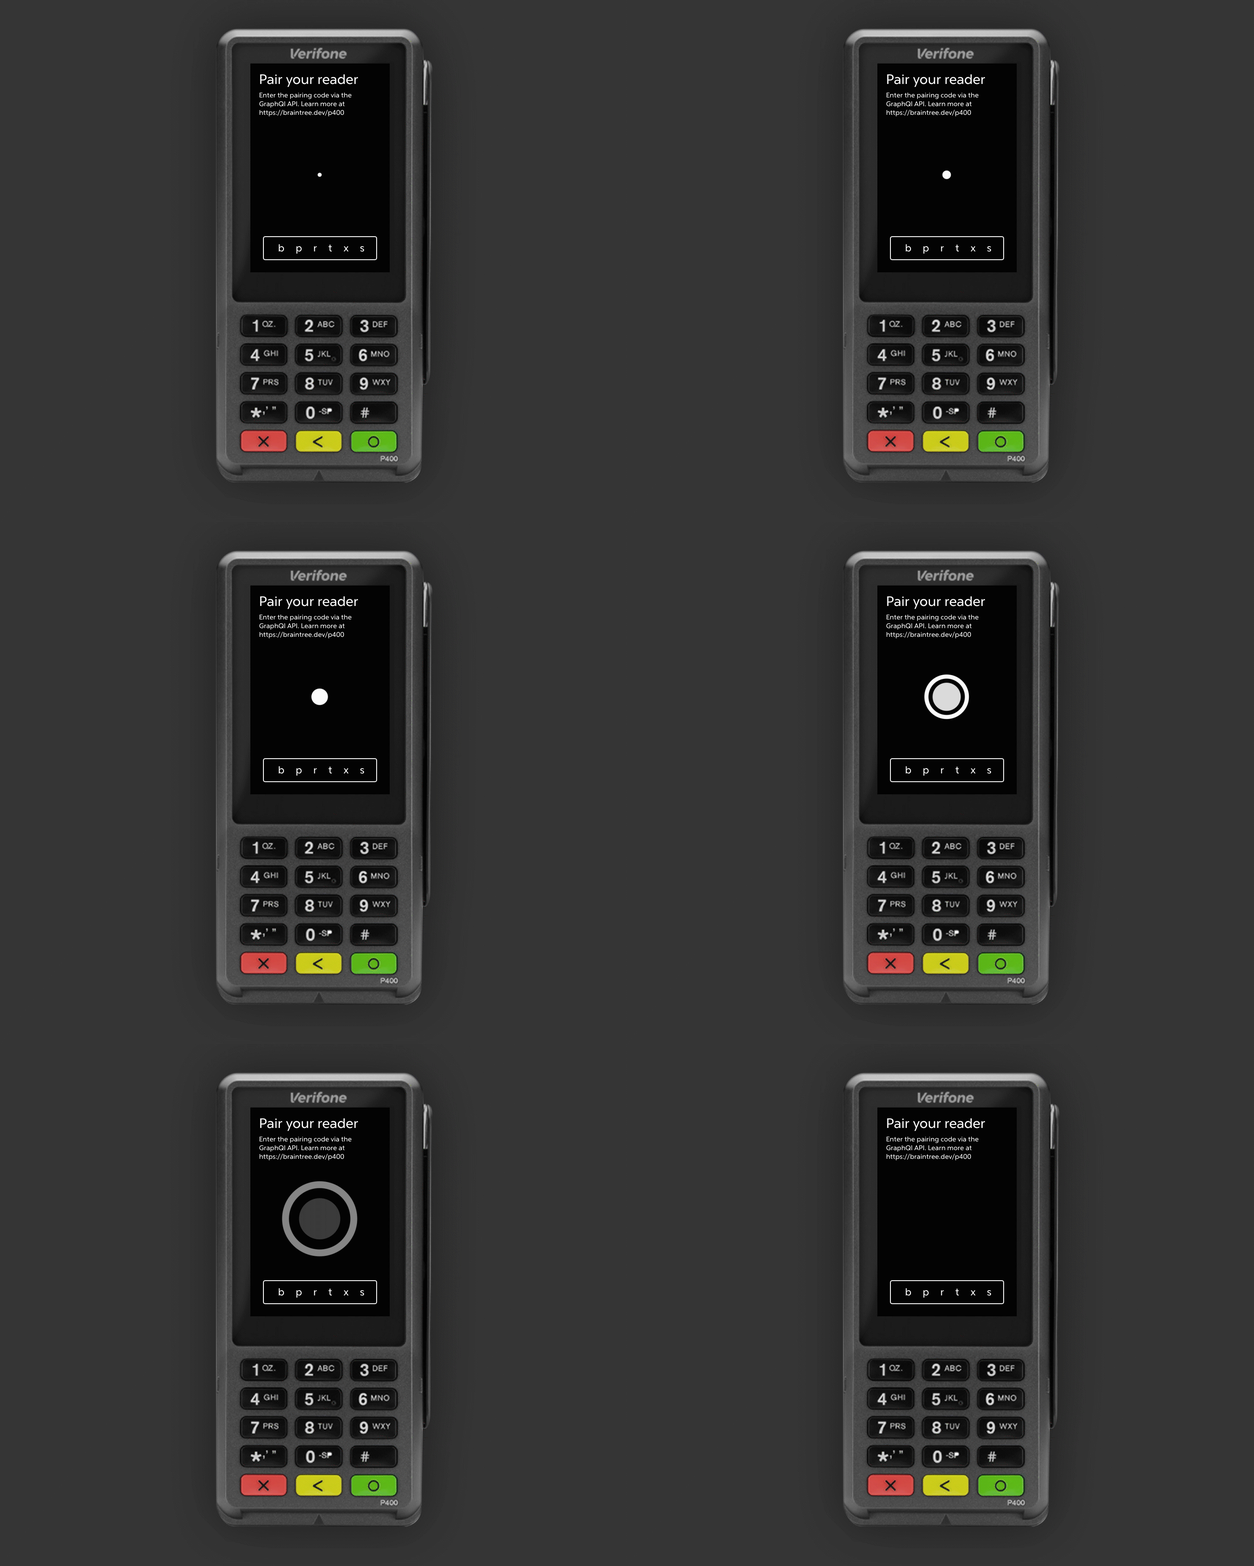
To use a reader with your account, you need to pair the device to your
Braintree Sandbox Account and assign the reader to a
location.id. During this initial setup, your reader will pair
with your Sandbox Merchant Account via the
location.id
you created. The code example below will require a
userCode
, which is the 6 characters displayed at the bottom of the reader screen.
We suggest using Postman and the GraphQL code example below to pair your reader
Try Postman - GraphQL Mutation
- GraphQL Variables
- Sample API Response
mutation PairInStoreReader($input: PairInStoreReaderInput!) {
              pairInStoreReader(input: $input) {
                  clientMutationId
                  reader {
                      id
                      name
                      vendor {
                      ... on VerifoneVendor {
                              model
                              osVersion
                          }
                      }
                      location {
                          id
                          name
                          address {
                              streetAddress
                              extendedAddress
                              locality
                              region
                              postalCode
                              countryCode
                          }
                      }
                      status
                  }
              }
          }
Update an Existing Location (Optional)
If you would like to update an existing location, you can use the below GraphQL mutation. Remember that you can only update an existing location if you have already created an in-store location. See our documentation for more details on available API inputs for updating an existing location.
- GraphQL Mutation
- GraphQL Variables
- Sample API Response
mutation UpdateInStoreLocation($input: UpdateInStoreLocationInput!) {
              updateInStoreLocation(input: $input) {
                  clientMutationId
                  location {
                      id
                      internalName
                      geoCoordinates {
                          latitude
                          longitude
                      }
                      qrCodePaymentsEnabled
                      payerId
                      name
                      address {
                          streetAddress
                          extendedAddress
                          locality
                          region
                          postalCode
                          countryCode
                      }
                  }
              }
          }
Update Reader Location Pairing (optional)
If you would like to move a card reader pairing from one existing location to another, you can use the GraphQL API UpdateInStoreReader mutation. See the example Below.
- GraphQL Mutation
- GraphQL Variables
- Sample API Response
mutation UpdateInStoreReader($input: UpdateInStoreReaderInput!) {
              updateInStoreReader(input: $input) {
                  clientMutationId
                  reader {
                      id
                      name
                      vendor {
                      ... on VerifoneVendor {
                              model
                              osVersion
                          }
                      }
                      location {
                          id
                          name
                          address {
                              streetAddress
                              extendedAddress
                              locality
                              region
                              postalCode
                              countryCode
                          }
                      }
                      status
                  }
              }
          }
Success!
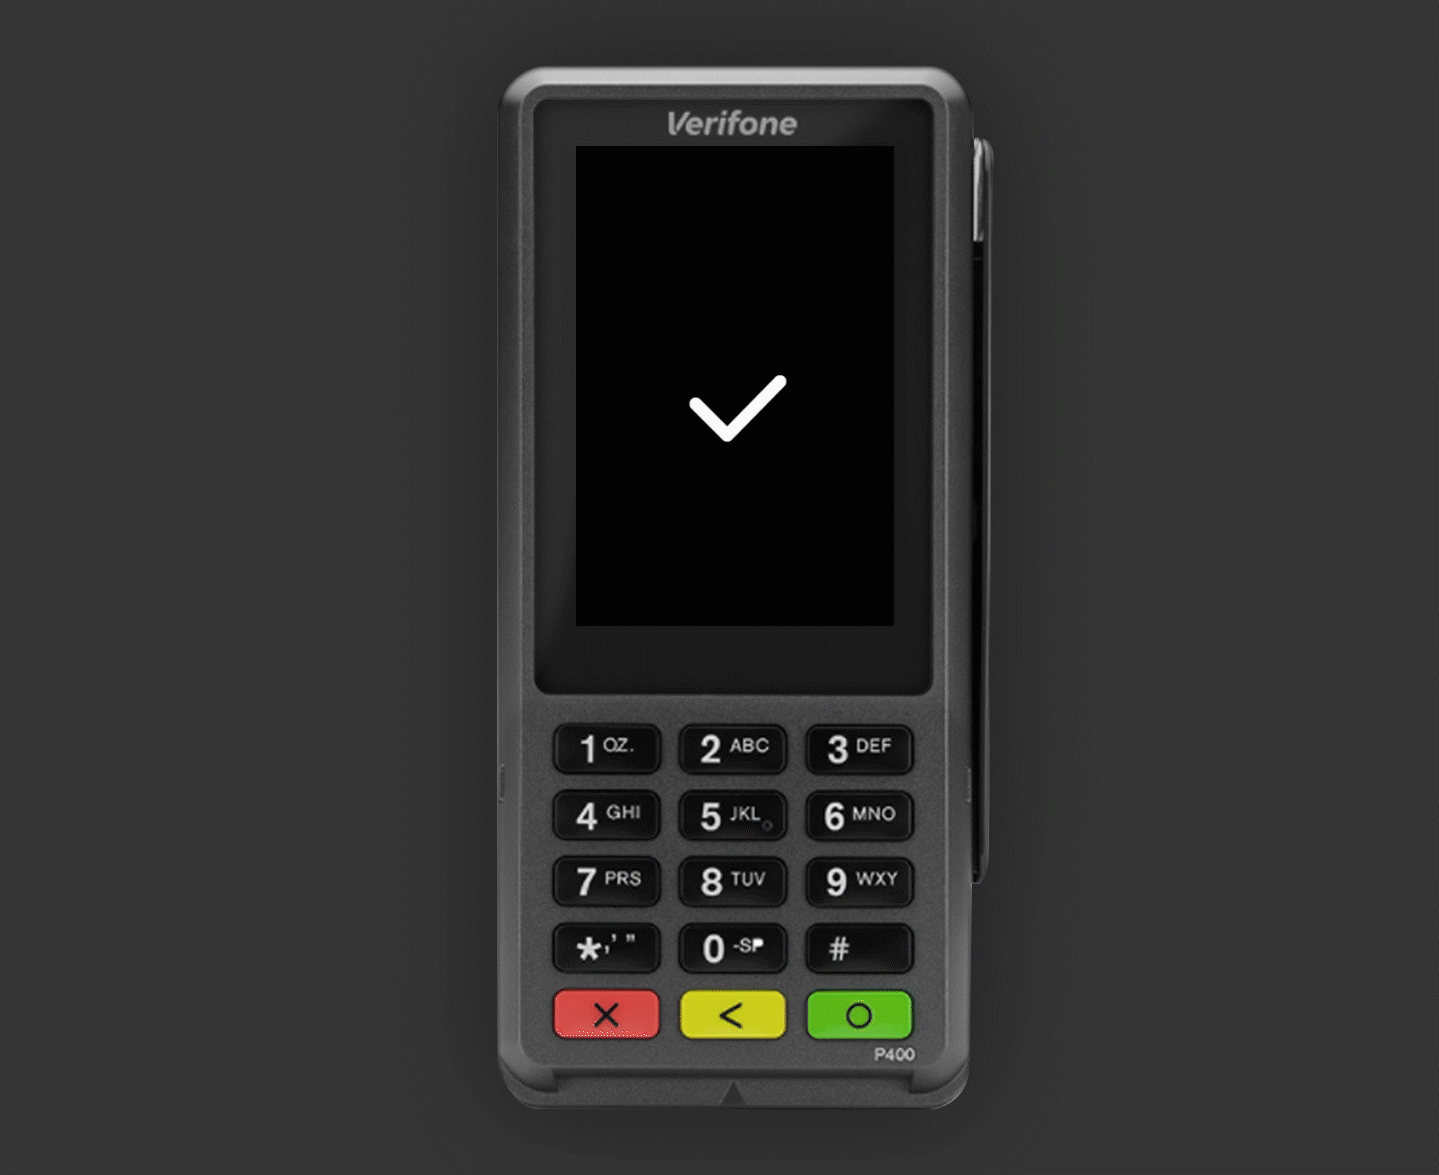
reader.id from the response in your database, as it will be required to be used in future reader initialization API requests.
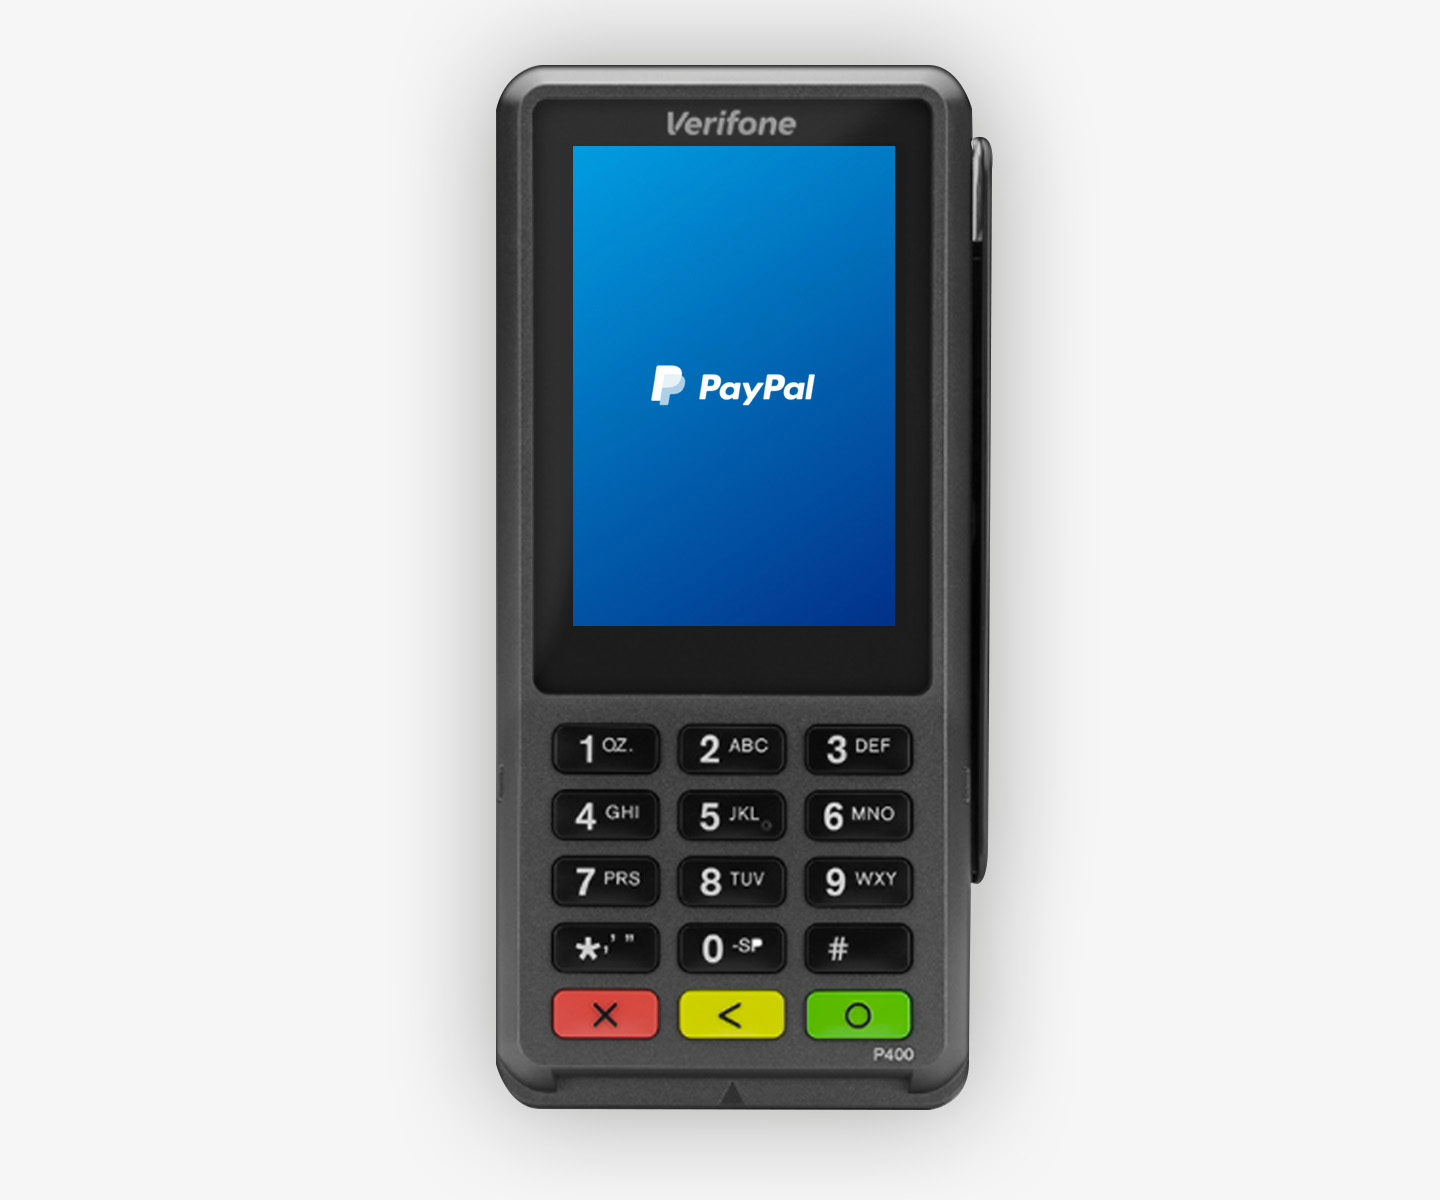
Your reader will automatically redirect to a PayPal-branded splash screen on success. Your reader is now connected to your Braintree Sandbox Account!
All set!
Continue reading through our integration guides section to see how to make a transaction on your reader.
Failed to Configure?
Most issues with setup can be quickly remedied by restarting the app. Please review our troubleshooting section for additional help.