Reader Management System (RMS) - Available in Beta Only
This page is dedicated to the Reader Management System tool or RMS built into the Braintree Control Panel. This tool allows you to manage your fleet of readers remotely from a web portal.
How to access the Reader Management System
First, you must enable access to the RMS by adding a user role to your Braintree Control Panel user by following the below steps:
Log into your gateway account (via the Braintree Control Panel)
Sandbox: https://sandbox.braintreegateway.com/login
Production: https://www.braintreegateway.com/login
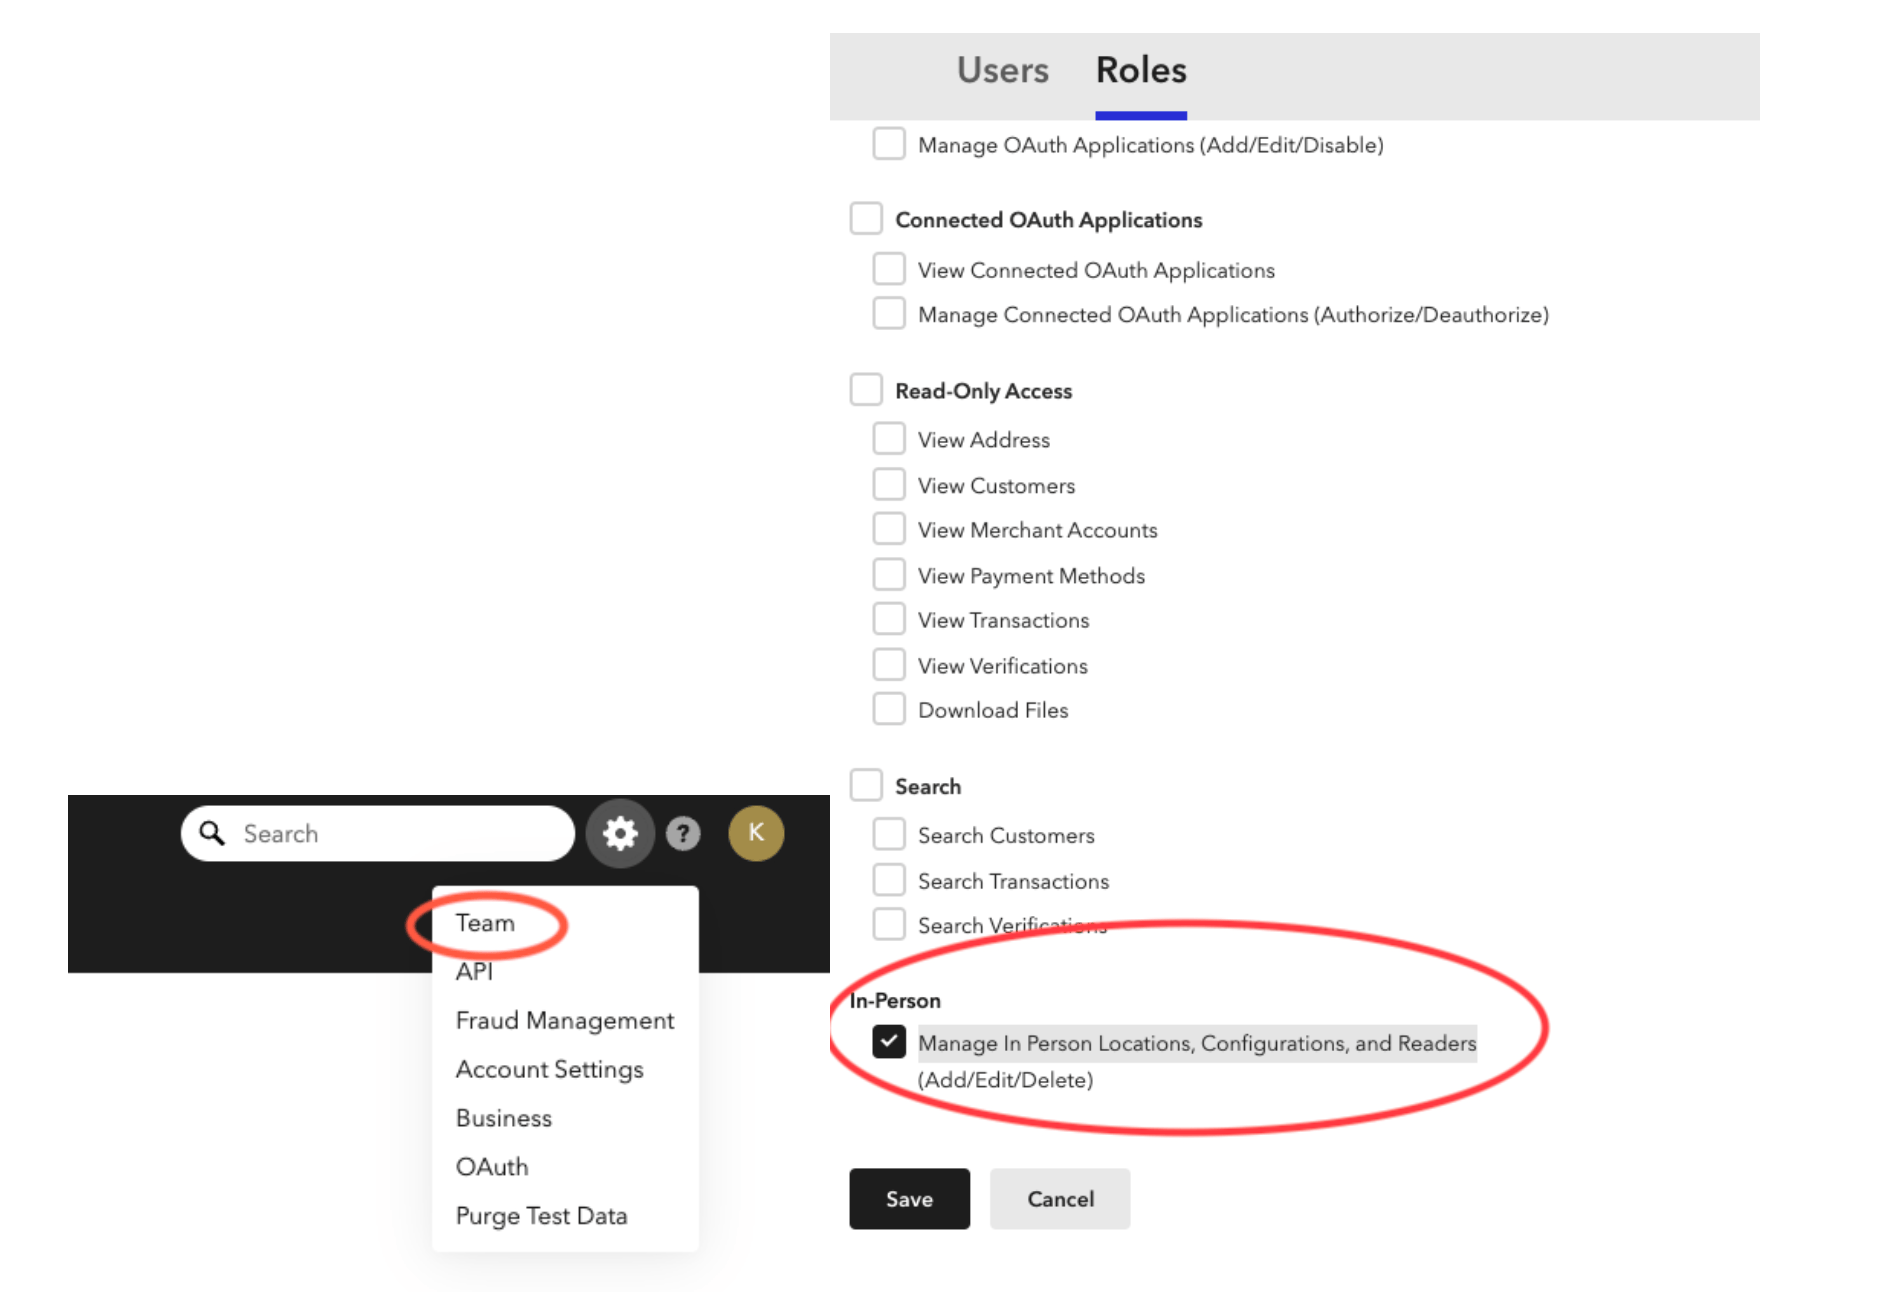
Go to Settings -> Team -> Roles ->
Either create a new role or edit an existing role associated with the user
Select “Manage In-Person Locations, Configurations, and Readers” under the “In-
Person” section
Accessing the RMS once enabled
Once the appropriate role has been added, you can navigate to RMS from the top navigation bar within the Braintree Control Panel.

Features supported by the RMS
The RMS provides an easy-to-use interface for the below reader management activities that are otherwise accessible via the API. See our API documentation for more information on using the API for these tasks.
View and manage your locations and associated card readers
Dive deep into reader details, including firmware versions and customizable options
Create new locations and pair new readers effortlessly
Update the firmware of one or more readers with ease
View and Manage Locations and Readers
From the RMS page, you can see the list of your readers from the “Readers” tab:
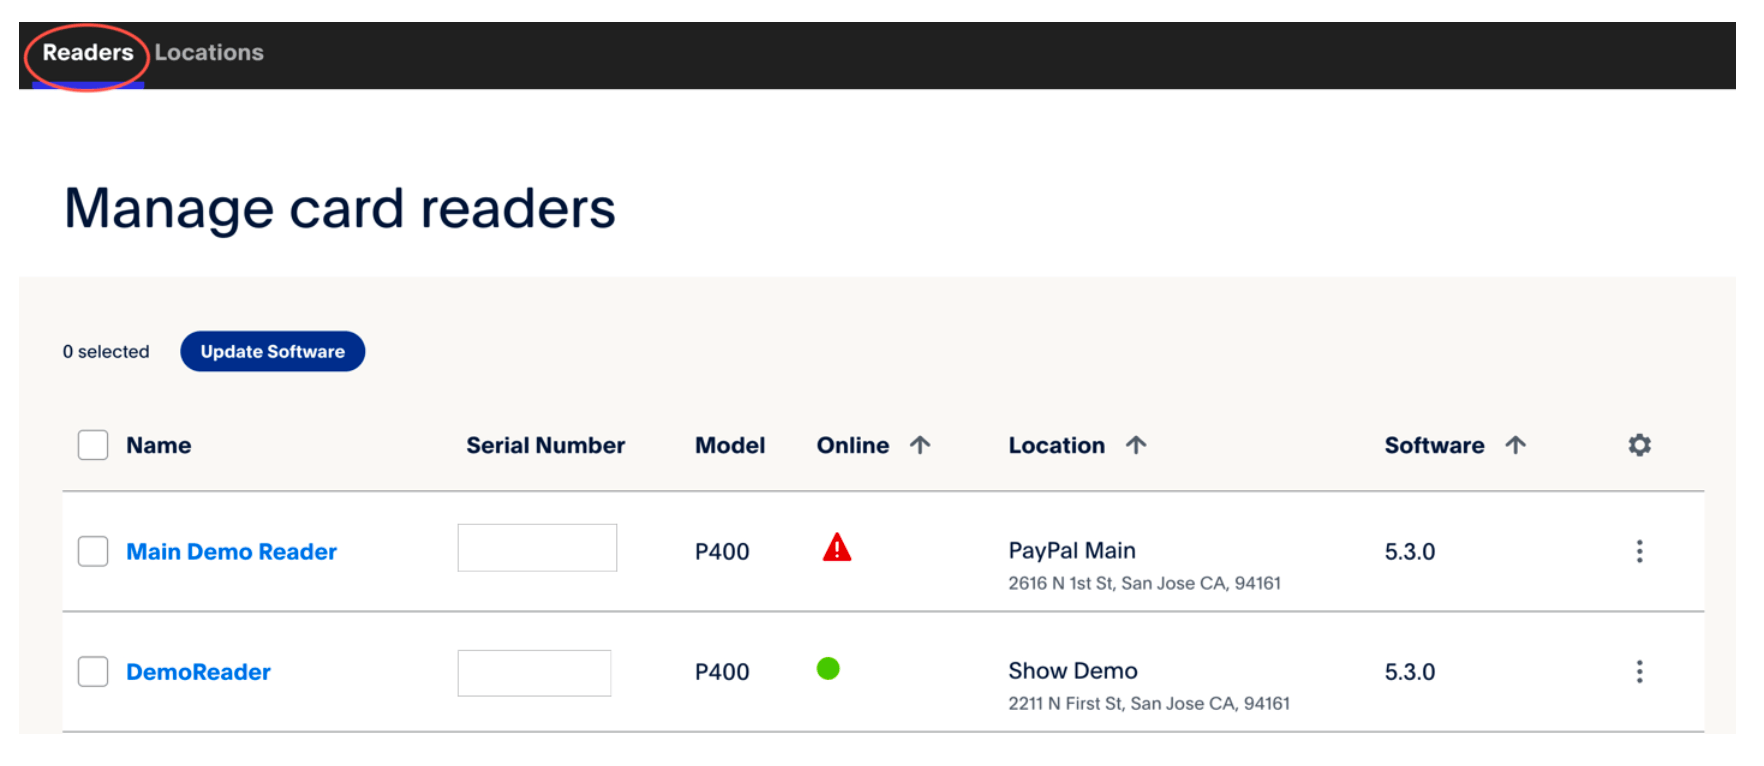
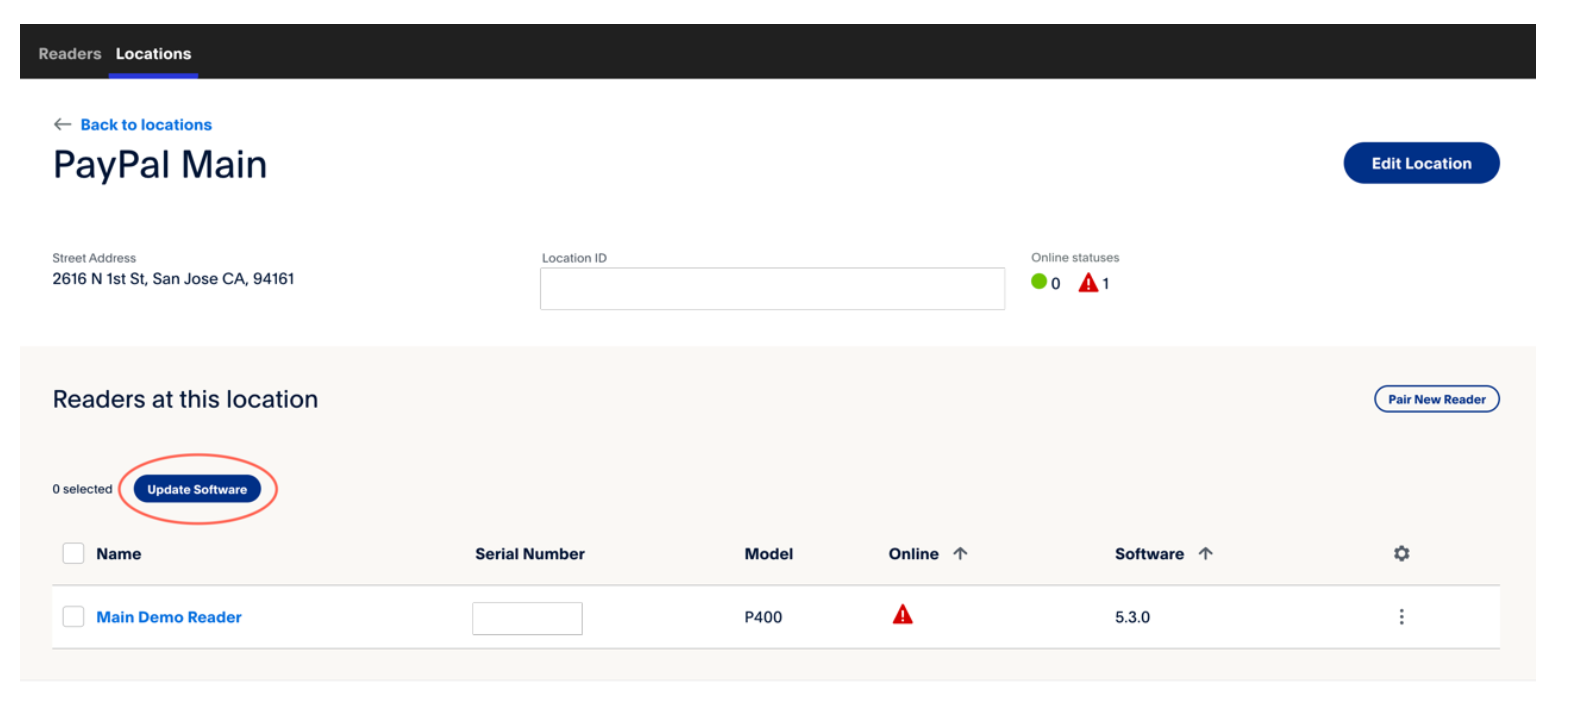
You can see the list of your locations from the “Locations” tab:
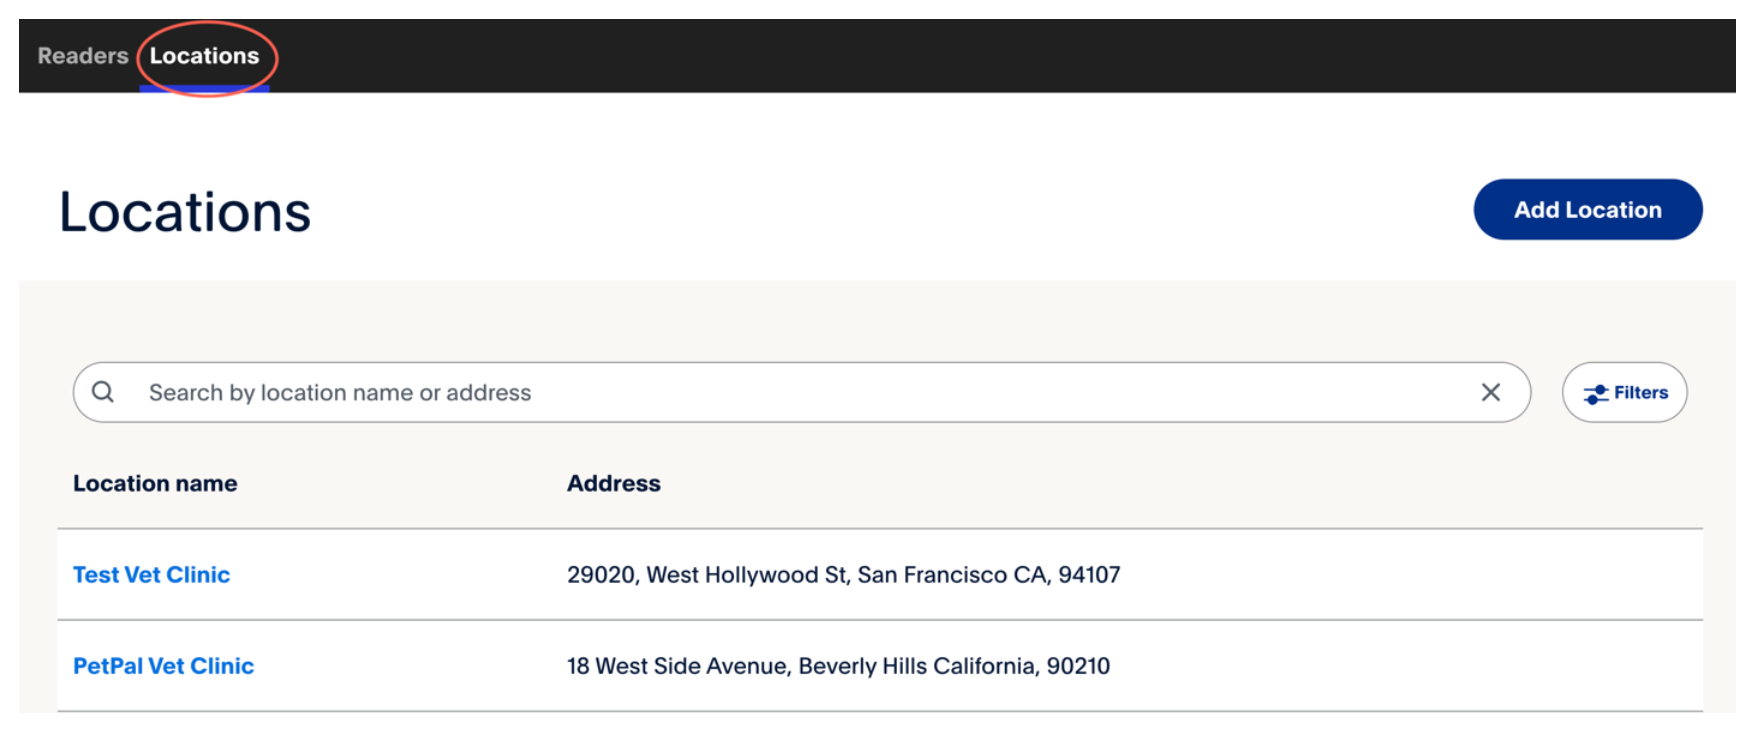
Get details about a specific Reader or Location
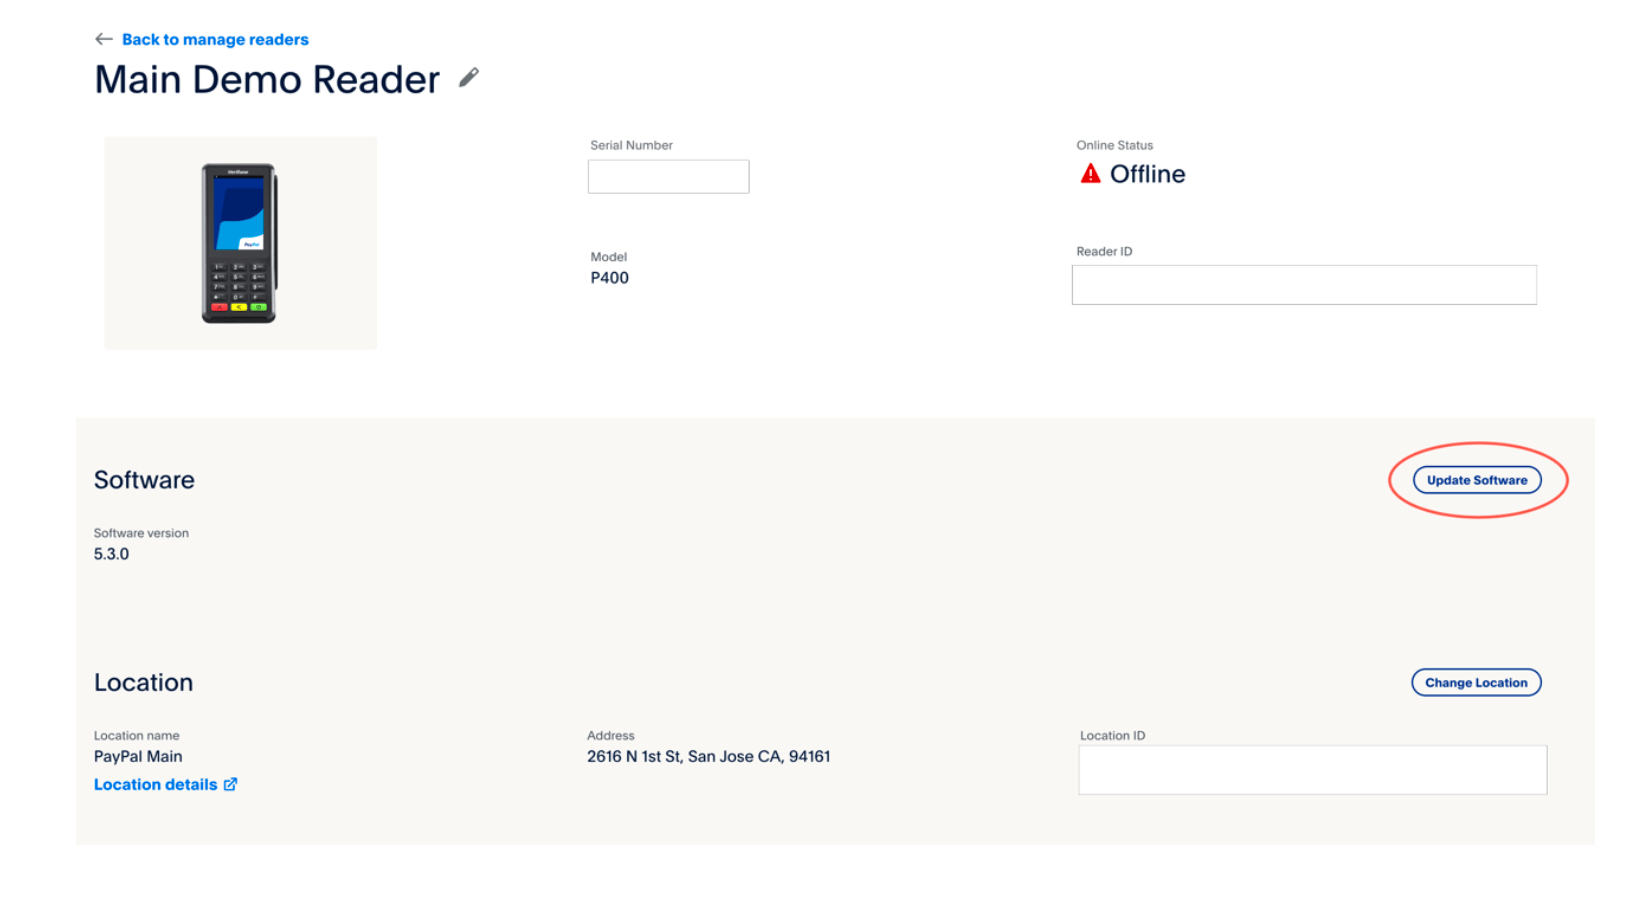
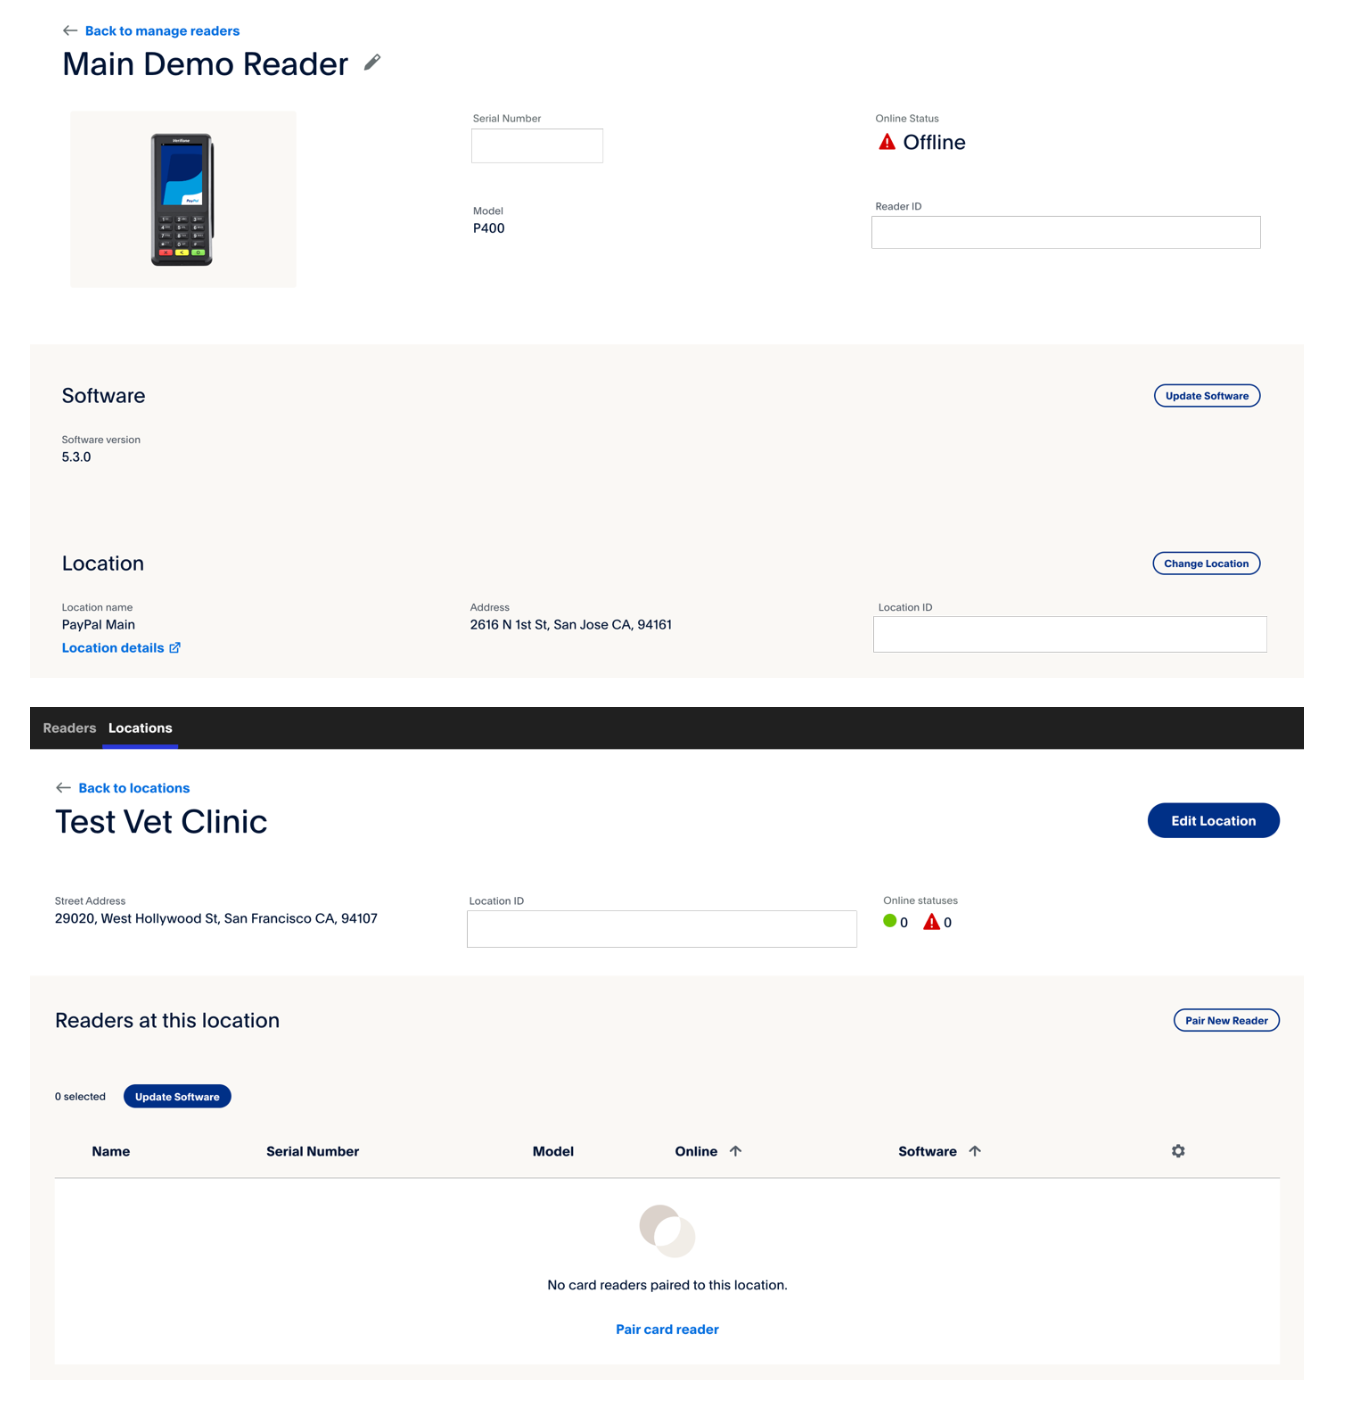
By clicking on any of the reader or location names under the “Reader” or “Location” tab, you will be taken to the details page, where you can see full details of the reader or location:
Create new Locations
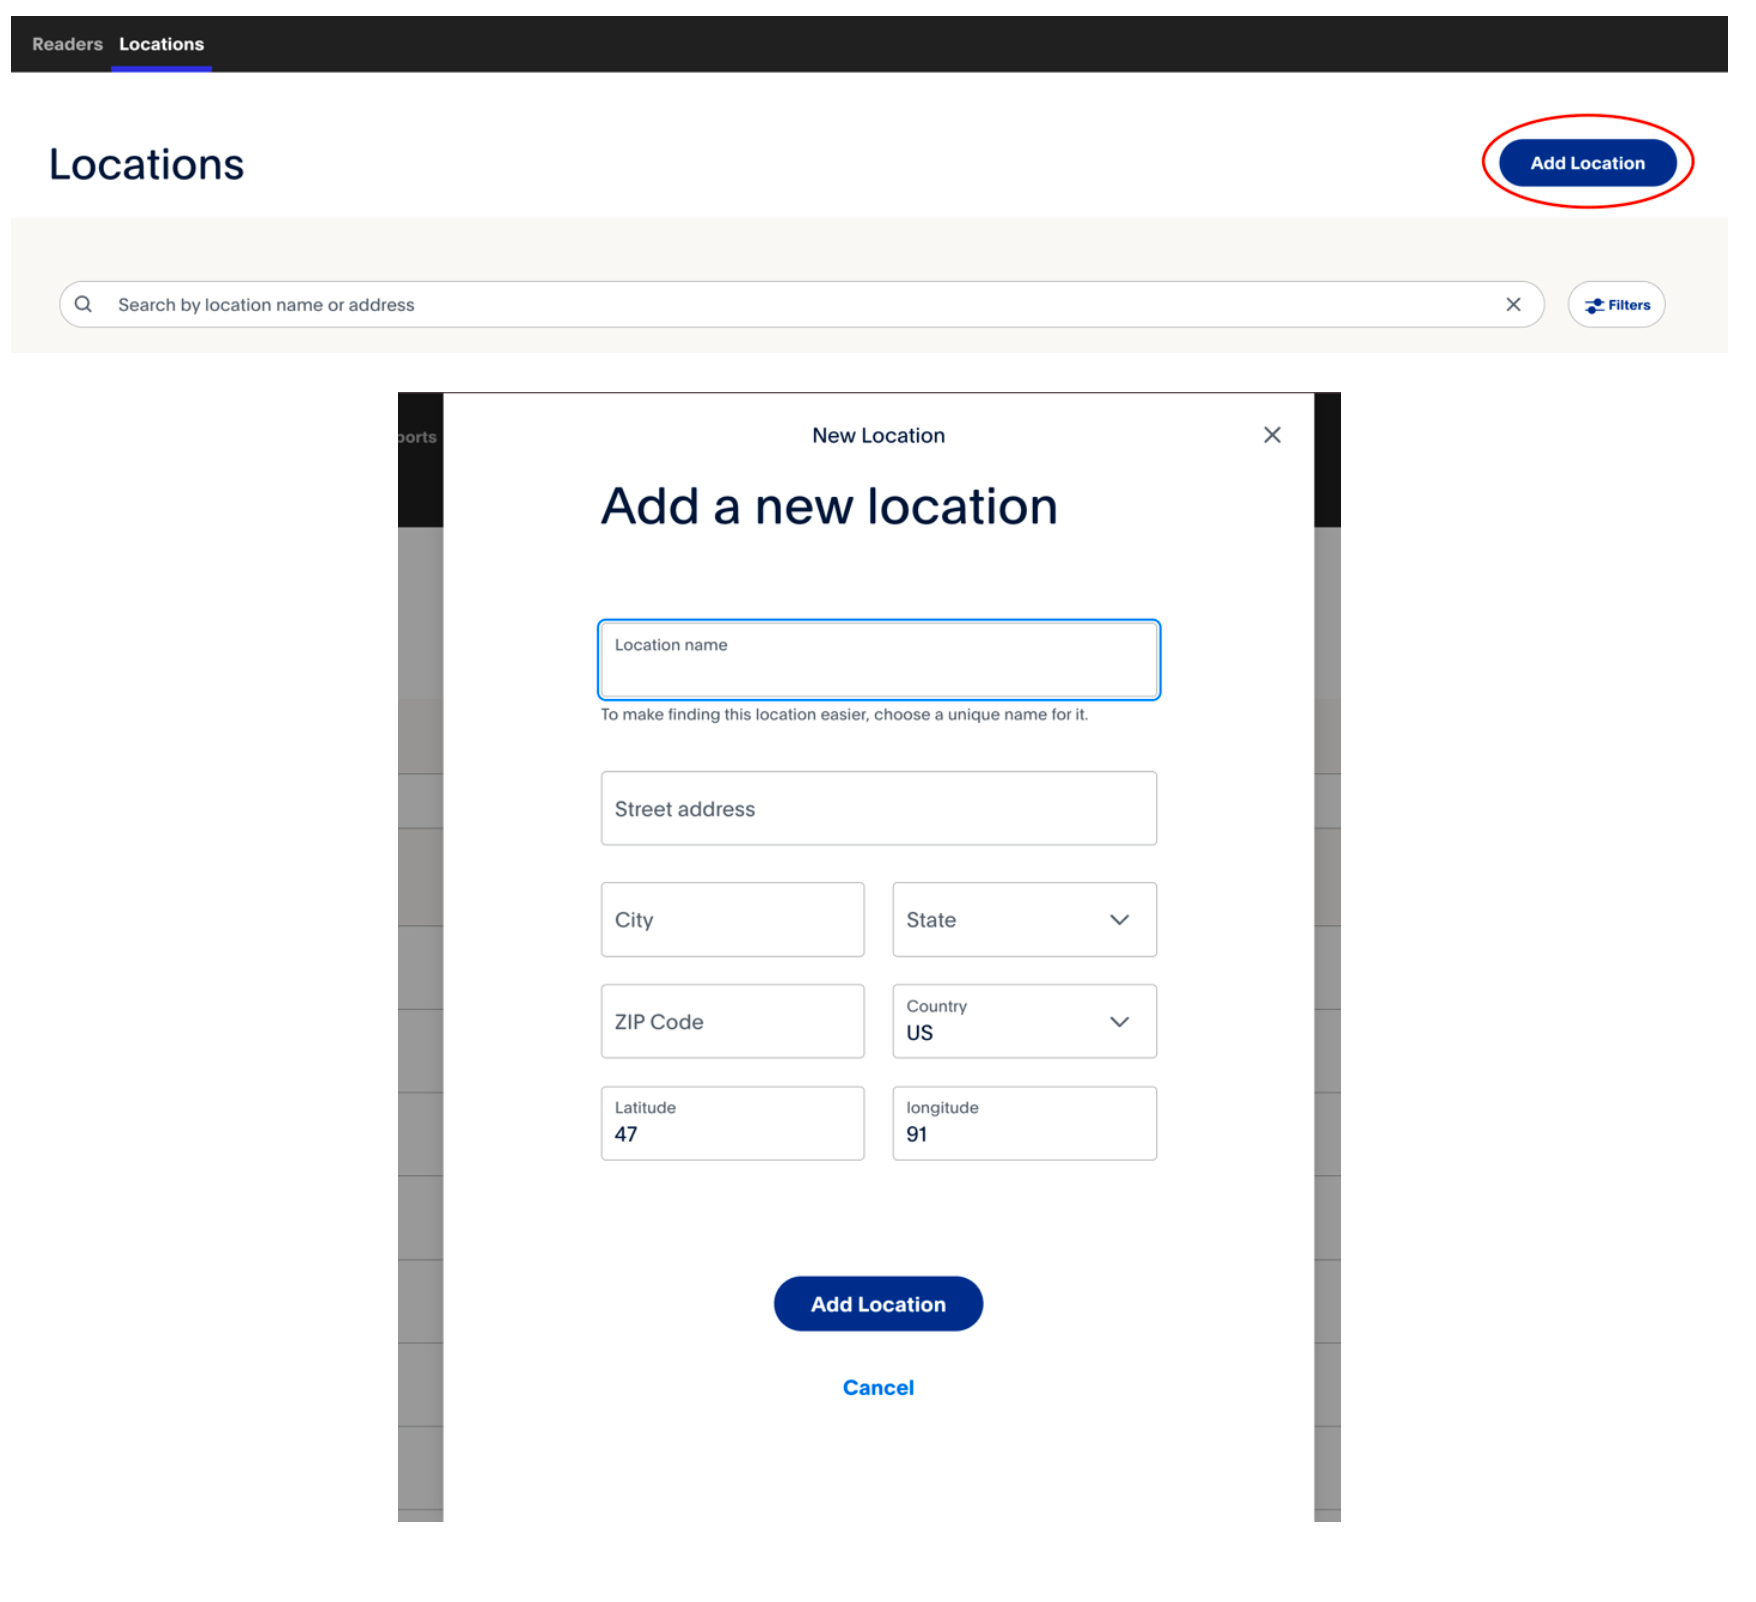
To create a new location, click on the “Add Location” button from the main location list page, fill in your store details in the popup, and submit:
Pair your Readers to a Location
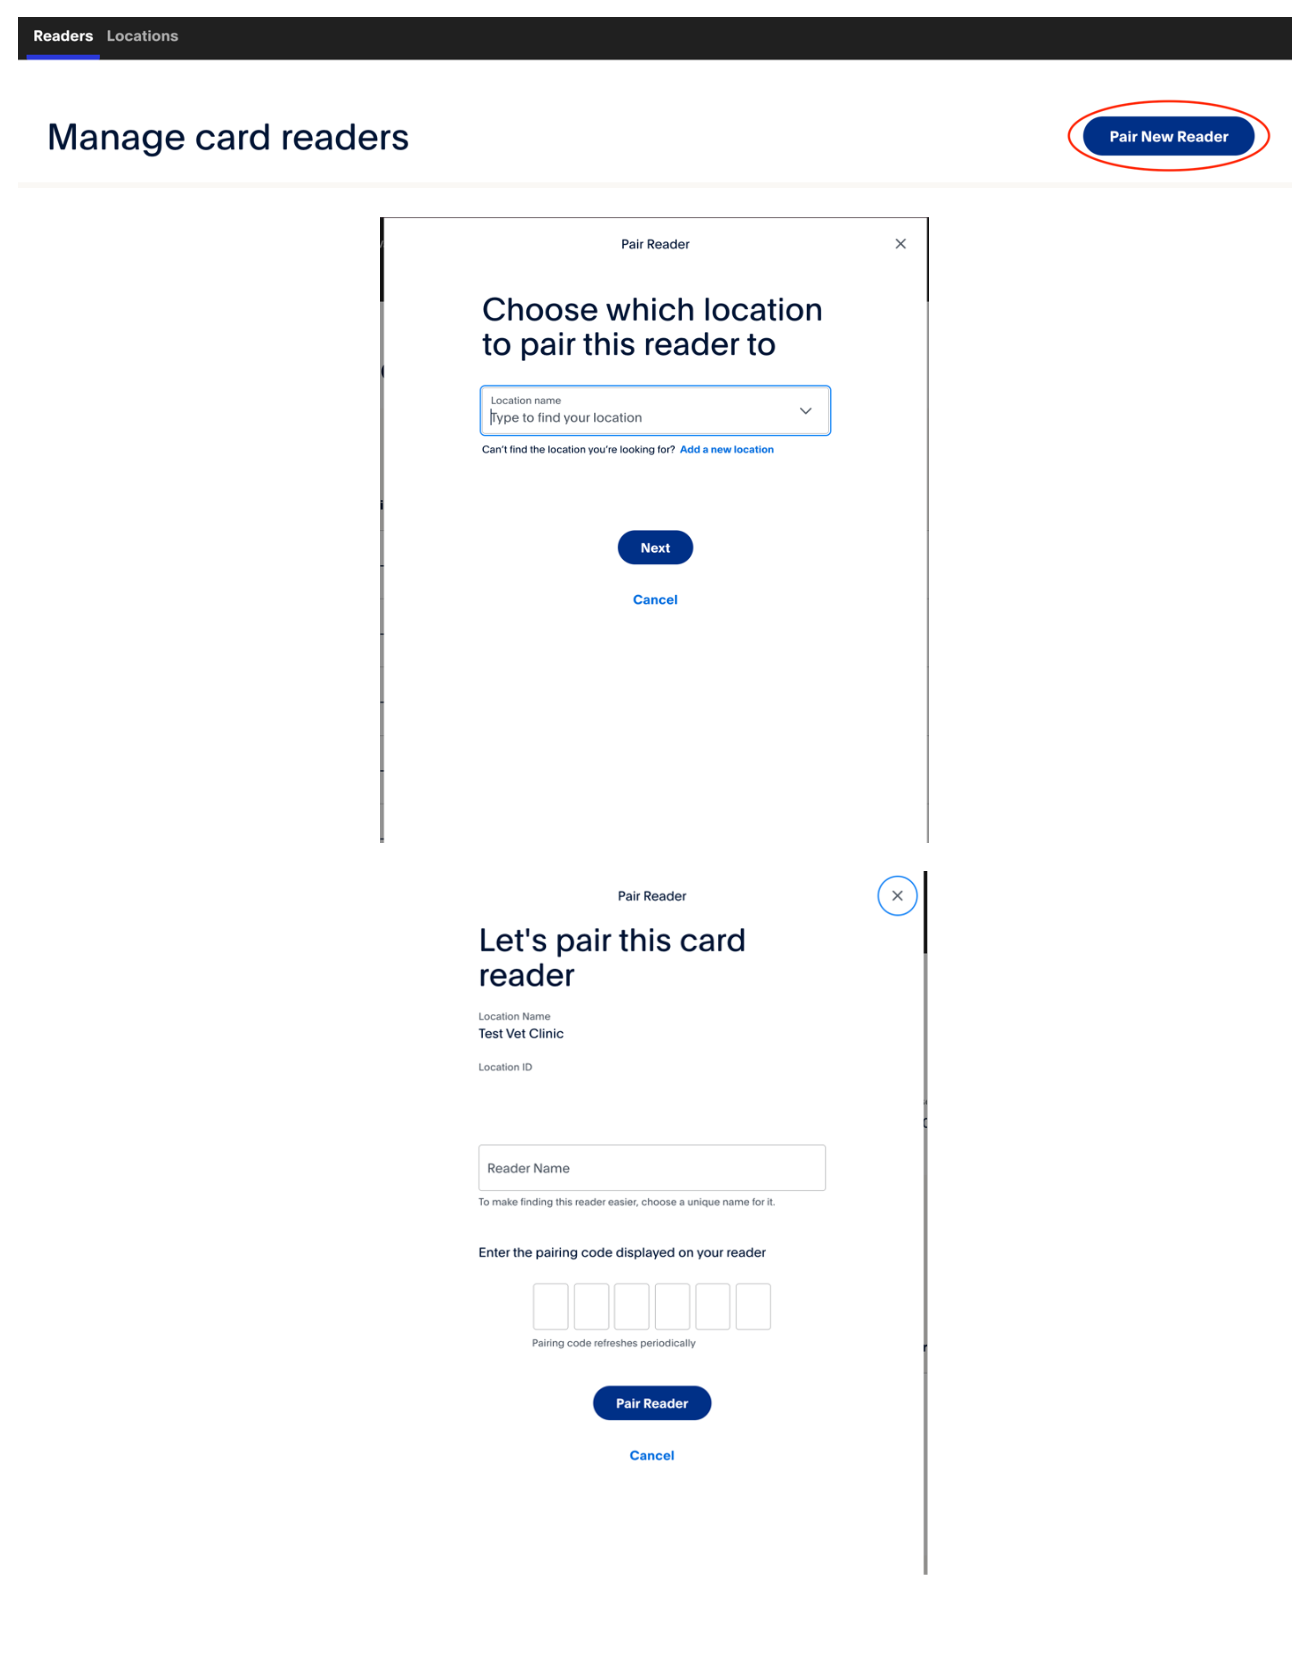
To pair a new reader to a location,
Go to the reader list page (through the “Reader” tab)
Click on the “Pair New Reader”
Proceed by selecting a location where you want to pair this reader on the popup
Enter the reader details, including the six-digit pairing code that is displayed on the
reader that you want to pair
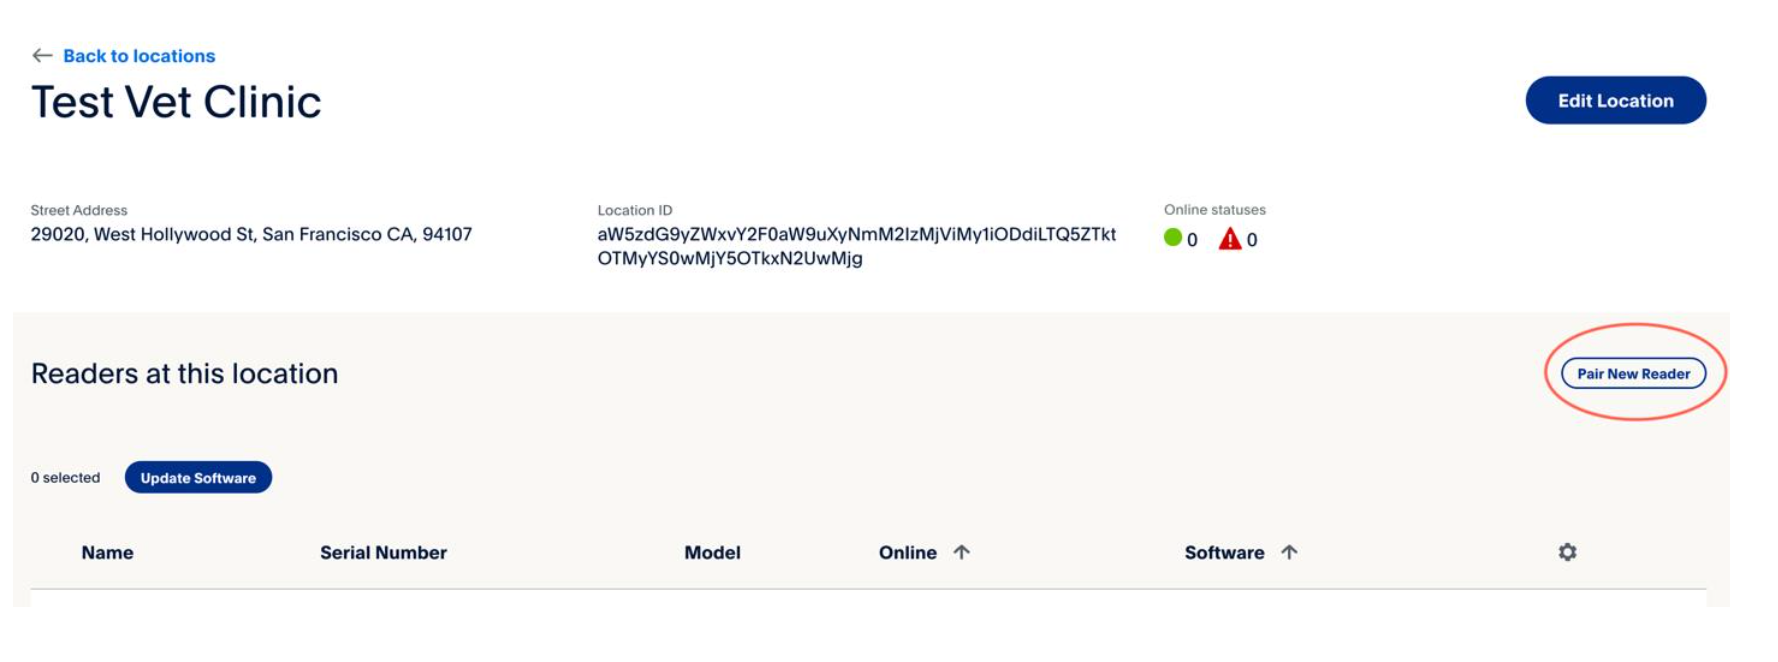
Alternately, you can also pair a reader to a location by:
Going to the location detail page (of any location)
Clicking on the “Pair New Reader” button from the page
Edit an existing Location
If you would like to change the name and/or address of a location, you can edit the location by clicking on the “Edit Location” button from a location detail page:

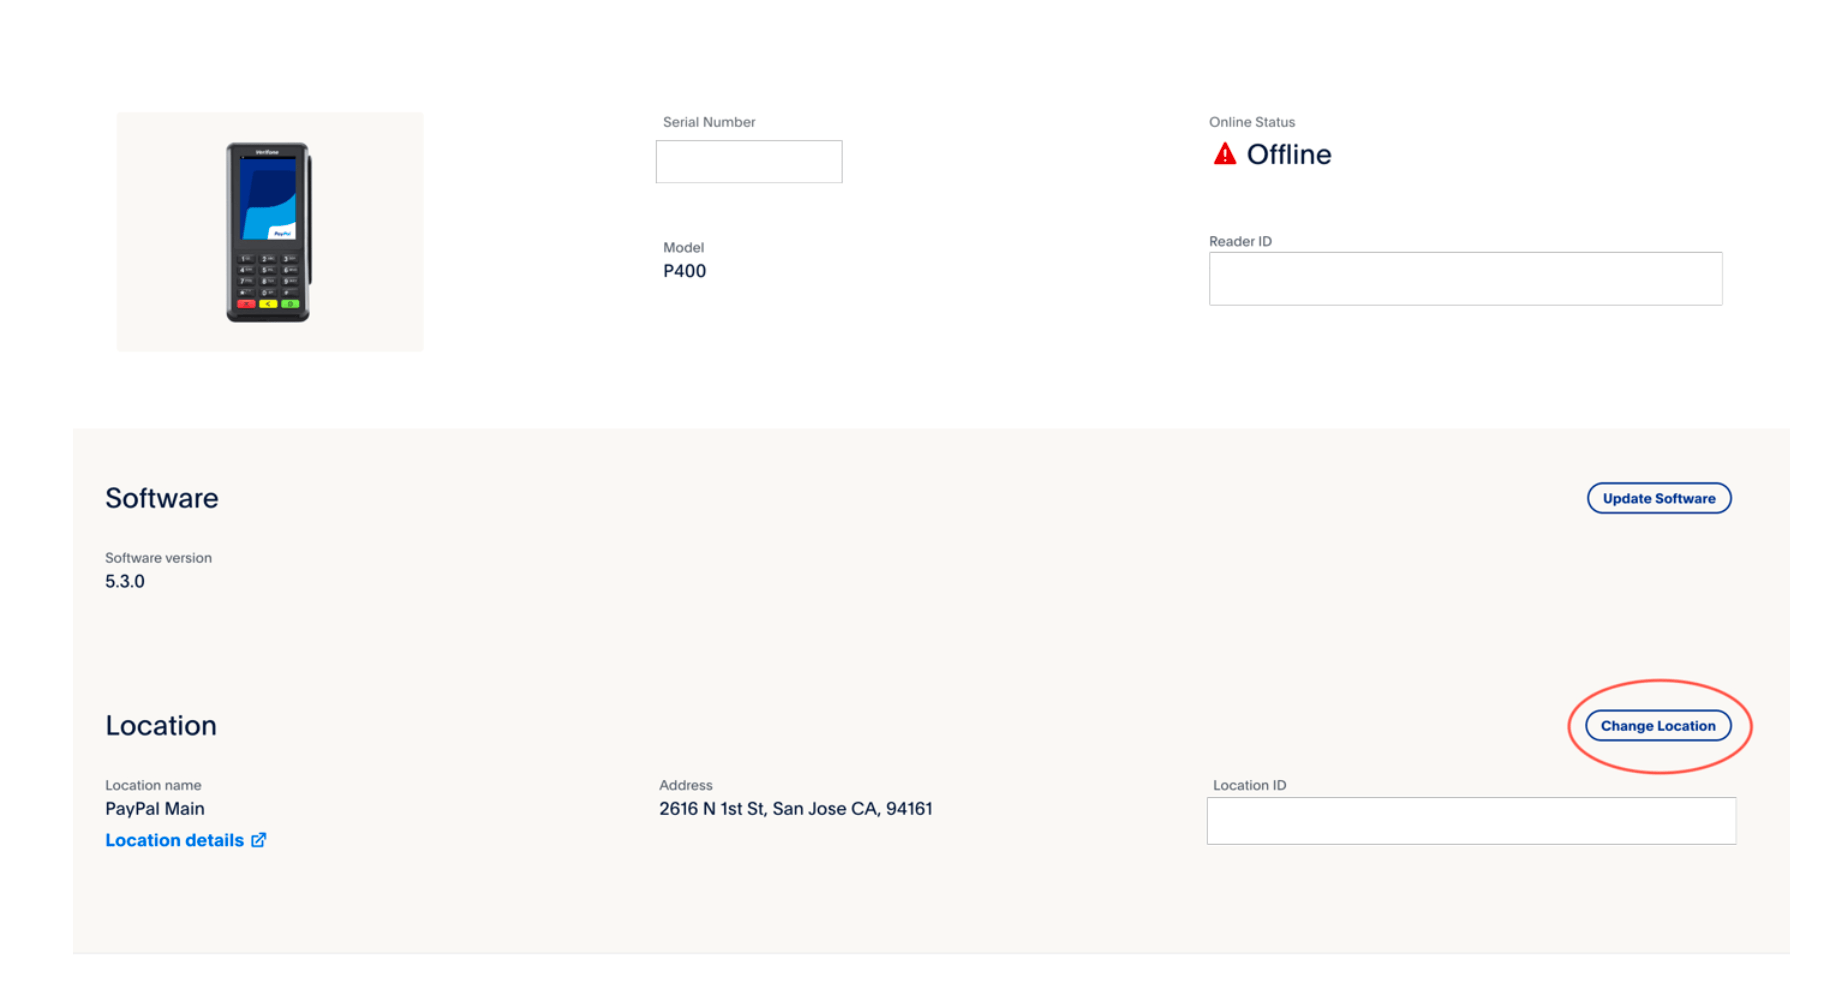
Update Reader or move to a new Location
If you would like to pair your reader to a different location than it is paired now, you can move the reader to a new location by clicking on the “Change Location” button from the reader detail page:
Updating the Reader Firmware
To update the firmware of your reader(s):
Navigate to the main reader list page
Select one (or more) readers from the list
Click the “Update Software” button to initiate a firmware update
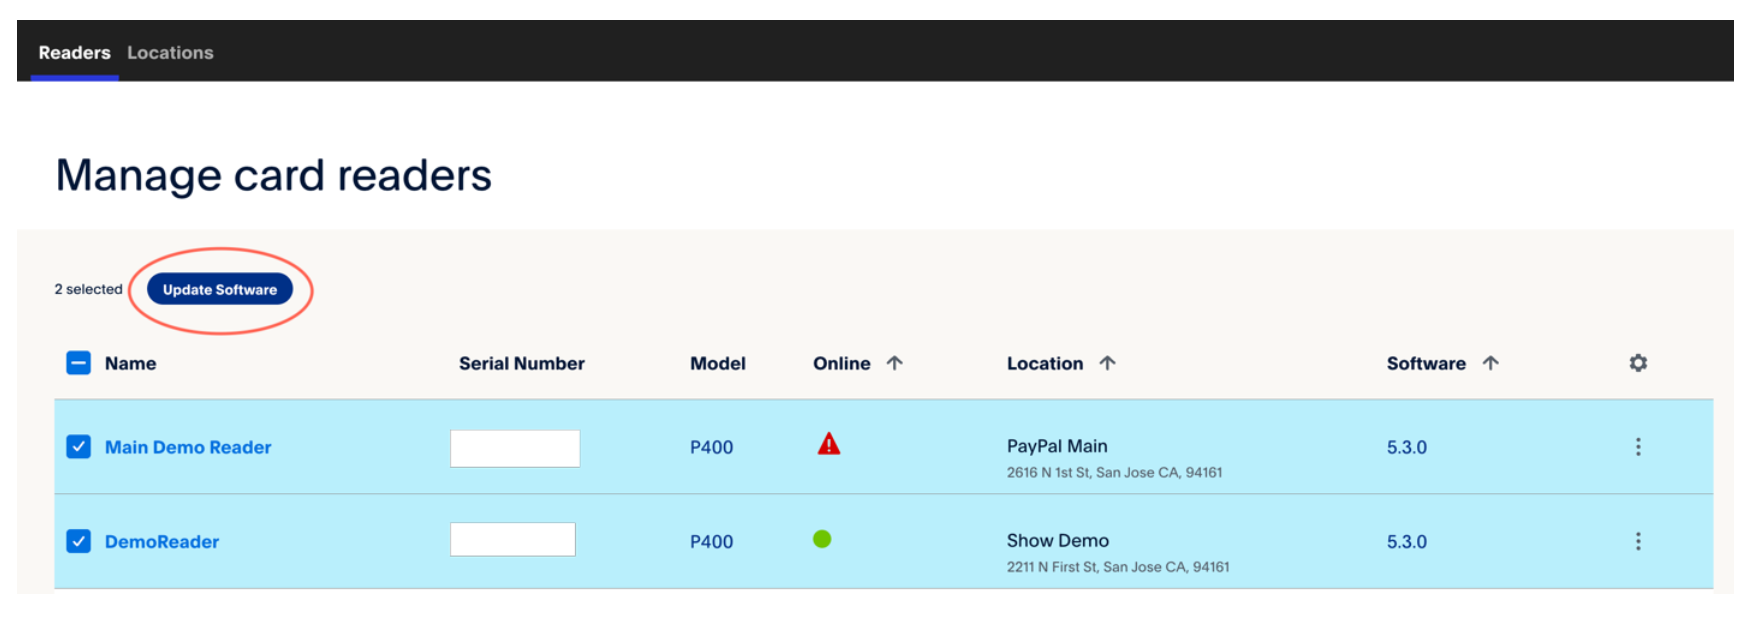
Alternatively, you can also initiate a firmware update from the detail page or a reader or location details page by clicking on the “Update Software” button:
