Build a checkout with Next.js
Add a basic checkout to a Next.js App Router app using server functions, no API routes.
Last updated: August 24, 2026
Estimated time: 15 minutes
Copy / Export
Adding PayPal Checkout to a Next.js app used to require a fair amount of boilerplate. With the PayPal JavaScript SDK v6, the integration is more streamlined.
In this guide, you’ll build a working PayPal Checkout integration in a Next.js 16 App Router project. You’ll use paypal/react-paypal-js to integrate PayPal on the client and paypal/paypal-server-sdk to create and capture orders securely on the server.
The React SDK is a set of components that wrap the PayPal JS SDK in a modern, hooks-based API. It hides the complexity of the v6 SDK and enforces best practices by default, so buyers get the smoothest possible checkout.
Orders are created and captured inside Next.js Server Actions, OAuth2 is handled for you by the server SDK, and the whole flow runs end-to-end in the PayPal Sandbox before you touch a single live credential.
Want to skip the setup?
Use the Open in GitHub Codespaces button at the top of this page to launch the finished project in your browser, or clone the companion repo on GitHub to follow along locally.
What you'll build
A minimal Next.js 16 (App Router) product page with a live PayPal button wired to a real Sandbox transaction. The button renders with @paypal/react-paypal-js (SDK v6), and the order is created and captured server-side with @paypal/paypal-server-sdk inside a Next.js Server Action. It's the right pattern for one-time sales: a lifetime deal, a standalone course, a flat per-listing fee, or a one-time unlock.
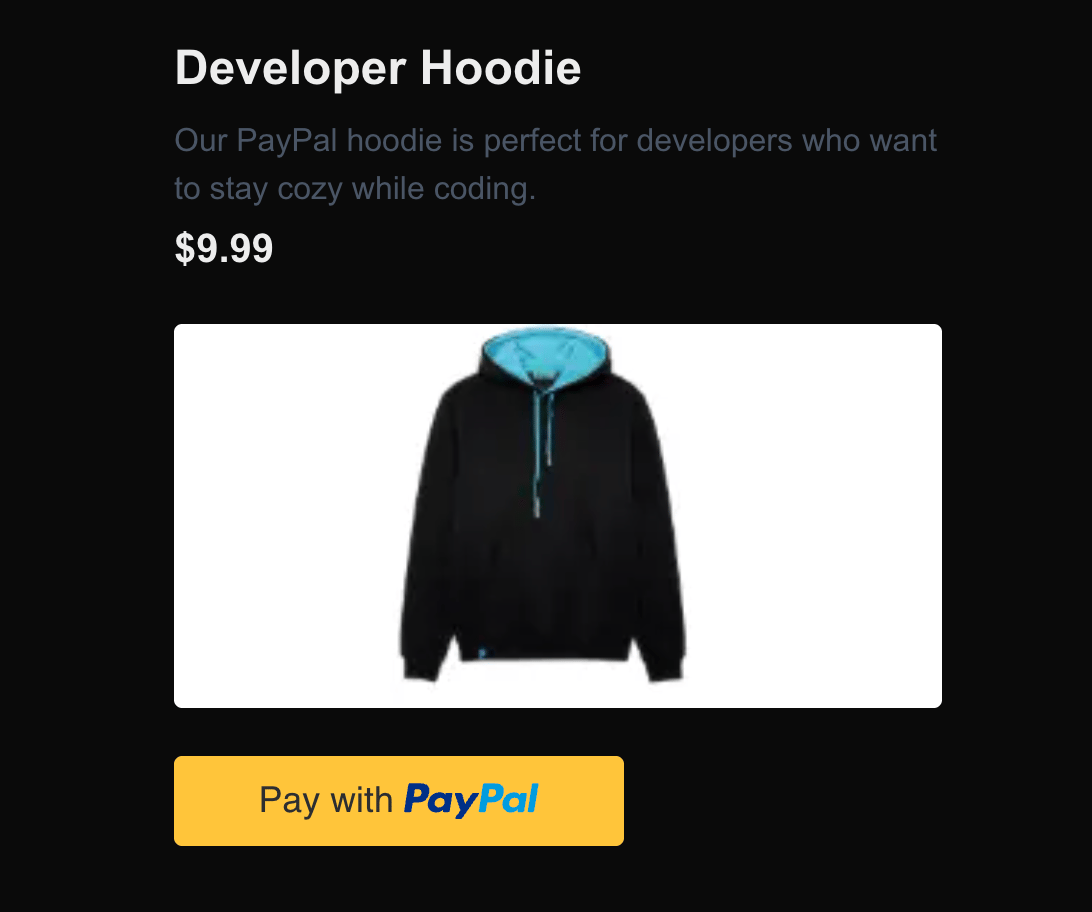
Other PayPal features
PayPal and Pay Later work out of the box, with Venmo, Apple Pay, and cards available via extra components, across 200+ countries and 23+ currencies.
What you'll learn
By the end of this guide you'll know how to:
- Set up
@paypal/react-paypal-jswith the Next.js App Router, applying Server Components, Server Actions, and"use client"boundaries correctly - Create and capture PayPal orders with
@paypal/paypal-server-sdkusing Next.js Server Actions, with no manual token management or raw HTTP calls - Flip between Sandbox and production with a single environment variable, and test the whole flow end-to-end in the Sandbox first
Tech stack
| Layer | Technology |
|---|---|
| Frontend | Next.js 16 (ReactJS), @paypal/react-paypal-js (sdk-v6) |
| Backend | Next.js Server Action, @paypal/paypal-server-sdk |
Prerequisites
Project structure
Once you've finished this guide, the relevant files will look like this:
paypal-nextjs/
├── app/
│   ├── actions.ts                # "use server" — create and capture order
│   └── page.tsx                  # Product page
├── components/
│   └── PayPalCheckout.tsx        # "use client" checkout component
├── lib/
│   └── paypal/
│       ├── client.ts             # Reusable PayPal server SDK client
│       └── orders.ts             # Create and capture orders
└── .env.local                    # Your credentials (never commit this)
How the payment flow works
- The buyer clicks the PayPal button rendered by
@paypal/react-paypal-js. - The button calls your
createOrderServer Action, which uses@paypal/paypal-server-sdkto create an order with PayPal and returns the order ID. - The buyer approves the payment in the PayPal popup or redirect.
- The button calls your
captureOrderServer Action, which captures the approved order and finalizes the payment.
Build the checkout
Step 1: Install the SDKs
npm install @paypal/react-paypal-js @paypal/paypal-server-sdk@paypal/react-paypal-jsgives you a hooks-based React wrapper around the PayPal v6 SDK.@paypal/paypal-server-sdkprovides typed access to the PayPal REST APIs from your server.
Step 2: Set up environment variables
Create an environment file with your PayPal Client ID and Secret:
NEXT_PUBLIC_PAYPAL_ENVIRONMENT=sandbox
NEXT_PUBLIC_PAYPAL_CLIENT_ID=your_sandbox_client_id_here
PAYPAL_CLIENT_SECRET=your_sandbox_secret_here
.env.local is already in your .gitignore, so it won't be tracked or committed. When you deploy, add the production version of these variables to your hosting provider.
Tip
You don't need to restart Next.js after editing .env.local. This version
reloads the app with the new values automatically, and you'll see a
Reload env: .env.local line in your terminal.
Warning
PAYPAL_CLIENT_SECRET must never be prefixed with NEXT_PUBLIC_. That
prefix exposes the variable to the browser. The secret is only ever used
server-side.
Step 3: Configure Next.js for local development
Next.js blocks cross-origin requests to dev-only assets and endpoints during development by default, to prevent unauthorized access. To keep developing across both 127.0.0.1 and localhost, update next.config.ts:
import type { NextConfig } from "next";

const nextConfig: NextConfig = {
  allowedDevOrigins: ["127.0.0.1", "localhost"],
};

export default nextConfig;
Step 4: Set up the PayPal server SDK
Set up the server SDK as two small modules under lib/paypal/: a reusable Client that any controller can share, and an orders module that uses it. Both are imported only from Server Actions on the server, so they never run in the browser.
Start with the client. It reads your credentials and selects the environment once, then exports a single shared instance:
import { Client, Environment } from "@paypal/paypal-server-sdk";

// One configured client, shared by every controller (Orders, Payments, Vault).
export const paypalClient = new Client({
  clientCredentialsAuthCredentials: {
    oAuthClientId: process.env.NEXT_PUBLIC_PAYPAL_CLIENT_ID!,
    oAuthClientSecret: process.env.PAYPAL_CLIENT_SECRET!,
  },
  environment:
    process.env.NEXT_PUBLIC_PAYPAL_ENVIRONMENT === "production"
      ? Environment.Production
      : Environment.Sandbox,
});
The orders module imports that client and exposes the create and capture helpers:
import {
  OrdersController,
  CheckoutPaymentIntent,
} from "@paypal/paypal-server-sdk";
import { paypalClient } from "./client";

const ordersController = new OrdersController(paypalClient);

export async function createPayPalOrder(amount: string): Promise<string> {
  const { result } = await ordersController.createOrder({
    body: {
      intent: CheckoutPaymentIntent.Capture,
      purchaseUnits: [
        {
          amount: {
            currencyCode: "USD",
            value: amount,
          },
        },
      ],
    },
  });

  if (!result.id) {
    throw new Error("PayPal order creation failed: missing order ID");
  }

  return result.id;
}

export async function capturePayPalOrder(orderId: string): Promise<unknown> {
  const { result } = await ordersController.captureOrder({ id: orderId });
  return result;
}
Splitting the client out means any controller you add later (Payments, Vault, Subscriptions) reuses the same authenticated instance instead of spinning up its own. The orders module wraps two core actions:
- Create a PayPal order for a given USD amount.
- Capture (finalize) an approved PayPal order.
ordersController sends the create and capture requests to PayPal. Because this guide sells a single item, createPayPalOrder takes one amount value and adds it to the purchaseUnits array. It must return an order ID, which is what the front-end checkout uses to continue the flow. capturePayPalOrder finalizes the payment after buyer approval and returns the transaction details for your confirmation or storage.
The server SDK handles OAuth2 client credentials for you. There's no manual token fetching or caching, and it refreshes the access token internally when it expires.
Note
To handle multiple items, make createPayPalOrder more flexible by passing in
line items. That's outside the scope of this guide. See our other Getting
Started Guides for a multi-item cart example.
Step 5: Create the Server Actions
Instead of API routes, use Next.js Server Actions. A file with "use server" at the top exports functions that run on the server and can be called directly from client components. No HTTP boilerplate, and fully type-safe end-to-end.
"use server";

import { createPayPalOrder, capturePayPalOrder } from "@/lib/paypal/orders";

export async function createOrder(): Promise<{ id: string }> {
  // In a real app, read the amount from the cart or database
  const orderId = await createPayPalOrder("9.99");
  return { id: orderId };
}

export async function captureOrder(orderId: string): Promise<unknown> {
  return capturePayPalOrder(orderId);
}
This is the boundary between your checkout UI and the PayPal SDK code. createOrder hardcodes 9.99 for simplicity; in your app you'd read it from a database or cart.
Note
The "use server" directive marks every exported function as a Server Action.
Next.js handles the serialization and network call automatically when you
import and call these from a client component.
Step 6: Build the checkout component
This client component renders the PayPal button, creates an order through your Server Action, captures payment after approval, and shows a success state.
"use client";

import { useState } from "react";
import {
  PayPalProvider,
  PayPalOneTimePaymentButton,
  OnApproveDataOneTimePayments,
} from "@paypal/react-paypal-js/sdk-v6";
import { createOrder, captureOrder } from "@/app/actions";

// Wrap in PayPalProvider — this loads and initializes the SDK script
export default function PayPalCheckout() {
  const [orderComplete, setOrderComplete] = useState(false);

  // Show a confirmation message after a successful order
  if (orderComplete) {
    return (
      <div
        role="status"
        className="rounded-lg border border-green-500 bg-green-50 px-5 py-4 font-medium text-green-700"
      >
        ✓ Payment successful! Your order has been confirmed.
      </div>
    );
  }

  return (
    <PayPalProvider
      clientId={process.env.NEXT_PUBLIC_PAYPAL_CLIENT_ID!}
      environment={
        (process.env.NEXT_PUBLIC_PAYPAL_ENVIRONMENT as
          | "sandbox"
          | "production") ?? "sandbox"
      }
      components={["paypal-payments"]}
      pageType="checkout"
    >
      <PayPalOneTimePaymentButton
        createOrder={async () => {
          const { id } = await createOrder();
          return { orderId: id };
        }}
        onApprove={async ({ orderId }: OnApproveDataOneTimePayments) => {
          await captureOrder(orderId);
          setOrderComplete(true);
        }}
        presentationMode="auto"
      />
    </PayPalProvider>
  );
}
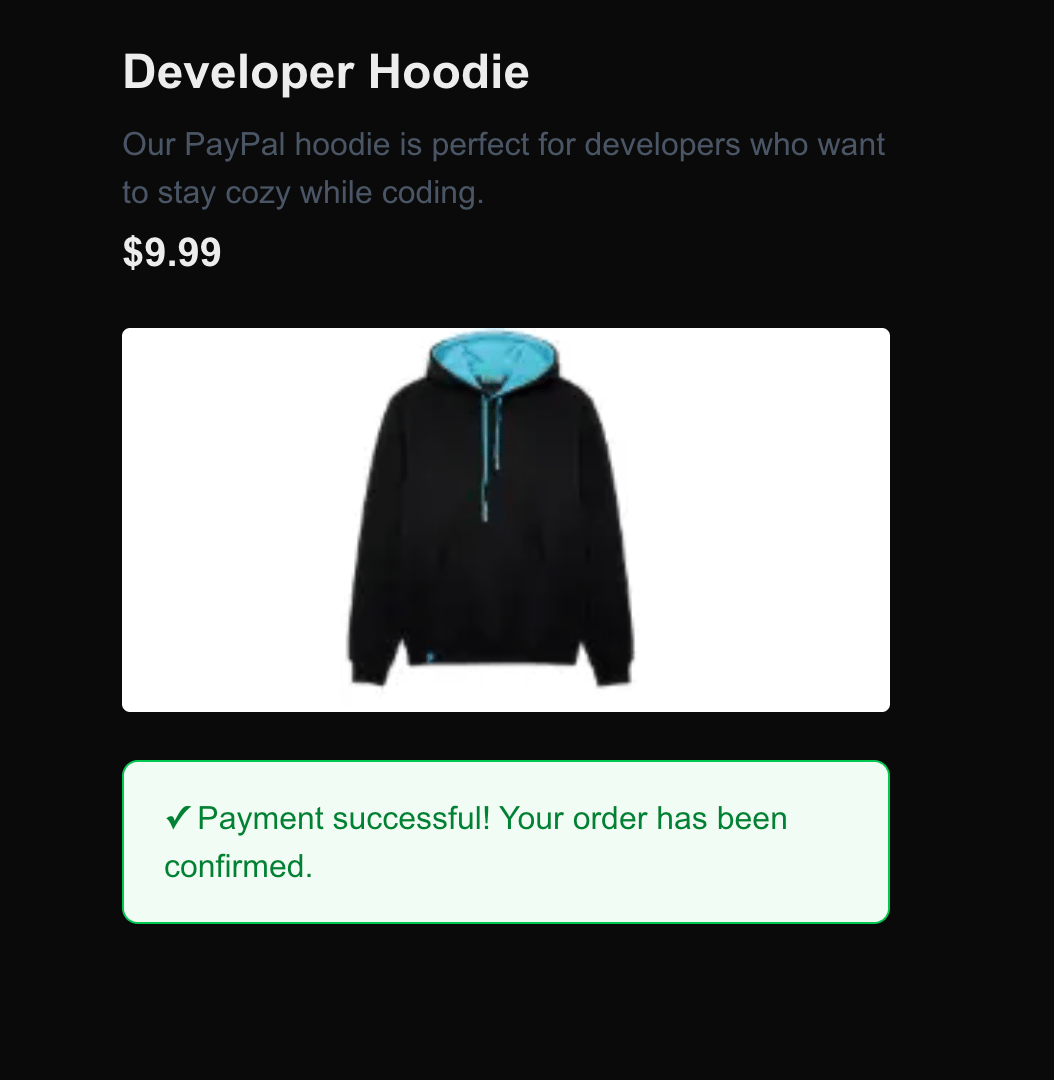
The "use client" directive makes this a client component, so it can use React state and the browser-based PayPal SDK. While the payment hasn't completed, the PayPal button shows. Once it succeeds, the button is replaced with a success card.
Important
The environment prop on PayPalProvider controls which PayPal script URL
loads (Sandbox vs production). Set it explicitly. If omitted, it defaults to
Sandbox, which rejects production credentials.
Tip
Place PayPalProvider as high in the component tree as possible. If you have
multiple checkout buttons on one page, wrap them in a single
PayPalProvider. Initializing more than one provider on the same page loads
the SDK multiple times.
Step 7: Add the component to your page
The PayPalCheckout component can drop into any Server Component page, because the "use client" boundary lives inside the component. Your page stays a Server Component.
import PayPalCheckout from "@/components/PayPalCheckout";

export default function ProductPage() {
  return (
    <main className="mx-auto max-w-md p-8">
      <h1 className="mb-2 text-2xl font-bold">Developer Hoodie</h1>
      <p className="mb-1 text-gray-600">
        The only hoodie with a PayPal logo on the back.
      </p>
      <p className="mb-6 text-xl font-semibold">$9.99</p>

      {/* Add your product image here */}
      <div className="mb-6 h-48 w-full rounded bg-gray-100" />

      <PayPalCheckout />
    </main>
  );
}
The page stays focused on product and layout, while the payment logic stays encapsulated in the child component.
Step 8: Run the project
npm run devStep 9: Open the app
In your browser, go to http://localhost:3000 to see your changes.
Step 10: Make a test payment
Click the PayPal button and complete a payment with your Sandbox buyer account, found in the PayPal Developer Dashboard under Sandbox → Accounts. To pay by card instead, use one of the test card numbers listed under Sandbox → Cards in the Developer Dashboard. Any future expiry date and a 4-digit security code are accepted in Sandbox.
Tip
Use the Sandbox buyer email and password from the Developer Dashboard to complete a test transaction. Never enter real card details in Sandbox mode.
Step 11: Verify in the Sandbox dashboard
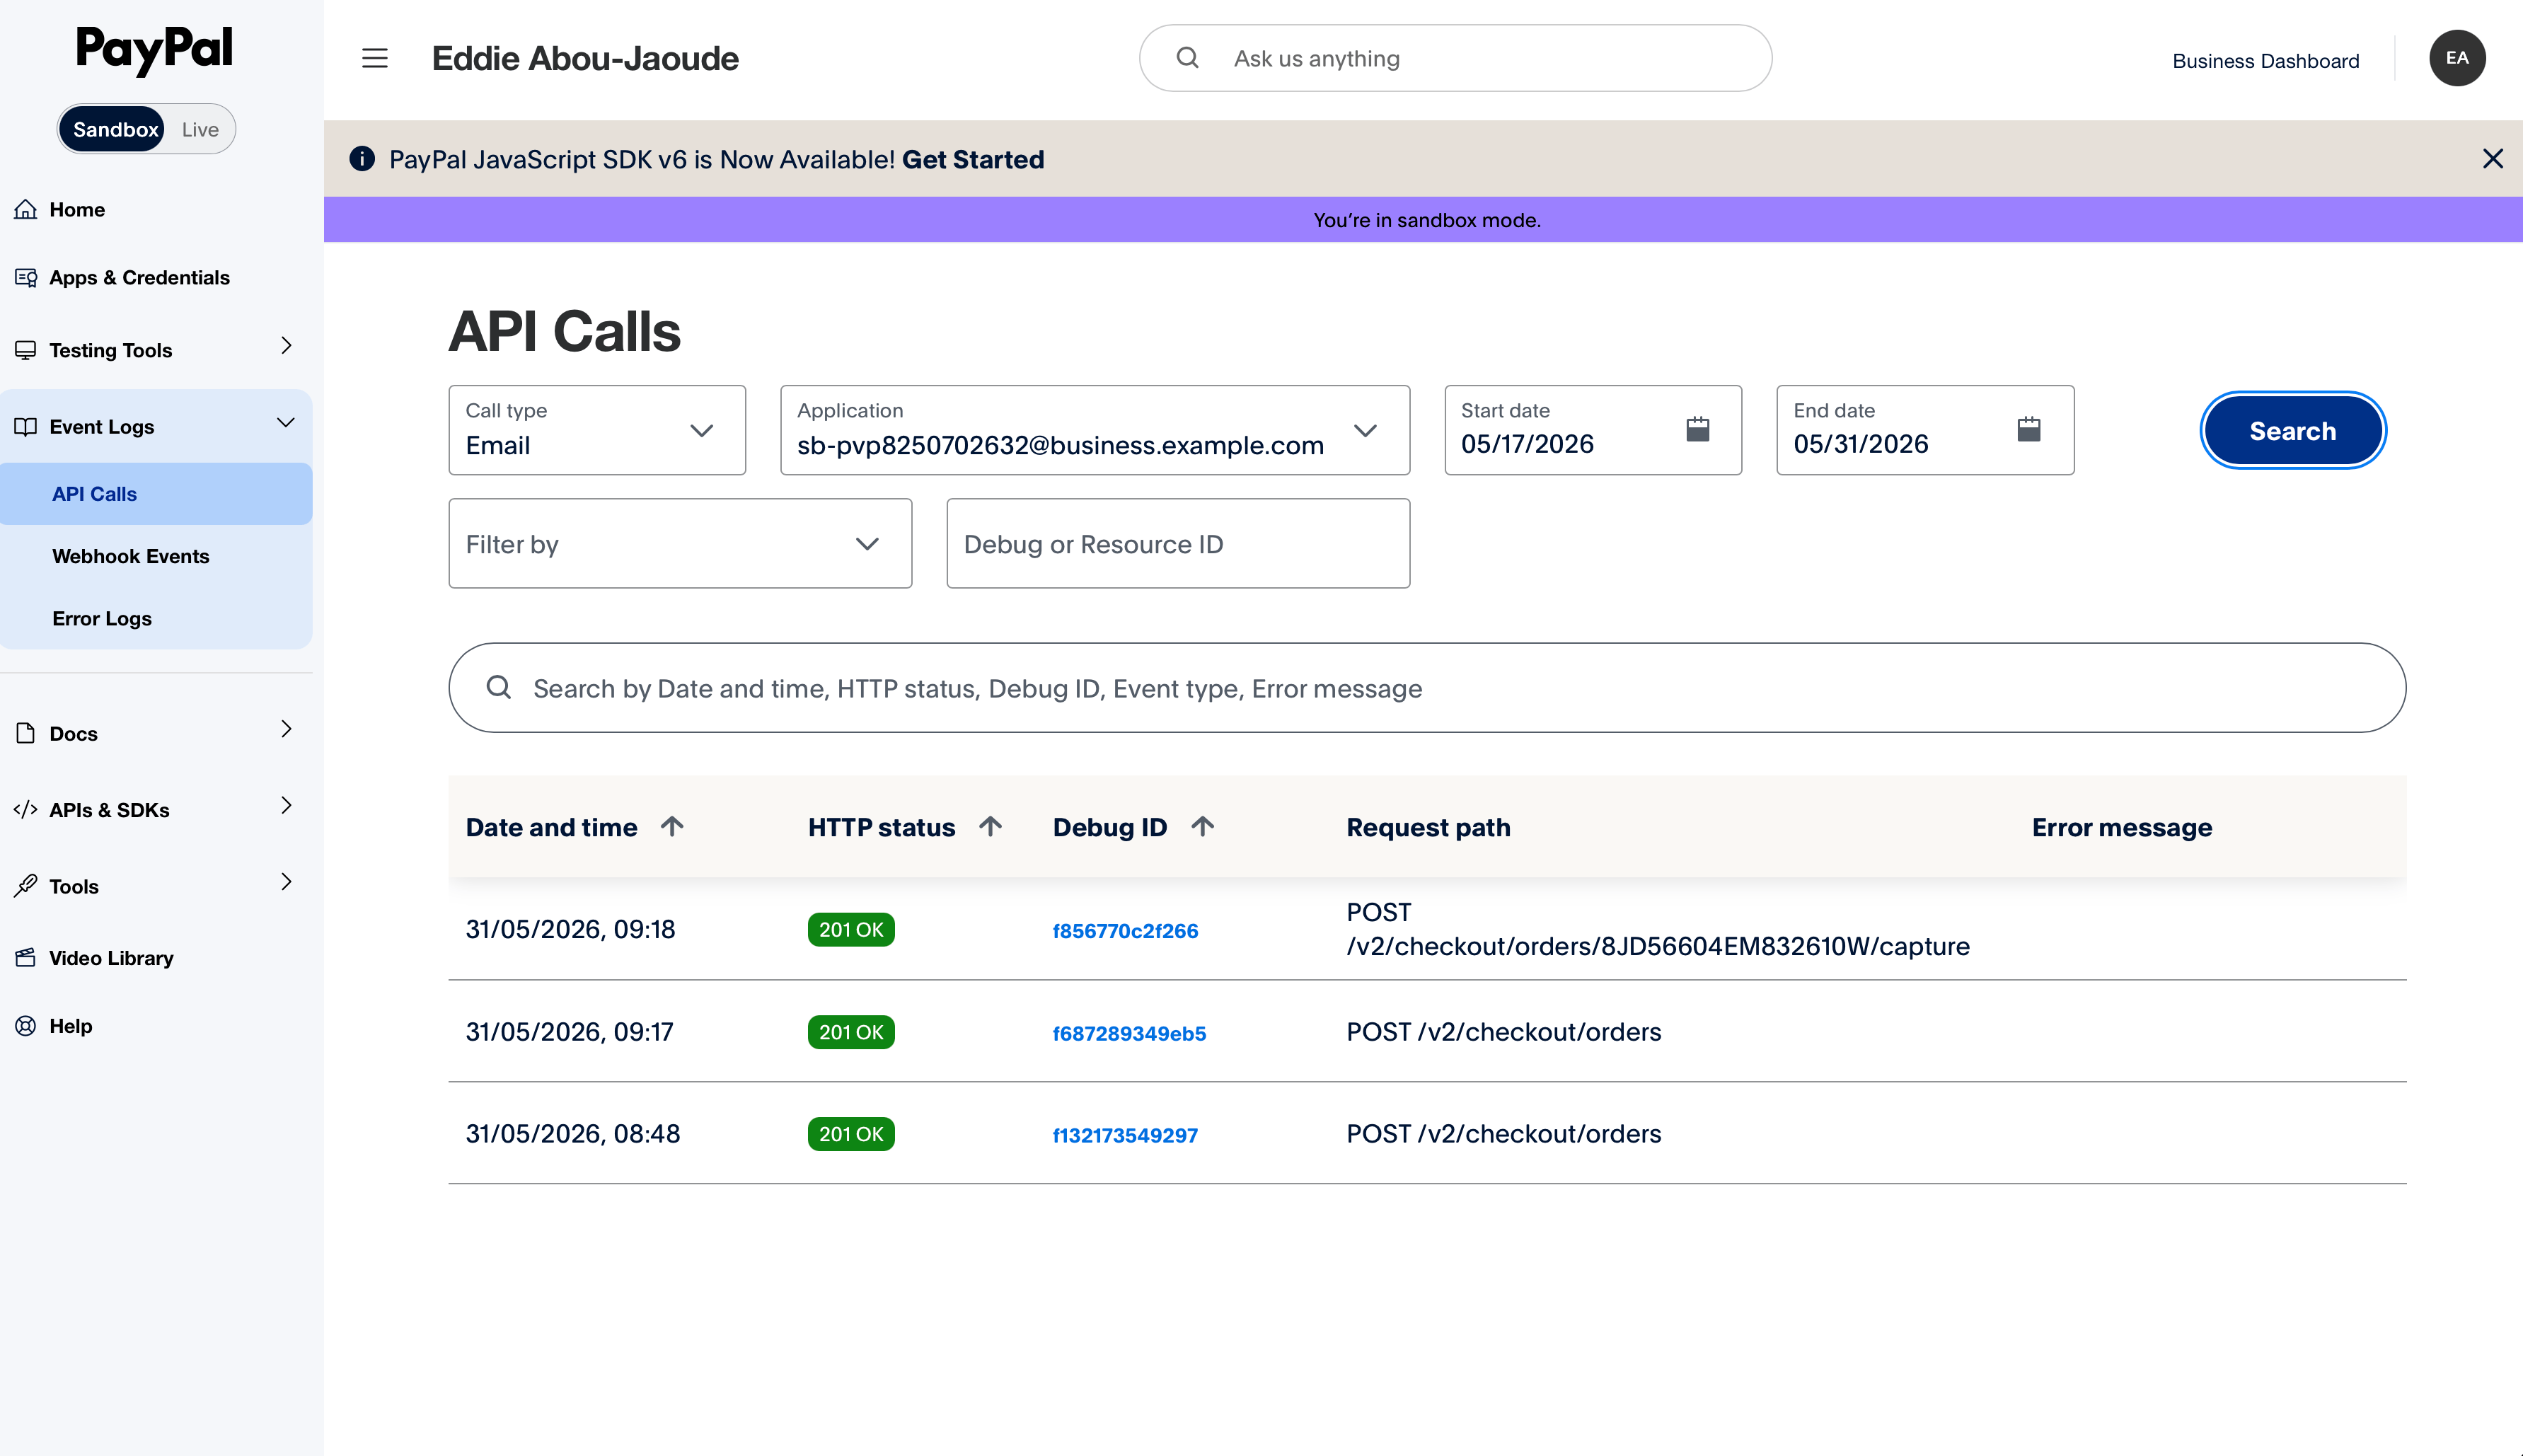
After a test payment, open your PayPal Sandbox dashboard and go to Event logs → API calls to see the order you just made:
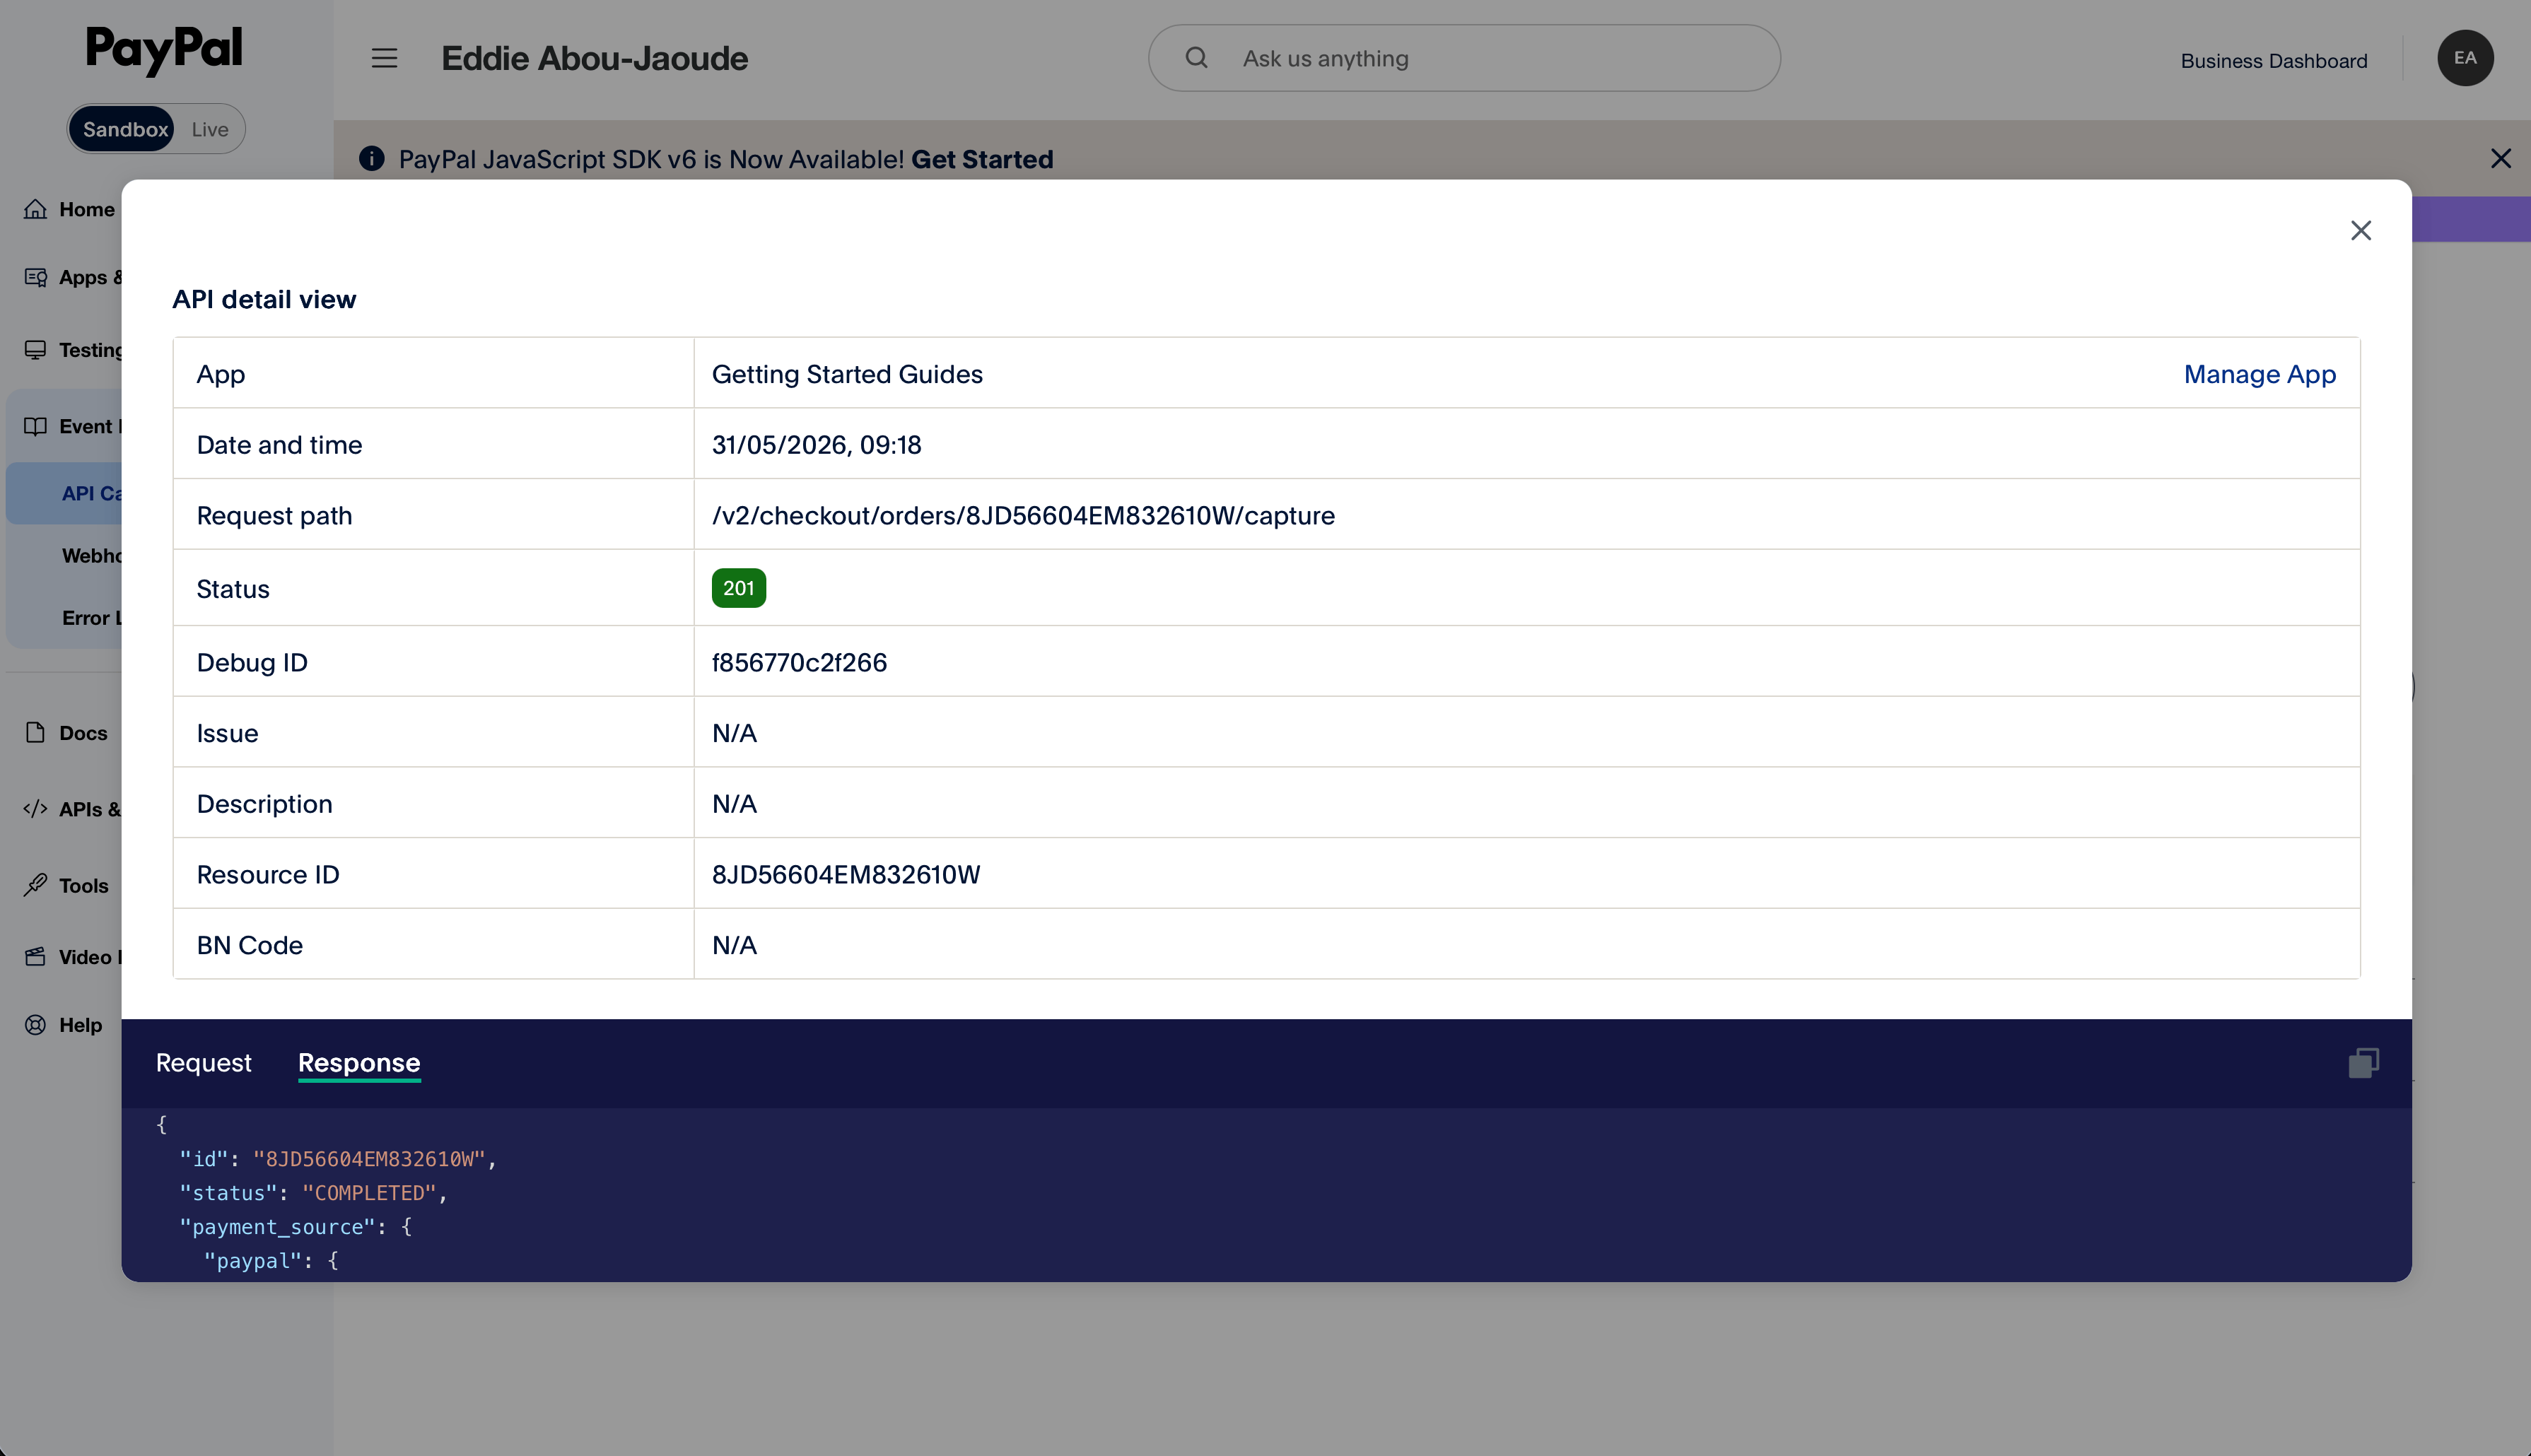
Click any item to see the full details of that API call:
Troubleshooting
Still stuck?
Ask in the PayPal Developer Community, or open an issue on the companion GitHub repo.
Full project
The complete project is in the companion GitHub repo, or launch it instantly with the Open in GitHub Codespaces button at the top of this page.
Frequently asked questions
Does this work with the Next.js Pages Router?
This guide targets the App Router, the current standard in Next.js 16. On the Pages Router you can't use Server Actions, so you'd replace app/actions.ts with a traditional API route under pages/api/.
Can I use JavaScript instead of TypeScript?
Yes. Rename the files to .js and .jsx and remove the type annotations. Everything works the same way. The type safety is recommended, not required.
Where do I find my Sandbox buyer credentials?
Log in to the PayPal Developer Dashboard, go to Sandbox → Accounts, and you'll see a default personal (buyer) account with a generated email and password. Use those to complete a test transaction.
What's the difference between Sandbox and production mode?
Sandbox uses fake accounts and test money. Production processes real payments. You switch by changing NEXT_PUBLIC_PAYPAL_ENVIRONMENT in .env.local and swapping in your live credentials.
Why use @paypal/paypal-server-sdk instead of calling the REST API directly?
The server SDK handles OAuth2 token management, request serialization, and error handling for you. Calling REST directly means writing and maintaining that plumbing yourself, which is error-prone and unnecessary when the SDK exists.
Can I change the hardcoded $9.99 amount?
Yes. In app/actions.ts, update createOrder to accept an amount and pass it through from your cart, database, or product page. Never accept the amount from the browser. Always look it up or validate it server-side.
What happens if the buyer closes the PayPal popup without paying?
Nothing. The onApprove callback only fires after the buyer approves the payment. If they cancel or close the popup, the order stays created but uncaptured, and no money moves.
Is it safe to put NEXT_PUBLIC_PAYPAL_CLIENT_ID in the browser?
Yes. The Client ID is a public identifier and is safe to expose on the front end. The PayPal JS SDK needs it to initialize. The PAYPAL_CLIENT_SECRET is different and must never leave the server.
How do I add Venmo, Pay Later, or card fields?
Those are additional components layered on top of this one-time-payment button. Start from the JavaScript SDK reference to see which components to load for each method.