
Set Up Your Client
The SSL certificates for Braintree Mobile (iOS and Android) SDKs are set to expire on March 30, 2026. This will impact existing versions of the SDK in published versions of your app. To reduce the impact, upgrade the
If you do not decommission your app versions that include the older SDK versions or force upgrade your app with the updated certificates by the expiration date,100% of your customer traffic will fail.
You can collect customer payment information via the client SDK in a number of ways:
- Add the Drop-in UI with a few lines of code to get a full-featured checkout with credit card and PayPal payments.
- Accept more payment types with your existing checkout form by adding buttons for PayPal, Apple Pay, Google Pay, and Venmo.
- Rolling your own checkout UI? Use credit card tokenization to save customer card information.
iOS SDK setup
Drop-in requires a minimum deployment target of iOS 12+ and Xcode 12+.
For additional requirements and installation options, see the iOS Client SDK Guide.
Swift Package Manager
To add the BraintreeDropIn package to your Xcode project, selectFile > Swift Packages > Add Package Dependency and enterhttps://github.com/braintree/braintree-ios-drop-in as the repository URL. Tick the checkbox for BraintreeDropIn.
If you look at your app target, you will see that the BraintreeDropIn library is automatically linked as a framework to your app (seeGeneral > Frameworks, Libraries, and Embedded Content).
Using CocoaPods
Add BraintreeDropIn to your Podfile:
- Ruby
pod 'BraintreeDropIn'Then run pod install.
Using Carthage
Braintree 6.0.0+ requires Carthage 0.38.0+ and the --use-xcframeworks option when running carthage update. Add github "braintree/braintree_ios" to yourCartfile, and add the frameworks to your project.
Get a client token
Client tokens are optional: You can initialize Braintree with atokenization key instead of a client token. If you are using a tokenization key, you may skip this section and a href="#try-it-now">use the tokenization key for your authorization instead.
Your server is responsible for generating a client token, which contains the authorization and configuration details that your client needs to initialize the client SDK.
Your app should request a client token from your server. This example uses our sample integration server; please adapt it to use your own backend API.
- Swift
func fetchClientToken() { // TODO: Switch this URL to your own authenticated API let clientTokenURL = URL(string: "https://braintree-sample-merchant.herokuapp.com/client_token")! let clientTokenRequest = URLRequest(url: clientTokenURL) clientTokenRequest.setValue("text/plain", forHTTPHeaderField: "Accept") URLSession.shared.dataTask(with: clientTokenRequest) { data, response, error in // TODO: Handle errors let clientToken = String(data: data!, encoding: .utf8) // As an example, you may wish to present Drop-in at this point. // Continue to the next section to learn more... }.resume() }You should obtain a new client token frequently, at least once a day or as often as your app restarts. For the best experience, you should kick off this network operation before it would block a user interaction.
Try it now
We generated a demo tokenization key for you so you can jump right in. This is for testing purposes only! When you're ready to build your own integration, use your own tokenization key or generate your ownclient token.
- Swift
let authorization = "sandbox_f252zhq7_hh4cpc39zq4rgjcg"The above demo client token is for temporary use. You must change this client token in order to process payments with your Braintree sandbox or production account.
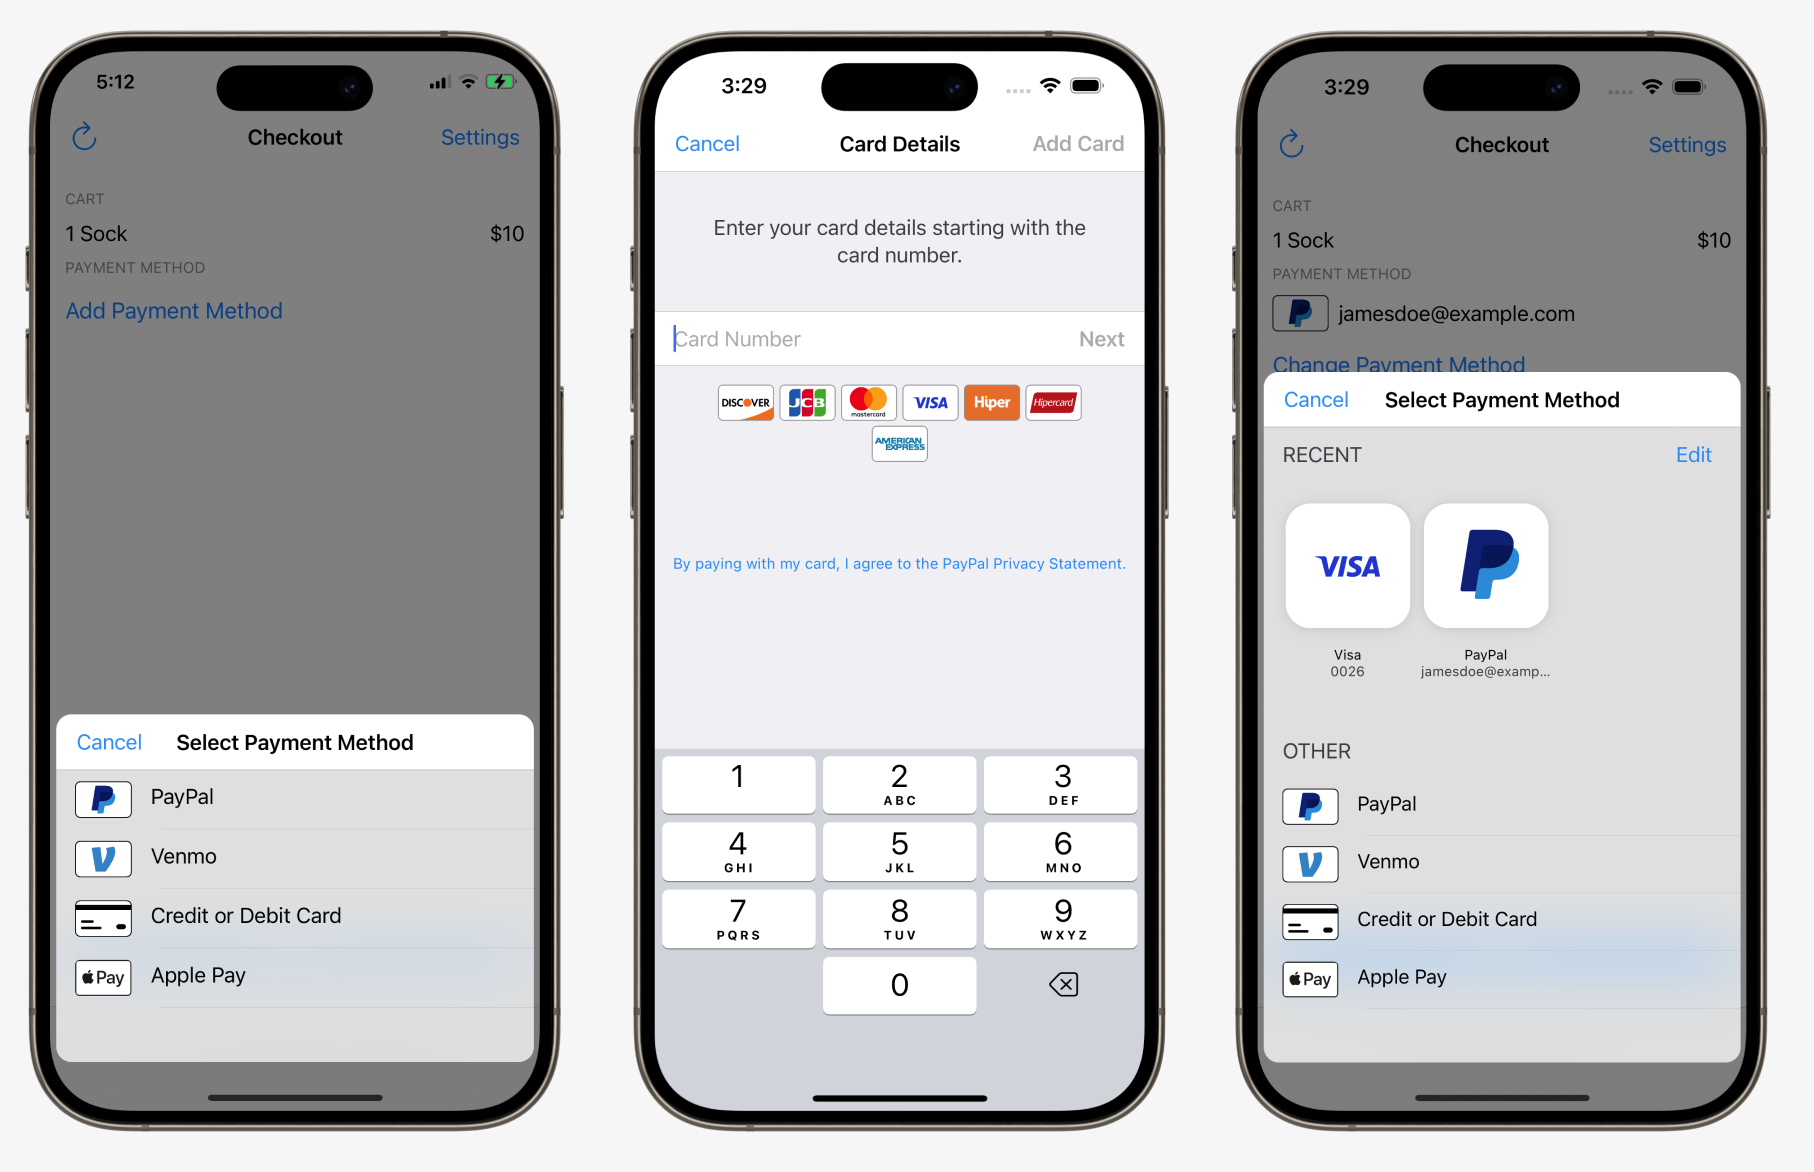
Present Drop-in UI
Starting July 14, 2025 the Drop-in SDK will move to a deprecated status and we will no longer make any updates to this SDK. Processing will be supported for 1 year after the deprecation date, but you should upgrade immediately to avoid any disruption.
Starting July 14, 2026 the Drop-in SDK will move to an unsupported status and will no longer supported by Braintree developers or Braintree Support. Processing for unsupported SDKs can be suspended at any time.
Please migrate to the Braintree SDK to continue processing and receiving updates.
At this point, you are ready to collect payment information from your customer.
Drop-in is the easiest way to get started. It provides a fully fledged payments experience out of the box. You can also choose to create a custom UI and then tokenize the payment information directly.
Add the following import statement to any class using Braintree.
- Swift
func showDropIn(clientTokenOrTokenizationKey: String) { let request = BTDropInRequest() let dropIn = BTDropInController(authorization: clientTokenOrTokenizationKey, request: request) { (controller, result, error) in if (error != nil) { print("ERROR") } else if (result?.isCanceled == true) { print("CANCELED") } else if let result = result { // Use the BTDropInResult properties to update your UI // result.paymentMethodType // result.paymentMethod // result.paymentIcon // result.paymentDescription } controller.dismiss(animated: true, completion: nil) } self.present(dropIn!, animated: true, completion: nil) }Test your integration
Create a sandbox account
If you haven't already, sign up for a free Braintree sandbox account:
Sign Up for a Braintree Sandbox Account
Log in toobtain your sandbox API credentials. You'll need your:
- Sandbox merchant ID
- Public key
- Private key
Use these credentials for your development and testing.
Test values
When testing in the sandbox, be sure to use our test card numbers (e.g.4111111111111111) and nonces (e.g. fake-valid-nonce). Real payment method data will not work in the sandbox. See ourTesting page for more details.
Send payment method nonce to server
Send the resulting payment method nonce to your server (again, adapt this example to your ownsetup):
- Swift
func postNonceToServer(paymentMethodNonce: String) { // Update URL with your server let paymentURL = URL(string: "https://your-server.example.com/payment-methods")! var request = URLRequest(url: paymentURL) request.httpBody = "payment_method_nonce=\(paymentMethodNonce)".data(using: .utf8) request.httpMethod = "POST" URLSession.shared.dataTask(with: request) { (data, response, error) -> Void in // TODO: Handle success or failure }.resume() }world.greeted = true
At this point, you should have a working client-side checkout flow. When your user provides payment information, you receive a payment method nonce and send it to your server.
Next, your server closes the loop by using the payment method nonce to create a transaction.