PayPal + AG Grid workshop, part 1: sandbox setup and PayPal data retrieval

Nov 05, 2026
34 min read
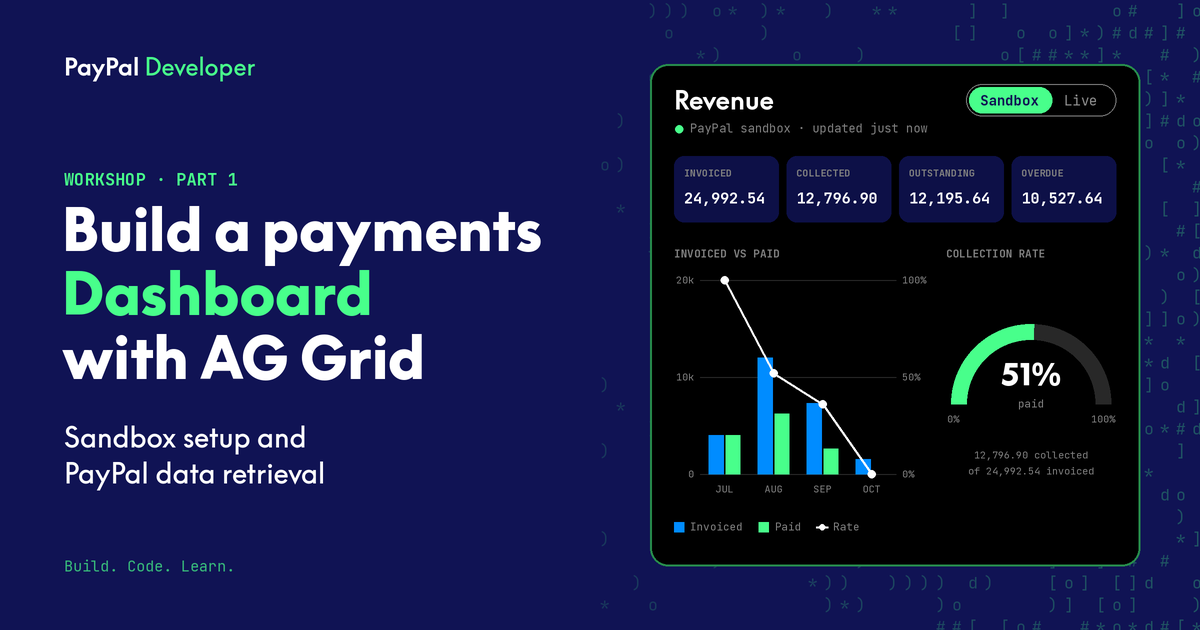
As part of PayPal's AI Hackathon which is taking place until November 12 2026, I had the opportunity to host a live workshop with the Developer Advocates at AG Grid. We built a small Next.js app that reads transactions, subscription billing plans and balances from a PayPal sandbox account with the official PayPal TypeScript Server SDK (or you can use the PayPal API directly), then renders an AG Studio Dashboard.
Visualising and aggregating data helps developers and the people using their products understand what is happening within their app, such as trends and spikes.
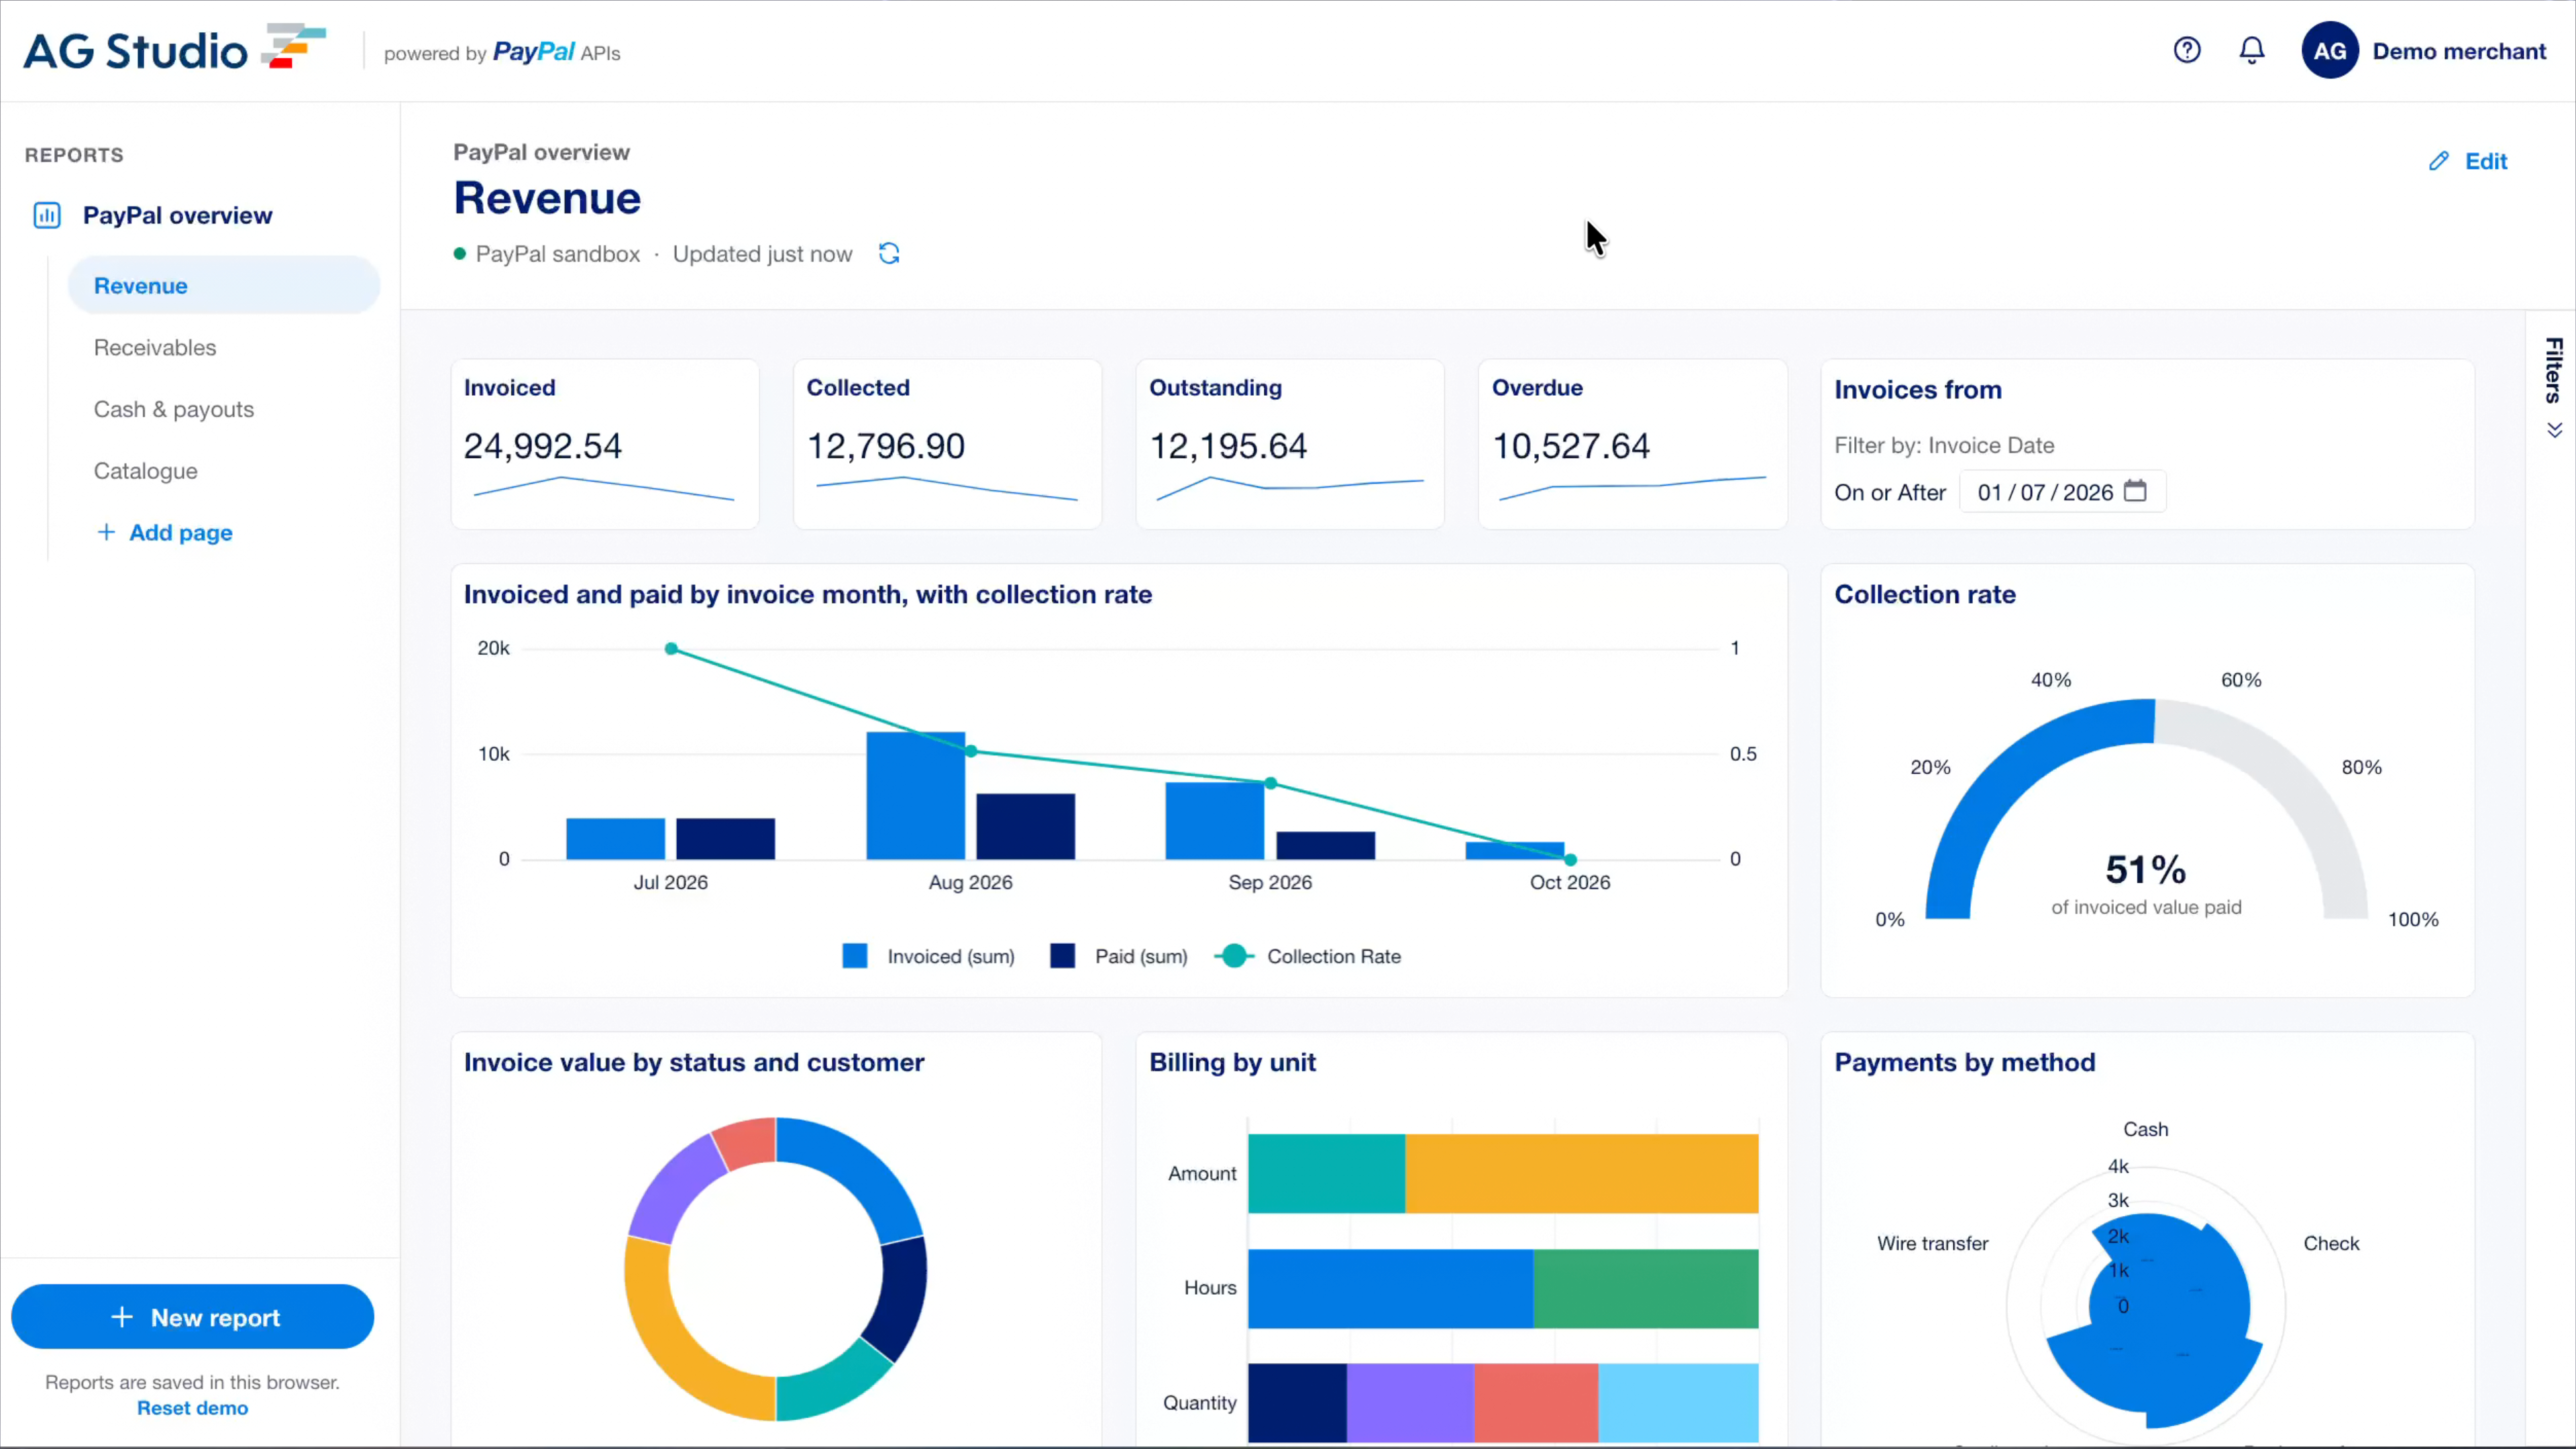
Given the interesting questions and discussions that came out of this workshop, we thought it would be useful for developers to write about this topic. Part 1 of the blog gets your PayPal data into the app. Part 2 uses AG Studio from AG Grid to turn that data into an interactive analytics dashboard. No dashboard setup is needed for this part.
In this blog I will cover the complete first data path of getting data from PayPal into our Next.js app:
- Create the Next.js project.
- Set up the PayPal sandbox.
- Create a sandbox app and get its credentials.
- Seed the sandbox with dummy data.
- Install the PayPal Server SDK and retrieve transactions, balances and billing plans.
Prerequisites
- Node.js 24 LTS. Use it for both Next.js and the optional seed scripts, which run TypeScript directly. Check with
node --version. - npm, which comes with Node.js.
- A PayPal account to log in to the PayPal Developer Dashboard. If you don't have one, you can sign up for free from the dashboard login page.
Step 1: Create the Next.js project
Run create-next-app and give the project a name (paypal-ag-grid here; use whatever you like):
npx create-next-app@latest paypal-ag-gridThe first prompt asks whether to use the recommended defaults. Choose Yes, use recommended defaults. That gives us everything this project uses:
- TypeScript, which pairs well with the typed PayPal SDK.
- The App Router, so pages can be async server components that call PayPal on the server, where the credentials are safe.
- Tailwind CSS for the preview styling.
- **The
@/*import alias**, so later we can writeimport ... from "@/lib/paypal". - **
AGENTS.md**, which points AI coding agents at the Next.js docs bundled innode_modules. It's useful because Next.js 16 changes some APIs that agents may not know about yet.
create-next-app installs the dependencies and makes an initial git commit. Start the dev server to check everything works:
cd paypal-ag-grid
npm run dev
Open http://localhost:3000 and you should see the Next.js starter page. Stop the server with Ctrl+C; we'll come back to the code once we have credentials.
Step 2: Log in to the PayPal Developer Dashboard
Go to developer.paypal.com and select Log in to Dashboard. Log in with your PayPal account, or sign up if you don't have one.
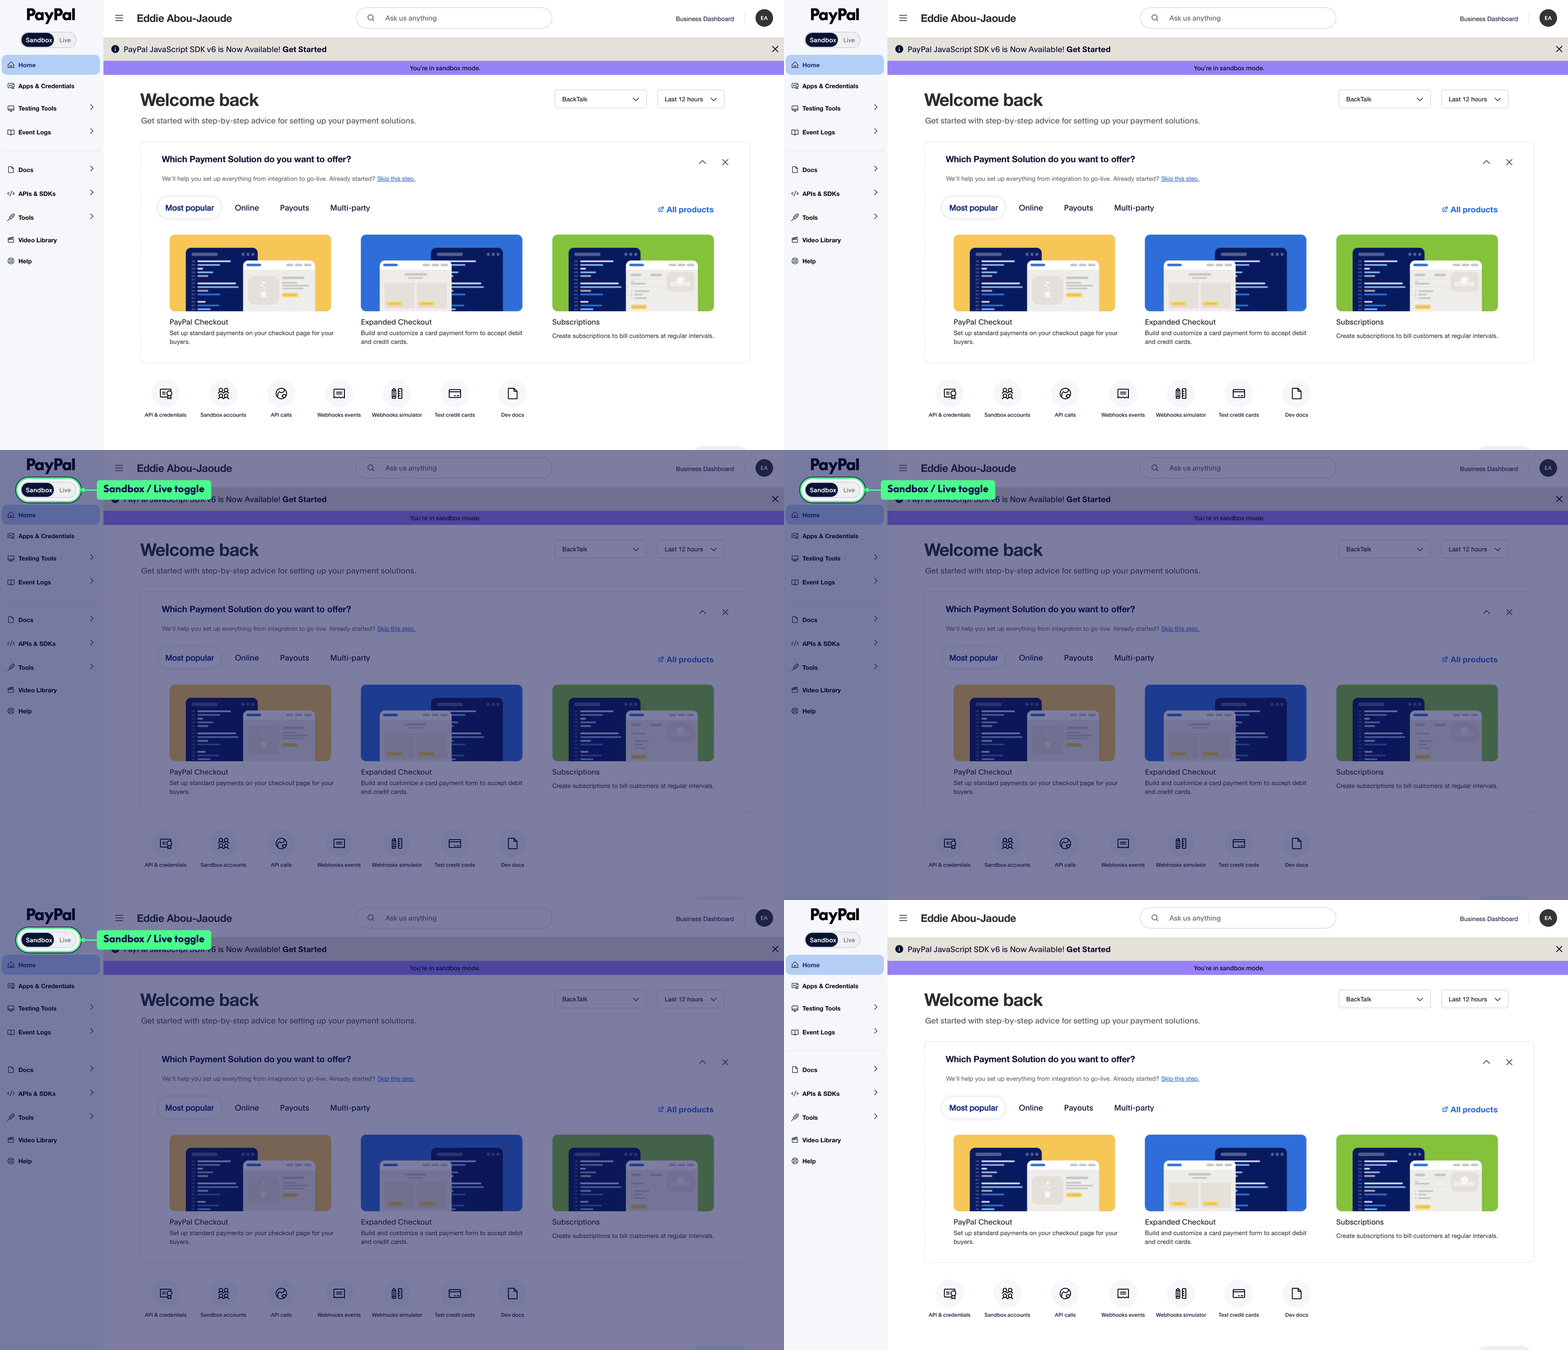
The dashboard has two environments, Sandbox and Live, and a toggle at the top to switch between them. Everything in this project uses Sandbox: fake money, fake accounts, and no risk of touching your real PayPal balance.
The Sandbox is where you build, test, break and fix, all before moving to production.
Step 3: Look at your Sandbox accounts
When you sign up as a PayPal developer, the Sandbox automatically creates two test accounts:
| Account type | Email format | Plays the role of |
|---|---|---|
| Business | sb-xxxxxxxx@business.example.com |
The merchant (seller) |
| Personal | sb-xxxxxxxx@personal.example.com |
The customer (buyer) |
To see them, go to Testing Tools > Sandbox Accounts.

The Business account matters most for this project. The app we create in the next step acts on behalf of that Business account, so every transaction, plan and balance the app shows belongs to it.
To see an account's details, select the ⋮ menu next to it, then View/Edit Account. This shows the generated email and password, which you can use to log in at sandbox.paypal.com and look around the account as that merchant or buyer.

Step 4: Create a Sandbox app
PayPal API credentials belong to an app, not to an account. New developer accounts come with a Default Application, which cannot be deleted. I do find that it is cleaner to create a specific Sandbox for each project, so that data between projects is kept isolated.
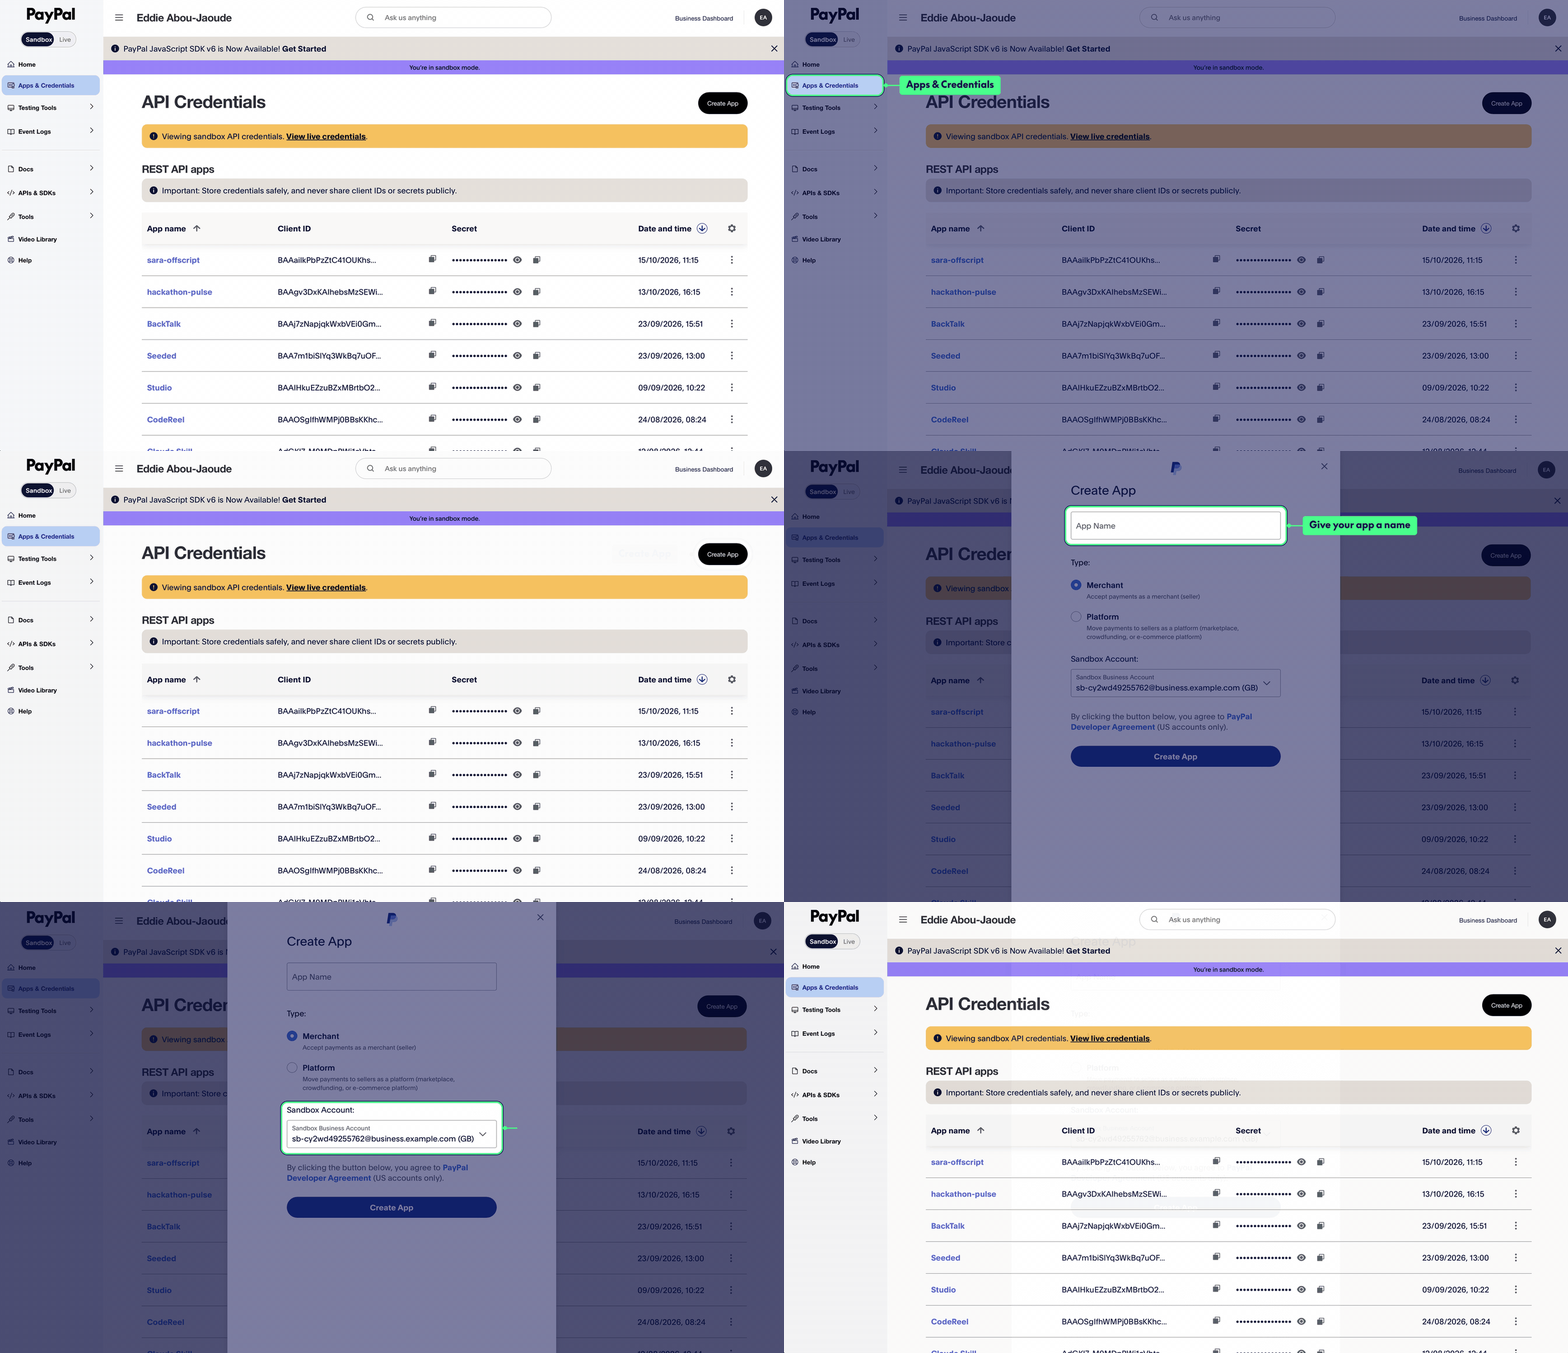
- Select Apps & Credentials and make sure the toggle is set to Sandbox.
- Select Create App.
- Fill in the form:
- App Name: something recognisable, for example
paypal-ag-grid. - Type: Merchant. We're reading our own business account's data, not acting for other sellers. (Platform is for marketplaces that onboard other merchants.)
- Sandbox Account: the default business account from step 3.
- App Name: something recognisable, for example
- Select Create App.
Step 5: Copy the client ID and secret
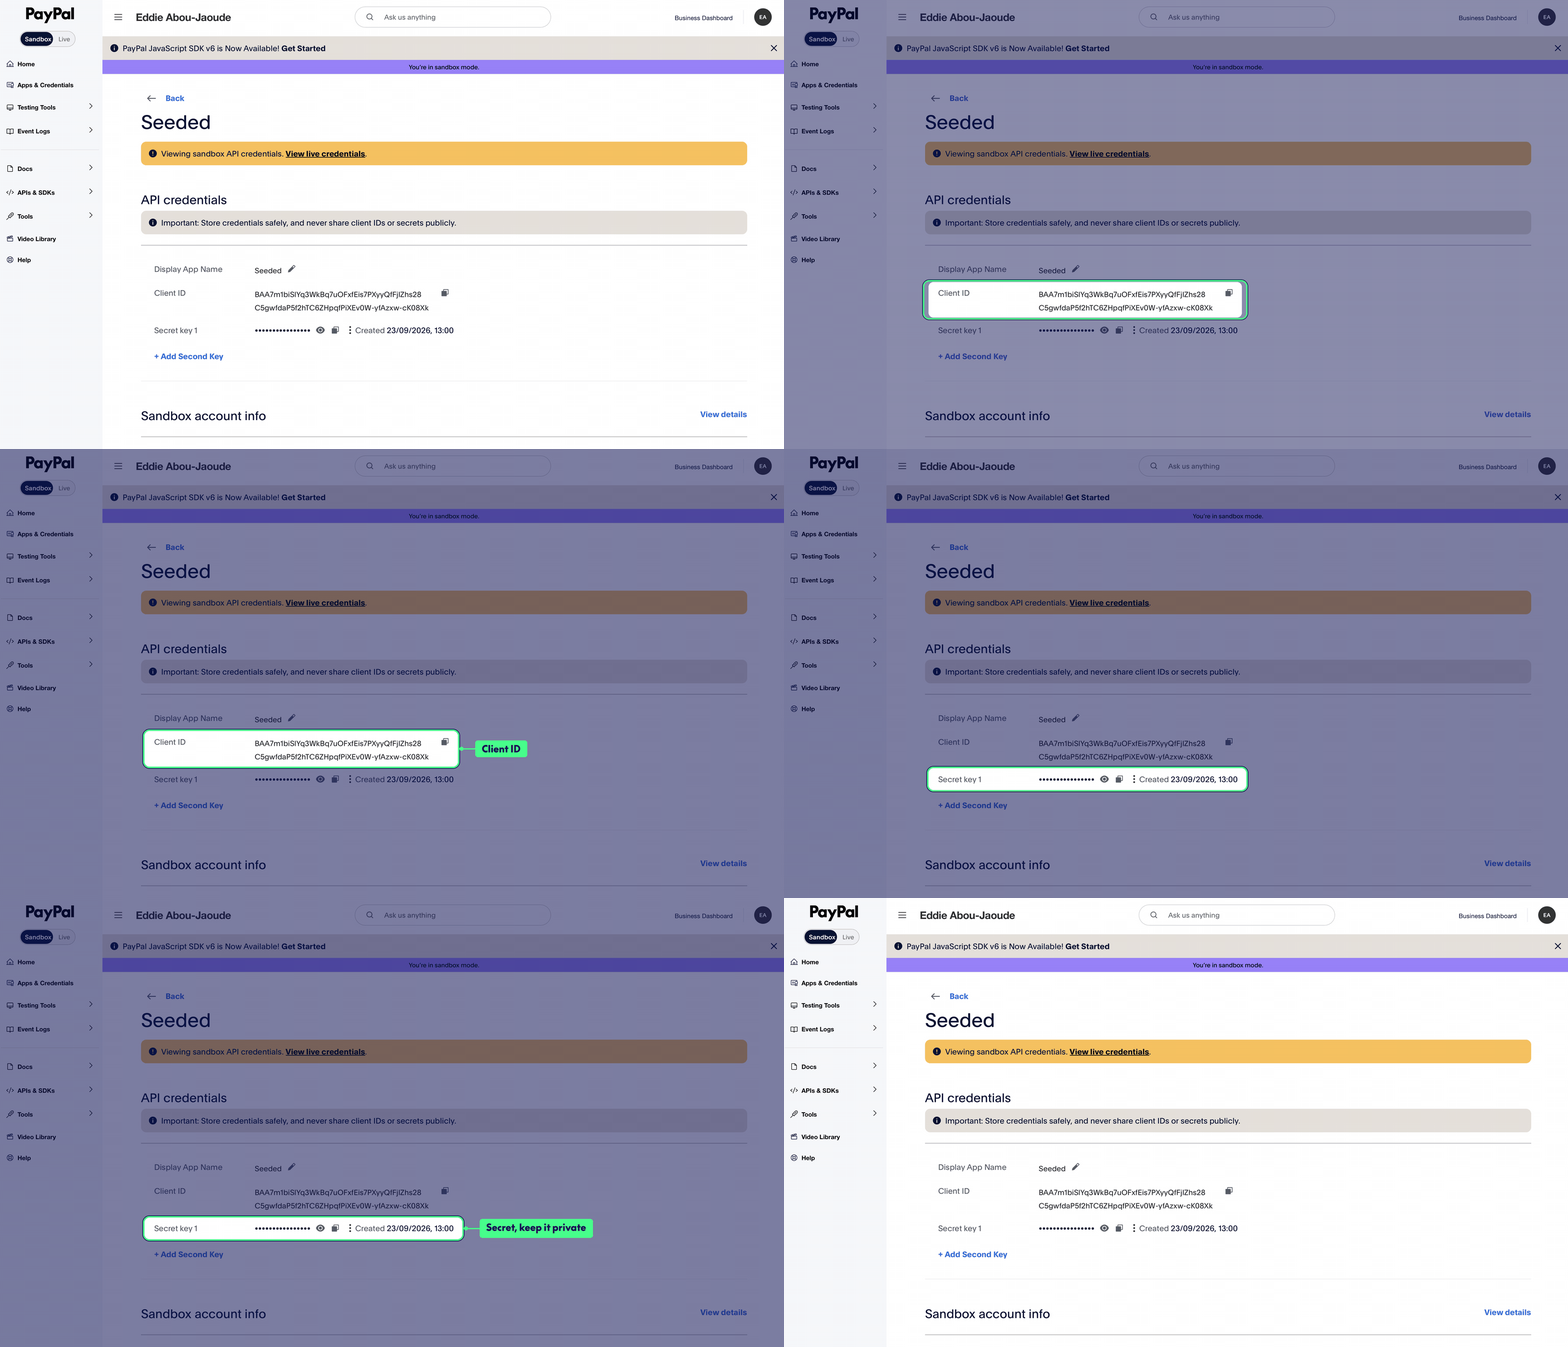
After the app is created, its page shows two credentials at the top:
- Client ID: identifies the app. It isn't secret on its own.
- Secret: proves the caller owns the app. Treat it like a password. Never commit it, never send it to the browser, and never paste it into screenshots.
Select Show next to the secret and copy both values somewhere temporary; we'll store them properly in step 7.
Step 6: Enable the app features
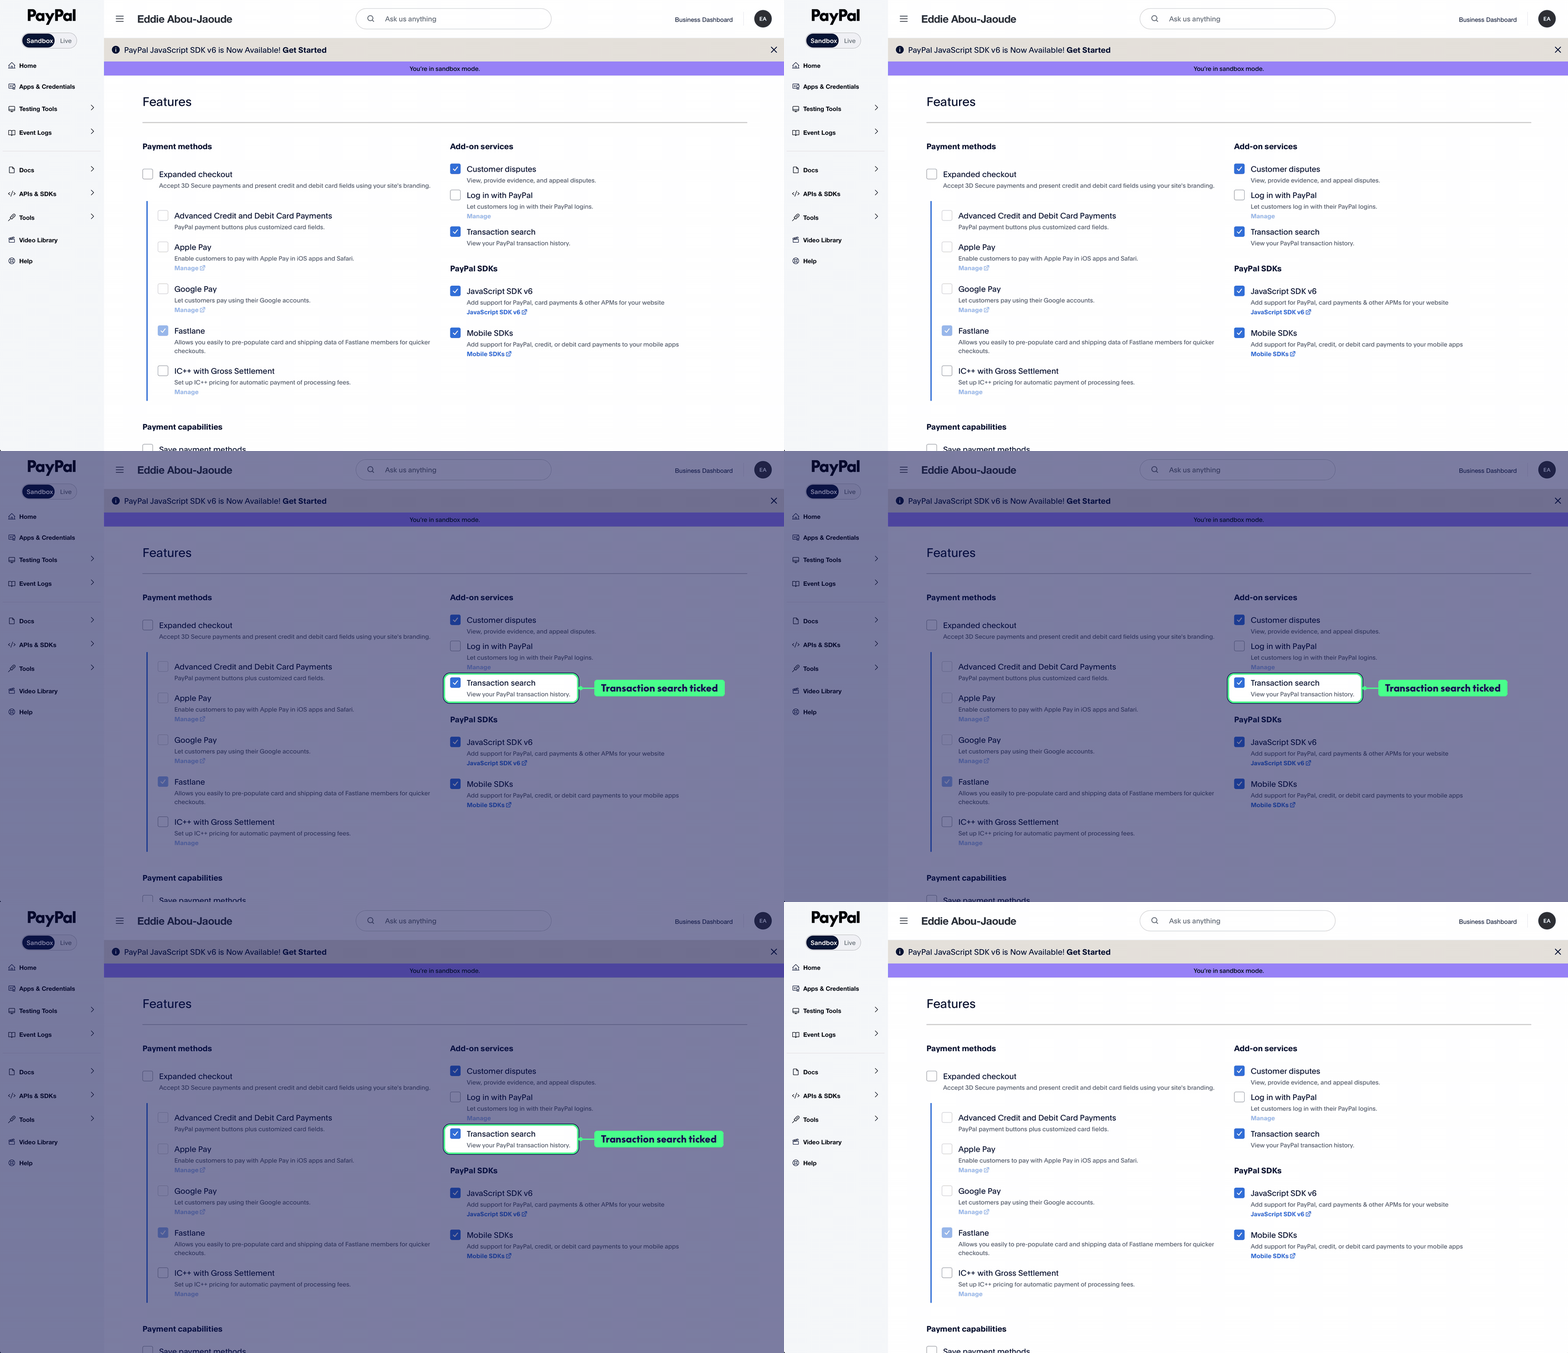
The app will read the account's transaction history with PayPal's Transaction Search API, and that's a feature you have to switch on for the app.
- On the app's page, scroll down to the sandbox app settings / Features section.
- Tick Transaction search.
- Select Save.
If you plan to use the optional sample data, enable Payouts here too, before making any API calls. The catalog seed uses the Subscriptions API, which also covers Catalog Products; you don't need to find a separate "Catalog Products" checkbox. Only enable Invoicing if you want to run the optional invoice seed.
Enable the features you need before requesting the first access token. Previously issued tokens can retain the old permissions until they expire (up to 9 hours), and requesting another token immediately may return the same cached token. If you change features later and see a permission error, check the app settings and allow the old token to expire.
Step 7: Store the credentials in the project
Back in the project, we keep the credentials in environment variables, so they never end up in the code.
Create two files in the project root.
env.example is committed to git. It documents which variables the project needs, with no values:
PAYPAL_CLIENT_ID=
PAYPAL_SECRET=
.env.local holds the real values and is not committed:
PAYPAL_CLIENT_ID=<your sandbox client ID>
PAYPAL_SECRET=<your sandbox secret>
Neither variable starts with NEXT_PUBLIC_, so Next.js only exposes them to server code, never to the browser bundle. That's exactly what we want for the secret.
Step 8: Retrieve data with the PayPal Server SDK
The official @paypal/paypal-server-sdk handles OAuth, request serialization and typed responses. Version 2.5.0 includes controllers for Transaction Search and Subscriptions, which cover the three datasets used here.
Install that version so the example and generated SDK types stay aligned:
npm install @paypal/paypal-server-sdk@2.5.0Create lib/paypal.ts. This module stays on the server because it reads the app secret. The server-only import makes Next.js fail the build if a Client Component accidentally imports it.
import "server-only";
import {
  Client,
  Environment,
  SubscriptionsController,
  TransactionSearchController,
} from "@paypal/paypal-server-sdk";

const clientId = process.env.PAYPAL_CLIENT_ID;
const clientSecret = process.env.PAYPAL_SECRET;

if (!clientId || !clientSecret) {
  throw new Error("PAYPAL_CLIENT_ID and PAYPAL_SECRET must be set");
}

const client = new Client({
  environment: Environment.Sandbox,
  clientCredentialsAuthCredentials: {
    oAuthClientId: clientId,
    oAuthClientSecret: clientSecret,
  },
});

const transactionSearch = new TransactionSearchController(client);
const subscriptions = new SubscriptionsController(client);

export async function getRecentTransactions() {
  const end = new Date();
  const start = new Date(end);
  start.setUTCDate(start.getUTCDate() - 30);

  const response = await transactionSearch.searchTransactions({
    startDate: start.toISOString(),
    endDate: end.toISOString(),
    fields: "all",
    pageSize: 20,
    page: 1,
  });

  return response.result.transactionDetails ?? [];
}

export async function getBalances() {
  const response = await transactionSearch.searchBalances({});
  return response.result.balances ?? [];
}

export async function getBillingPlans() {
  const response = await subscriptions.listBillingPlans({
    prefer: "return=representation",
    pageSize: 20,
    page: 1,
    totalRequired: true,
  });

  return response.result.plans ?? [];
}
Each SDK call returns an ApiResponse<T>. The parsed, camel-cased PayPal response is in response.result; the functions above return only the arrays the UI needs. For this preview, the code will fetch the first page of up to 20 transactions from the last 30 days and up to 20 billing plans, not the account's complete history. However, this can be changed later and even made more flexible by passing in specific values from the parent function.
Now replace app/page.tsx with an async Server Component that loads the independent datasets in parallel:
import { connection } from "next/server";
import { Suspense } from "react";
import {
  getBalances,
  getBillingPlans,
  getRecentTransactions,
} from "@/lib/paypal";

export default function Page() {
  return (
    <main className="mx-auto max-w-5xl p-8">
      <h1 className="mb-6 text-2xl font-semibold">PayPal sandbox data</h1>
      <Suspense fallback={<p role="status">Loading PayPal sandbox data...</p>}>
        <PayPalPreview />
      </Suspense>
    </main>
  );
}

async function PayPalPreview() {
  await connection();

  const [transactions, balances, plans] = await Promise.all([
    getRecentTransactions(),
    getBalances(),
    getBillingPlans(),
  ]);

  const exampleData = {
    transaction: transactions[0] ?? null,
    balances,
    billingPlan: plans[0] ?? null,
  };

  return (
    <pre className="overflow-auto rounded-lg bg-gray-950 p-4 text-sm text-gray-100">
      {JSON.stringify(exampleData, null, 2)}
    </pre>
  );
}
connection() defers the SDK calls until an incoming request instead of running them during prerendering. The component runs only on the server: the browser receives rendered output, never the client ID or secret. Promise.all starts the three independent data requests together.
Start the app and open http://localhost:3000:
npm run devCheck the result
You should see PayPal sandbox data followed by JSON containing transaction, balances and billingPlan.
- The preview shows only the first transaction and billing plan, plus the returned balances.
transaction: nullorbillingPlan: nullmeans the request succeeded but returned no matching records. That's normal for a new Sandbox account; you can add sample data below.- Refresh the page to fetch again. This is a request-time preview, not an automatically updating feed.
- Transactions and balances can each take up to three hours to appear, including after seeding. A successful request does not guarantee that reporting data is up to date.
If you see an error instead of JSON, check the terminal running npm run dev. invalid_client means you should check the Sandbox client ID and secret in .env.local. This may be a permission error, so revisit step 6 and check that the credentials belong to the app whose features you enabled. One rejected request causes Promise.all to reject, causing the page not to display the other datasets until the error is resolved.
Optional: seed the Sandbox with sample data
You can skip this section if you already have data or are happy to start with an empty preview. Otherwise, use these seed scripts to create sample records in your sandbox.
To use these seed scripts, from your project root download the complete scripts folder with the command:
npx --yes degit@3.10.0 "paypaldev/hackathon-paypal-ag-grid-boilerplate/scripts#d7f892268cd43dde85554ac872cafca8d6f22b84" scriptsThis uses degit to copy a pinned workshop revision without cloning the repository or changing your app's dependencies. It includes scripts/package.json, which the scripts need to resolve their imports.
Then create the data used in this part:
node --env-file=.env.local scripts/seed-paypal.ts catalog payoutsNode loads PAYPAL_CLIENT_ID and PAYPAL_SECRET from your existing .env.local. No credentials need to be pasted into the command, and there's no package.json edit or additional dependency installation for the seed scripts. They authenticate directly with PayPal's sandbox API, separately from the app's SDK client.
The catalog group creates products and billing plans. The payouts group creates sandbox money movement for Transaction Search and balances; it needs Payouts enabled in step 6. To create just products and plans, omit payouts. Optional sample invoices use the separate invoices group and require invoicing access; the preview above does not display invoices.
After a successful run, the terminal prints Seed complete. Refresh your app to see the plans. Transaction and balance reporting can take up to three hours to reflect the payouts.
Reruns: matching products, plans and invoices are skipped. Payouts use fixed batch IDs, which PayPal rejects as duplicates for 30 days. Running the payout seed after that window can create additional Sandbox payouts. These scripts use Sandbox money only.
Optional: call the PayPal REST API directly
The SDK handles OAuth for you. If you need an API outside SDK 2.5.0's controller set, such as Catalog Products or Invoicing, you can call REST directly instead.
The authentication difference is that you exchange the client ID and secret for an access token yourself. From the project root, run this in Bash or zsh (not PowerShell):
set -a && . ./.env.local && set +a

curl --fail-with-body --silent --show-error \
  "https://api-m.sandbox.paypal.com/v1/oauth2/token" \
  -u "$PAYPAL_CLIENT_ID:$PAYPAL_SECRET" \
  -H "Content-Type: application/x-www-form-urlencoded" \
  -d "grant_type=client_credentials"
-u sends the client ID and secret using HTTP Basic authentication. PayPal returns an access token and its lifetime in seconds, for example:
{
  "access_token": "A21AA...",
  "token_type": "Bearer",
  "expires_in": 32400
}
Use that token, not the client secret, in subsequent API requests:
Authorization: Bearer <access_token>Keep the token private, just like the secret: don't commit it or include it in screenshots. In the app, obtain and reuse it on the server until it expires, then request another. REST responses use PayPal's original snake_case field names; SDK models expose camel-cased properties. See PayPal's OAuth guide for details.
Where we are
We now have:
- a Next.js 16 project with TypeScript, Tailwind CSS and the App Router
- a PayPal Sandbox Business account and app with Transaction Search enabled
- credentials stored server-side in
.env.local - optional sample products, billing plans and payouts
- a server-only PayPal SDK client that retrieves transactions, balances and billing plans
- a Server Component that displays a JSON preview of Sandbox data
Everything so far stays on the server, so your credentials never reach the browser. In Part 2, on AG Grid's blog, we put AG Studio on top of this data. You can define dashboard pages in JSON, or let your users build their own reports by drag-and-dropping the widgets.
Continue to Part 2: build the dashboard with AG Studio
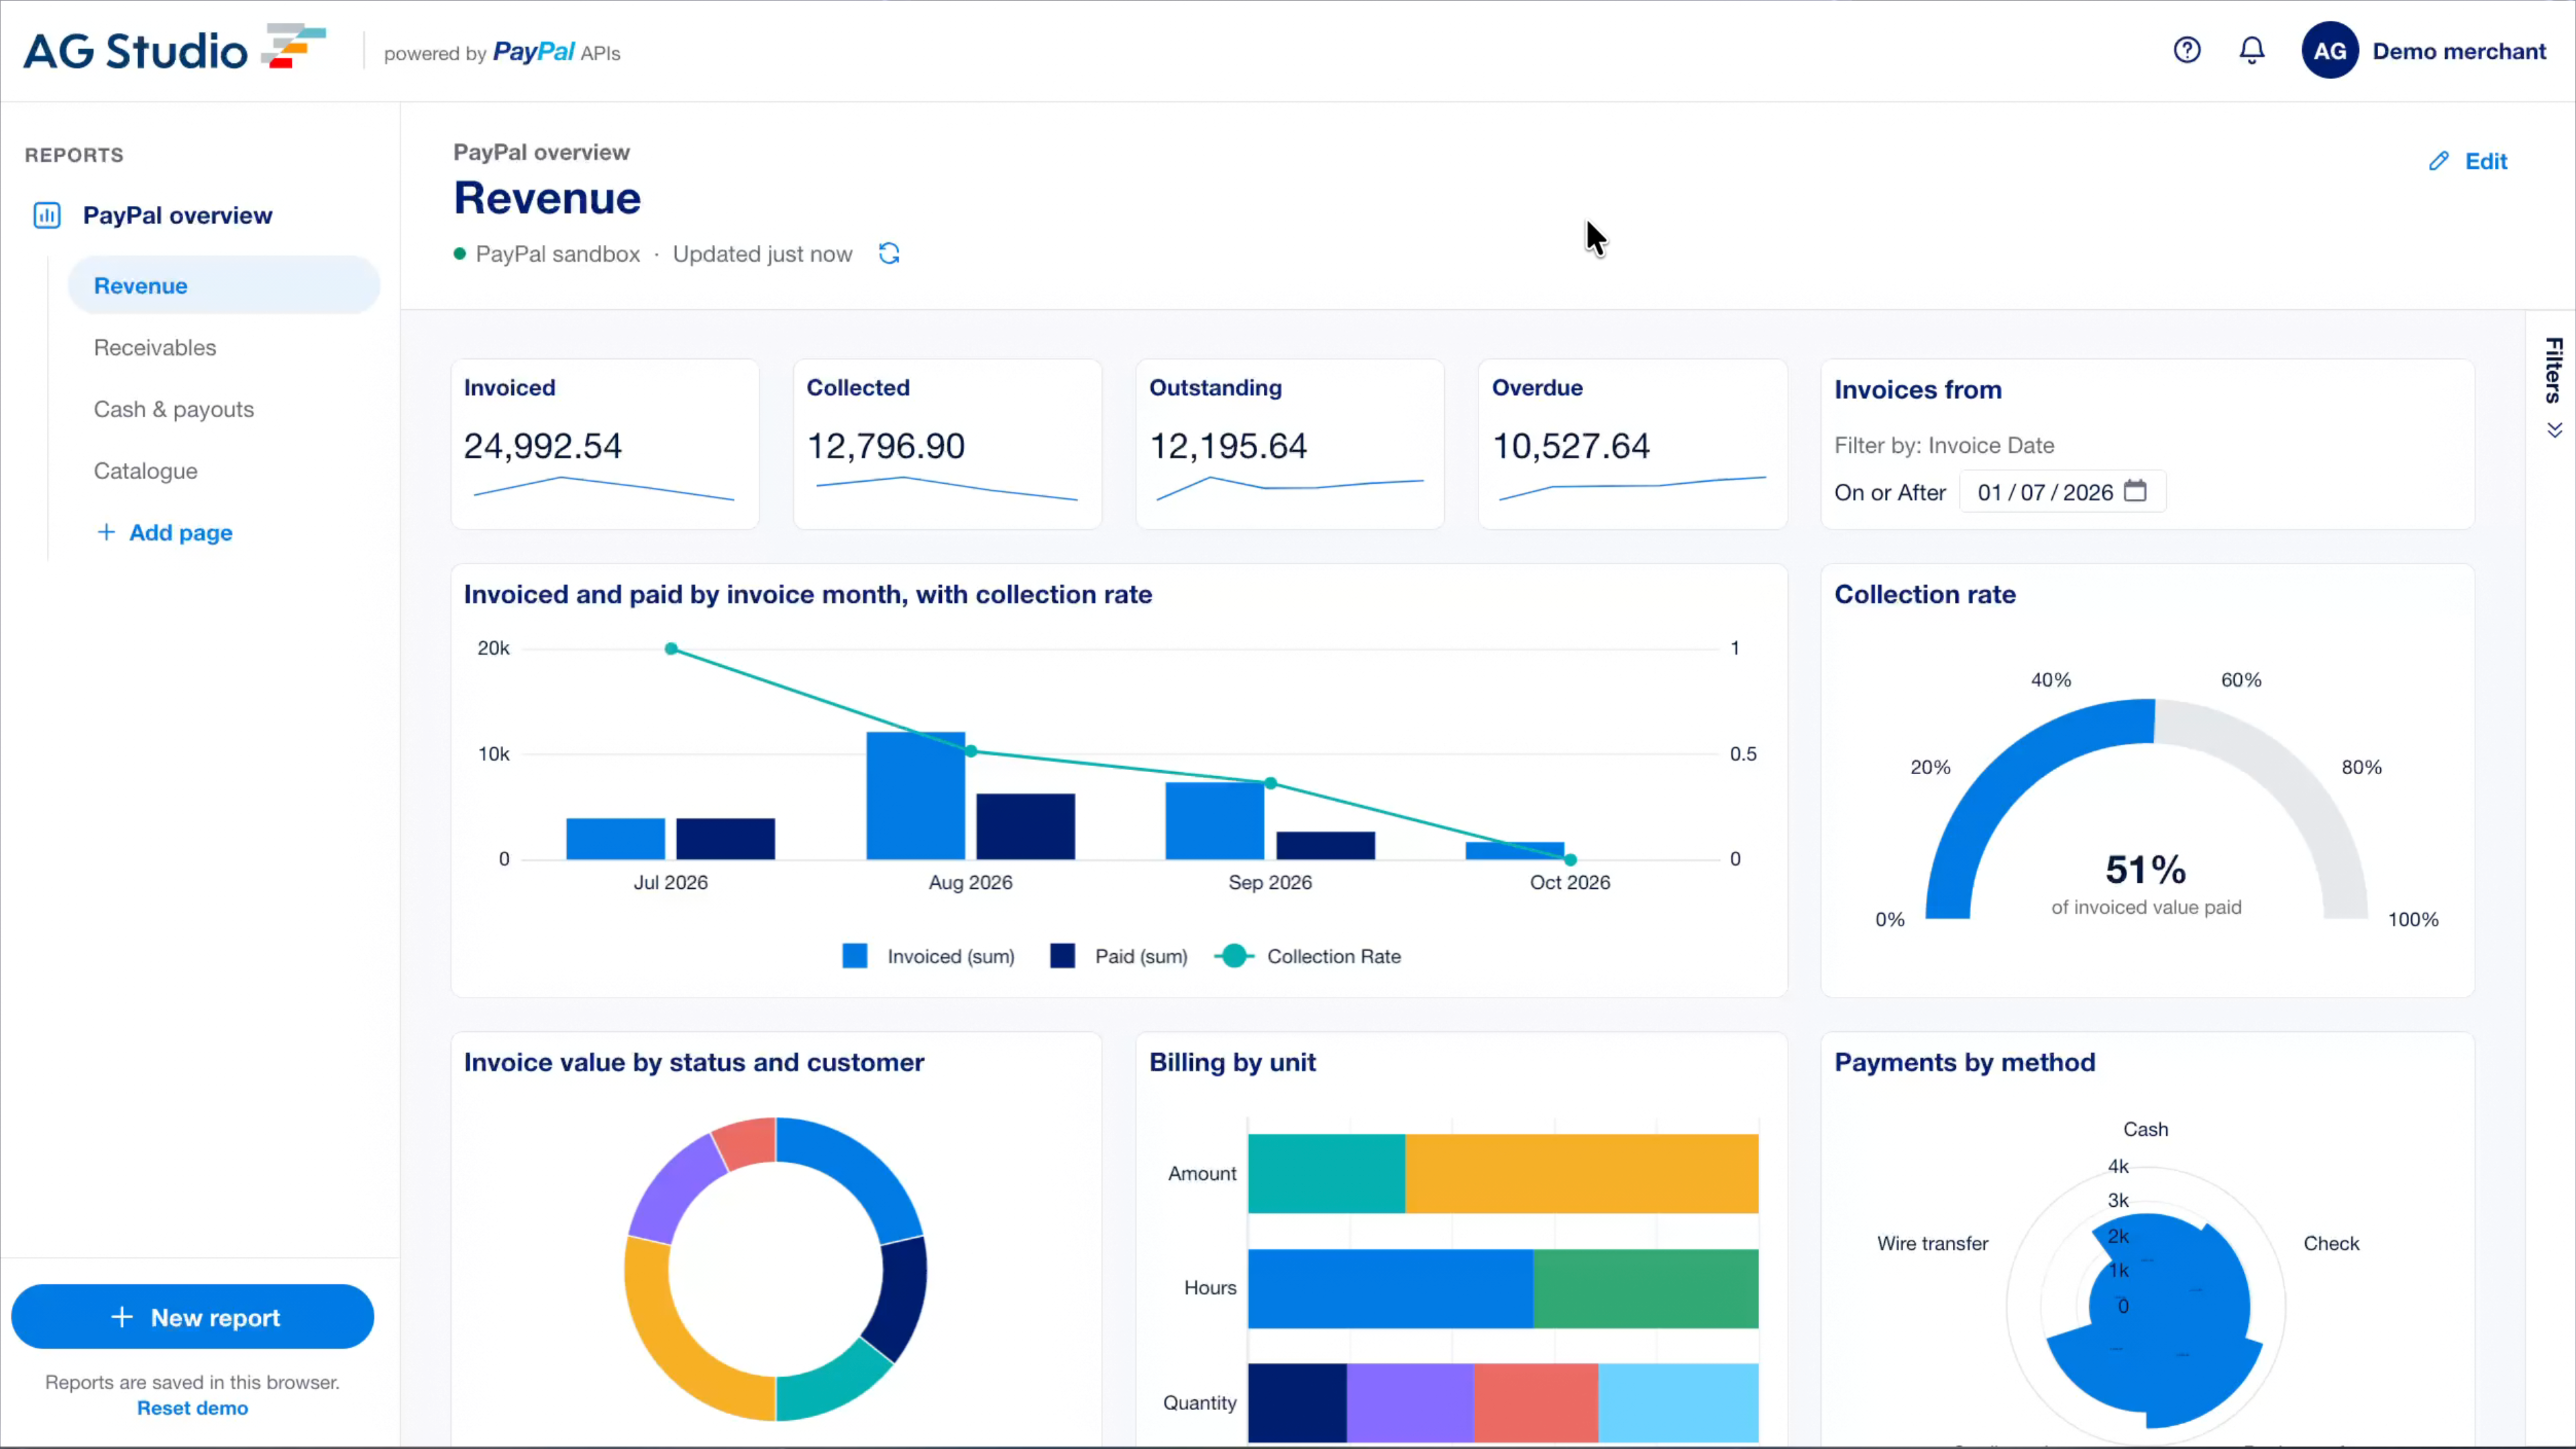
Read Part 2 to see how you can add AG Studio to your app, to visualise the PayPal data from your Sandbox on a dashboard which will look like this:
Why use AG Studio for a payments dashboard
You could build this dashboard by hand. Pick a data grid and charting library, configure each component by hand, wire up filters, and do it all over again every time one of the users asks for a new visualisation or feature. Finance wants revenue by plan, support wants failed payouts, and the product team wants to see this week against last week. Payments data invites those kinds of requests.
AG Studio is built for that situation. Here is what it gives you:
- Dashboards are configuration, not code. You define pages in JSON, so a new view is a config change rather than a new component and a deployment.
- Your users can build their own. Once the PayPal data is in the app, the users can create and change dashboards themselves, without opening a ticket with a developer.
- It lives inside your app. AG Studio is a JavaScript library that runs in your product, so there is no iframe, and more importantly, your application controls everything. It is also heavily customizable so it slots into your existing design system.
- Your data stays yours. We never see it. Your PayPal data flows from your server into your app, and that is the end of the journey.
- It uses both AG Grid and AG Charts. AG Studio benefits from our 10 years of experience building data-intensive components for some of the world's largest companies.
This blog post shows how the data gets in. Part 2 talks about how little code it takes to put Studio on top of it.
To see both parts together, watch the full "Build a payments dashboard without building a dashboard" workshop recording on YouTube.
Recommended
Managing Recurring Payments with Apple Pay Using PayPal
4 min read

Why You Should Attend PayPal’s Developer Meetup at Money20/20
4 min read
Building a Customizable Messaging Platform
10 min read