PayPal No-code Invoicing to Simplify Your Life! 😮💨
Jan 25, 2023
15 min read

Every developer I know (ok, most developers 😅) seeks ways to accomplish tasks more efficiently. The rise of no- and low-code tooling is empowering both coders and non-coders alike to achieve business and operational goals that deliver just as much value, without requiring as much code. 🎉
One such area is Invoicing. Invoice management is a crucial part of any enterprise, and no-code invoicing tools allow people to quickly configure their invoicing system, manage open invoices and payments seamlessly, and save precious time to invest in other revenue-generating pursuits.
In this guide, I show you how to incorporate PayPal’s No-code Invoicing system into your business or organizational workflow. In a few minutes, you’ll be sending your first invoice!
Guide Overview
Part 1. Access Invoice Builder
Part 2. Edit Business Information
Part 3. Build Invoice
- Part 3b. Edit Invoice Parameters
- Part 3c. Add Price Adjustments
- Part 3d. Enable Partial Payments and Tips
- Part 3e. Preview Finished Invoice
Part 4. SEND IT! 🚀
Part 1. Access Invoice Builder
Sign in to your Business PayPal account. If you do not have one, sign up for one; bear in mind that this is different from a Personal PayPal account.
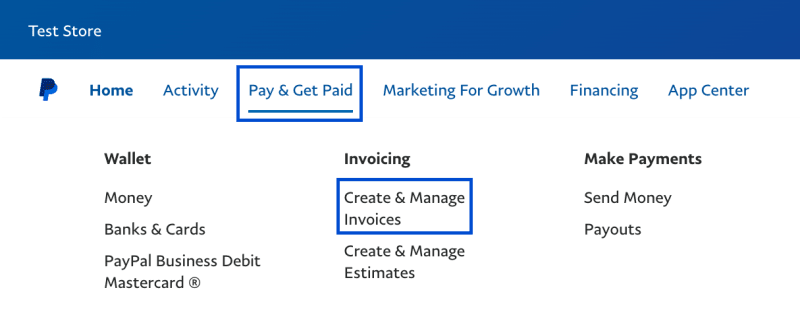
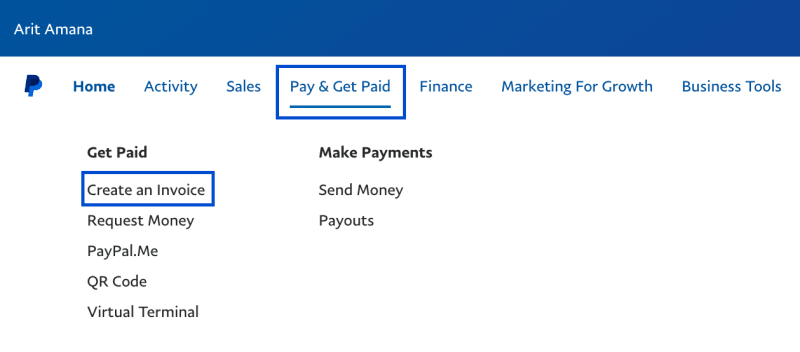
From the navigation bar, navigate to Invoicing. Your navigation layout may vary; I have reproduced two variations in the images below.
Part 2. Edit Business Information
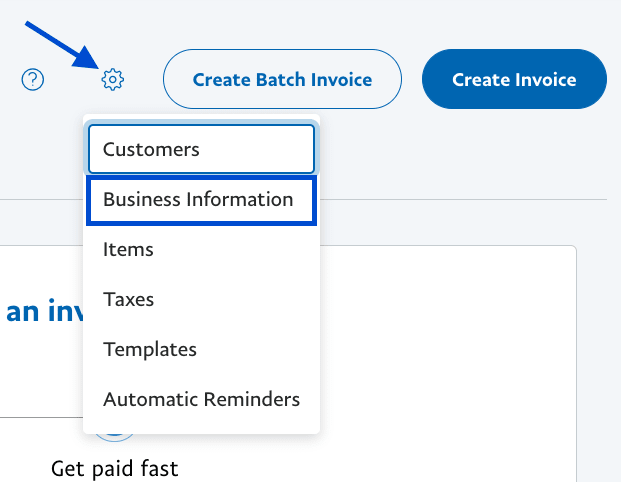
Edit your business information so that it displays correctly on your invoices. Click the Gear Icon towards the right, then select Business Information.
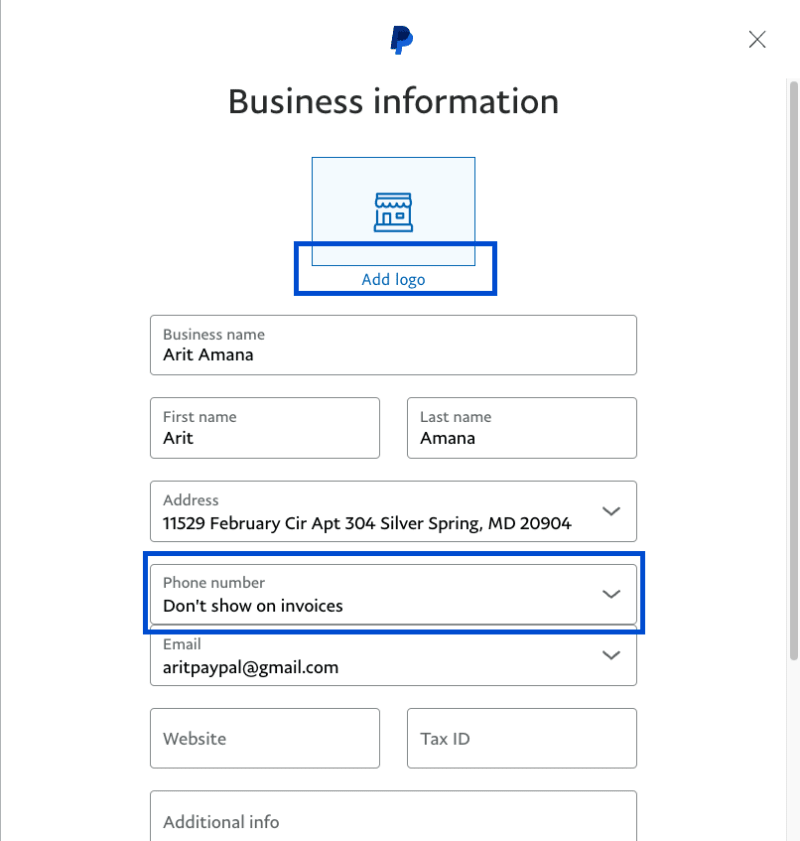
In the panel that opens, you may add your business logo and choose which business details display in invoices.
Part 3. Build Invoice
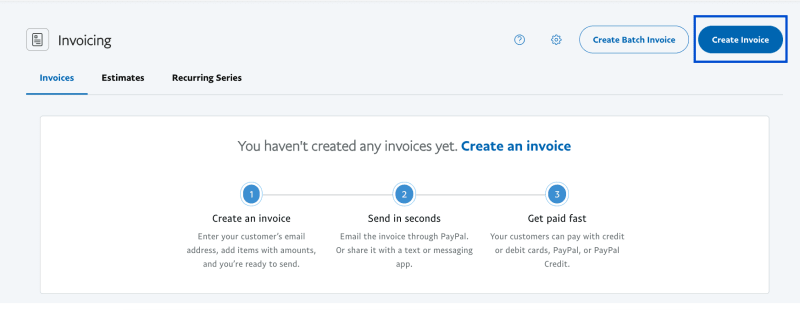
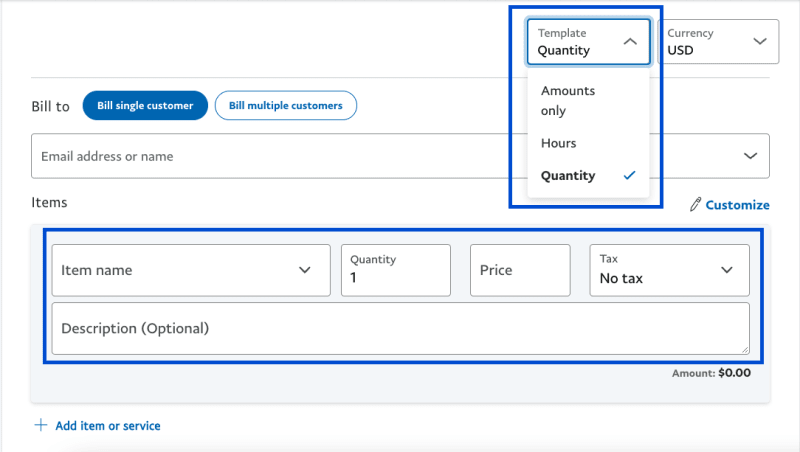
Click the Create Invoice button. Next, type in the products or services for which you are creating an invoice. PayPal offers good flexibility in how you define and customize these items: in terms of amounts, quantity, or hours.
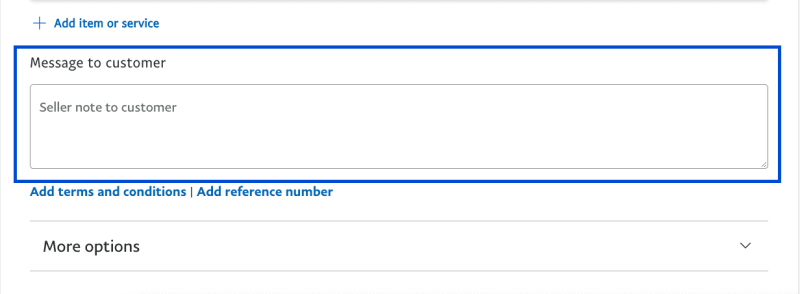
You may leave an optional note for your customer, to communicate some details that are not captured in the Item List.
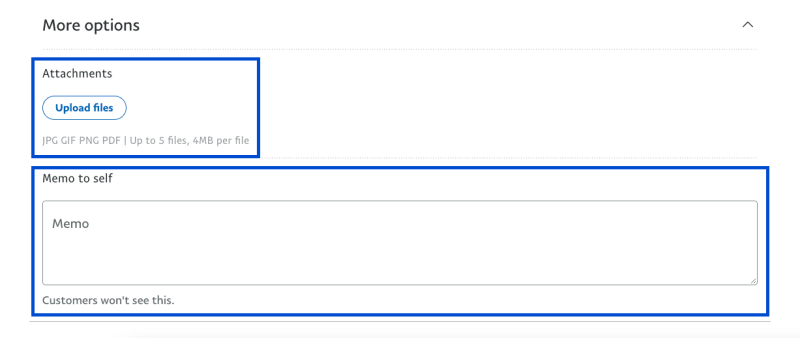
You may also attach images or PDF documents to your invoice and leave yourself a memo. This memo is hidden from your customer; they will not have access to it.
Part 3b. Edit Invoice Parameters
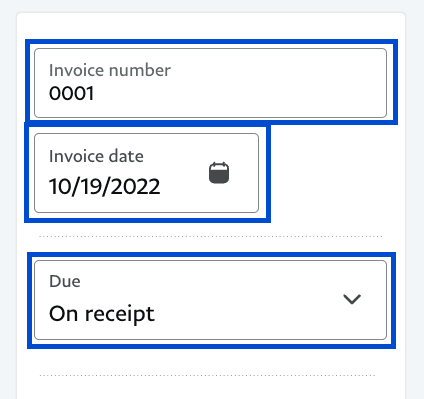
Next, to the right of the Invoice Builder, you may specify an Invoice Number, the Invoice Date (defaults to the current date), and the Due Date.
Part 3c. Add Price Adjustments
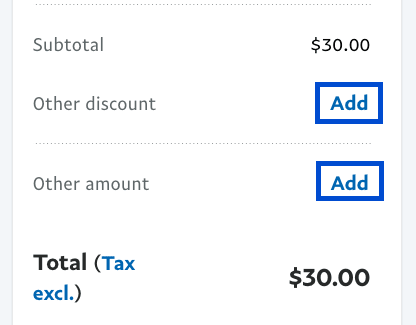
You can also add some price adjustments that affect the final Invoice amount, such as discounts, fees, surcharges, etc.
Part 3d. Enable Partial Payments and Tips
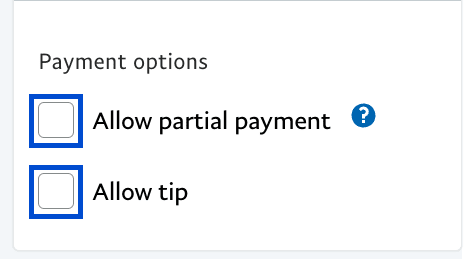
I think this is a cool feature: you can allow your customers to make partial payments toward their invoice! 🥳
You can even specify the minimum amount that a partial payment can be. You can also accept tips.
Part 3e. Preview Finished Invoice
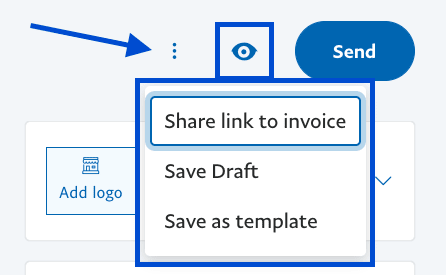
When you’re done building your Invoice, you can preview what it looks like from your customer’s perspective. Click the Eye Icon at the top corner of the Invoice Builder.
If you anticipate reusing the structure of the invoice you’ve built, you can save it as a Template; find this option among others in the dropdown menu next to the Eye Icon.
Part 4. SEND IT! 🚀
All looks good? Then SEND your Invoice — click the Send button. After sending, the next view shows you the activity on your invoice. You can add further memos to yourself.
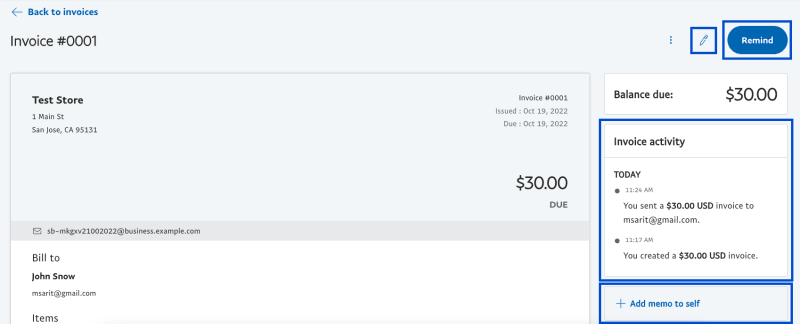
There are also some post-invoice actions available to you:
- Remind your customer about their invoice (click the Remind button at the top-right corner)
- Edit your Invoice using the Pencil Icon
- Access other actions from the 3-dot Dropdown, such as Record Payment (if your customer pays you outside of PayPal) or Download Invoice PDF
Recommended

PayPal Has Updated Its Webhook Verification Endpoint
3 min read
PayPal No-Code Estimates: Get on the Same Page!
4 min read
Accept E-Commerce Payments Easily with PayPal’s Buttons Component
9 min read
