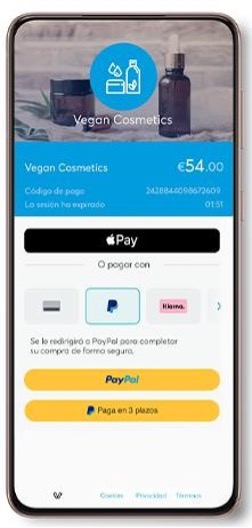
Enable Pay Later for Viva Wallet
Last updated: Nov 18th, 8:50am
Promote PayPal Pay Later offers using messaging and buttons on your Viva Wallet store.
PayPal offers short-term, interest-free payments and installment payment options that buyers can use to buy now and pay later. You get paid up-front, and there are no additional costs.
Pay Later includes:
- Paga en 3 plazos, which eligible Spanish buyers can use to pay in three interest-free payments for purchases of €30 – €2,000.
- Paga en 6, 12 o 24 plazos, which eligible Spanish buyers can use to pay for purchases of €120 – €2,999, with terms of 6, 12, or 24 monthly payments.
Know before you begin
- Before you begin, learn more about Pay Later offers.
- PayPal now includes Pay Later when you enable the feature, integrate PayPal Checkout with Viva Wallet.
- As a merchant, you're eligible to promote Paga in installments if you are a Spain-based PayPal merchant with a Spain-legal business entity, a Spain-facing website, and a one-time payment integration. At this time, promoting Pay Later offers are not available on PayPal vaulted payments or billing agreement integrations
- Pay later offers also follow the PayPal Acceptable Use Policy, which governs the usage of PayPal and prohibits the use of PayPal and pay later offers for certain types of transactions, such as real money gaming and firearms.
How it works
Web

Enable Pay Later messaging and button
-
Sign in to your production Viva Wallet account.
-
Click on Settings > API Access and scroll down to the PayPal (Payment Method) section. Click on the Enable PayPal as a payment method button.
-
If you already have a PayPal Business Account:
- Enter your registered email address, select your country > click Next.
- Enter your password Login.
- A message is displayed about confirming your email address. Setup is now complete.
-
If you do not already have a PayPal Business Account:
- Enter the email address you wish to register, select your country and click on the Next button. The Set up your PayPal Business Account window is displayed.
- Create and confirm your password and click on the Next button. The Please tell us about your business window is displayed.
-
Complete the details and click Agree and Create Account button.
-
Complete the first window that pops up and click Next.
-
After completion of the second window, click on Submit.
-
A window is displayed stating that you need to confirm your email address to activate your account. Go to your email and confirm activation of your PayPal account.
-
Close the window and refresh the Viva Wallet Settings > API Access page. PayPal will appear as a payment method once PayPal approves the integration.
See also
See the Viva Wallet documentation page for PayPal Checkout to learn more about Viva Wallet PayPal Payments.