Enable Pay Later messaging on Gene Commerce for Magento (Braintree)
Last updated: Nov 15th, 11:23pm
Promote PayPal Pay Later offers using messaging and buttons on your Magento store using the Gene Commerce plugin.
PayPal offers short-term, interest-free payments and other special financing options that buyers can use to buy now and pay later. You get paid upfront at no additional cost unless you are in the US.
Pay Later messaging include the following Pay Later offers which are available to US customers only:
- Pay in 4 - Eligible US buyers can pay in four interest-free payments for purchases of $30 to $1,500.
- Pay Monthly - Eligible US buyers can pay in 6, 12, or 24 monthly installments for purchases of $199 to $10,000.
Know before you begin
- Before you begin, learn more about Pay Later offers.
- The Gene Commerce for Magento plugin can only be used with Braintree. Before you enable Pay Later messaging, download the plugin from the Magento Marketplace.
-
US-based consumers are eligible for Pay Later offers across most of our integrations. As a merchant, you're eligible to promote Pay Later offers if you are based in the US with a US-facing website and a one-time payment integration. Promoting Pay Later offers is not available if you're using vaulted payments or subscriptions.
How it works
These are sample checkout pages with Pay Later messaging and button enabled for webpages and mobile devices.
Pay Later messaging and button on a webpage

Pay Later messaging and button on a mobile device

Enable the messaging and button
To enable the Pay Later messaging and button, complete the following:
Note: Make sure you have the Gene Commerce plugin activated.
Access the settings
- Login to the Magento admin portal.
- Go to Stores > Configuration.
- Go to Sales > Payment Methods.
- Select Configure next to Braintree Payments.
Configure the plugin
- Title: When buyers enter their payment information (credit/debit card), the title is how the payment method listed is featured.
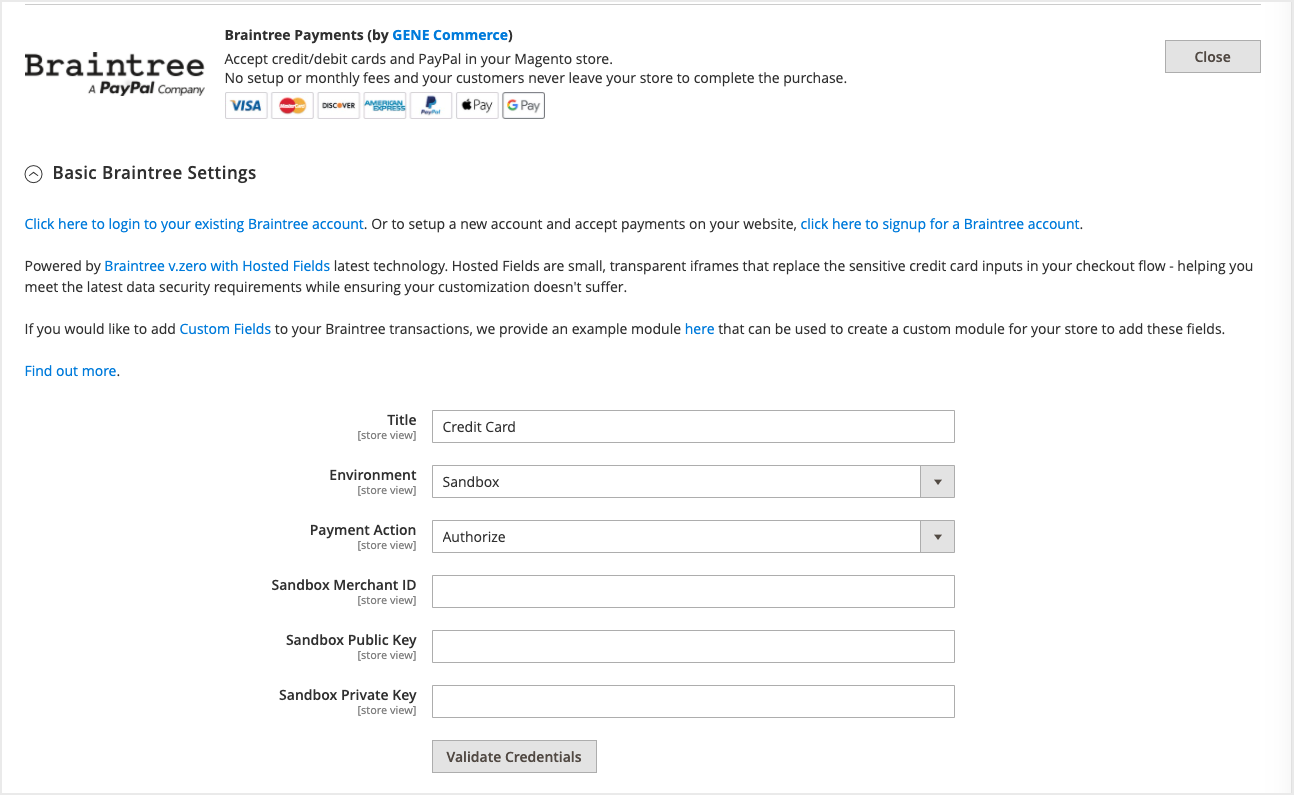
- Environment: To test your plugin and settings, select Sandbox. To go live, select Production.
- Payment Action: Choose between Authorize (authorize payment only, then delayed capture) or Intent Sale (immediate capture).
- Enable Card Payments: Set to Yes to accept credit card payments through Braintree.
- Enable PayPal through Braintree: Set to Yes to accept PayPal payments (including Pay Later) through Braintree.
- Enable PayPal Credit through Braintree: Set to Yes to show the blue PayPal Credit button where eligible.
- Enable PayPal Pay Later through Braintree: Set to Yes to accept Pay Later messaging in the US.
- Enable Vault for Card Payments: Set to Yes to vault credit card payment methods through Braintree.
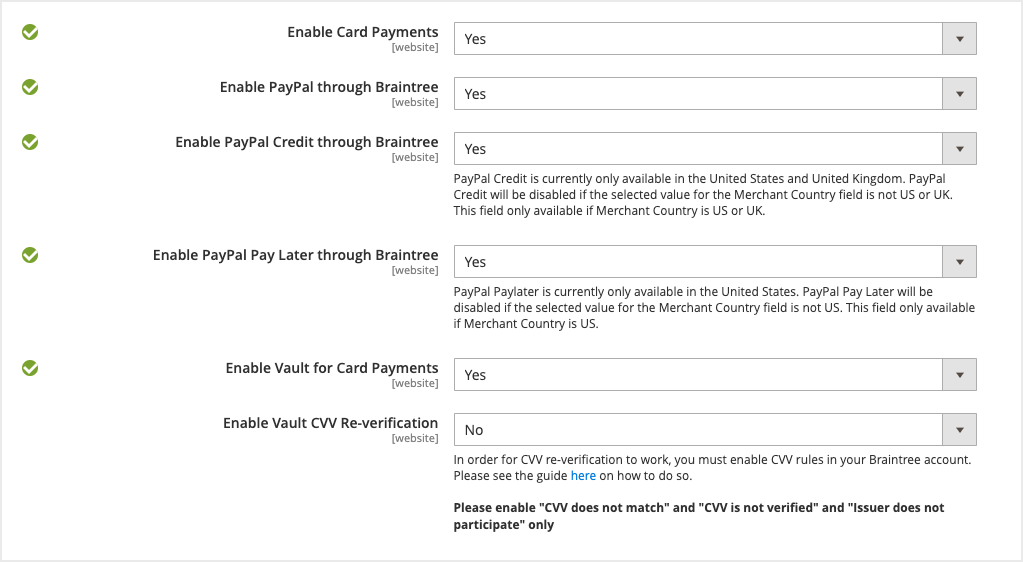
- Enable Vault CVV Re-verification: When using a vaulted method, require usage of CVV.
Note: Do you have your Braintree Credentials? Learn how to access your Merchant ID, public key, and private key.
Advanced Braintree settings
If you need to configure a Merchant Account ID, add that to Merchant Account ID.
Configure PayPal buttons
Go to PayPal through Braintree and change the Customise button to Yes. Customisable options include:
- Shape and color
- Location: Mini-cart and cart, checkout, or product page
Pay Later messaging
When Pay Later is set to Yes, messaging is enabled by default. It appears on the product pages, mini-cart and cart, and checkout pages.

Messaging can be toggled on and off. To adjust this, go to PayPal through Braintree > Product Page / Mini-Cart & Cart / Checkout Page > Enable PayPal Pay Later message on product page.
See also
See the Magento documentation to learn about eligibility and technical specifications for Pay Later offers through Braintree Payments.