- PayPal uses REST API credentials which you can get from the developer dashboard.
- Client ID: Authenticates your account with PayPal and identifies an app in your sandbox.
- Client secret: Authorizes an app in your sandbox. Keep this secret safe and don't share it
Integrate PayPal buttons and Hosted Fields
SDKLEGACYADVANCED
Last updated: May 12th, 3:53pm
Version CTA
This version of the JavaScript SDK integration guide for direct merchants is a legacy integration. Use version 2 for new integrations.
How it works
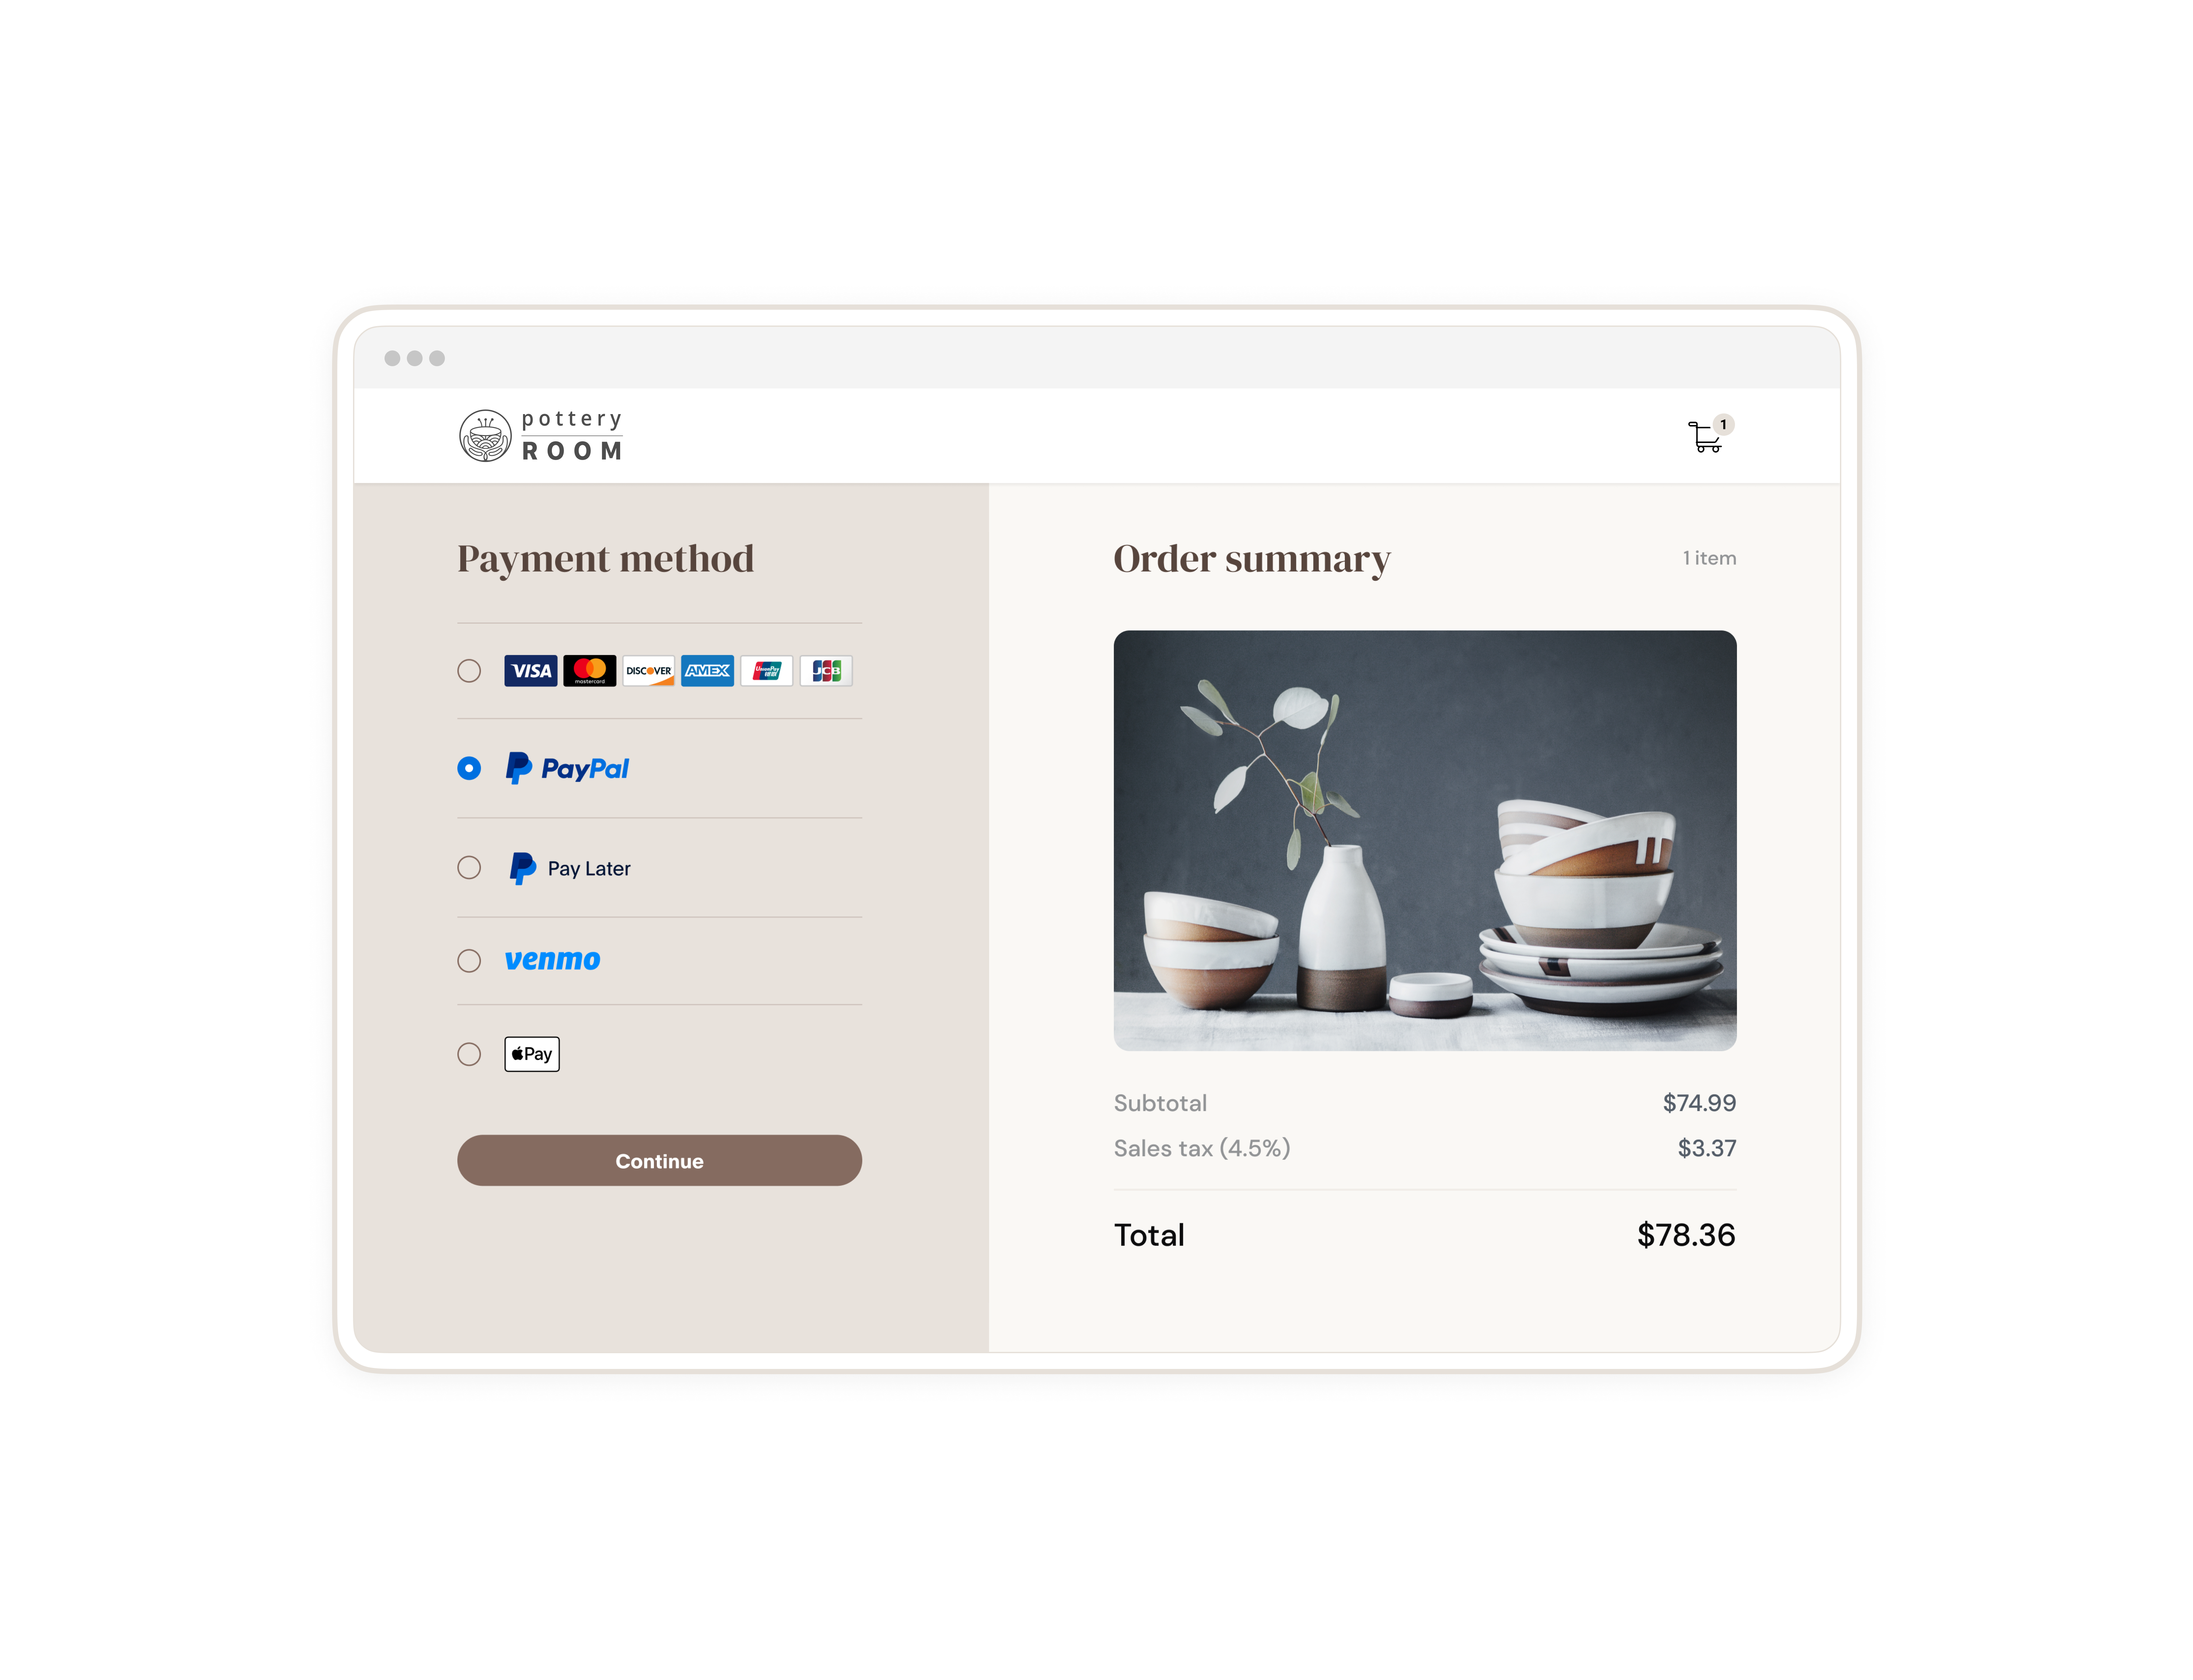
Expanded Checkout lets you offer the PayPal payment button and custom credit and debit card fields. This guide covers integrating the PayPal button, credit, and debit card payments. You can find more ways to extend your integration in our customization doc.
Once you integrate Expanded Checkout, you can also offer options like Pay Later, Venmo, and alternative payment methods with some additional configuration.
This integration guide follows the code in this GitHub sample.
Note: Discover Checkout's advanced features and unlock greater control over your checkout process by directly integrating with PayPal REST APIs. See Get started with PayPal REST API for more information about setting up your own custom integration.
Which integration to use
There are 2 versions of card payment integrations for direct merchants using the JavaScript SDK:
- Recommended: Version 2 uses the PayPal-hosted
CardFieldscomponent to accept and save cards without handling card information. PayPal handles all security and compliance issues associated with processing cards. TheCardFieldscomponent is the recommended integration method and receives ongoing enhancements and improvements. - Version 1 is a legacy integration that uses the
HostedFieldscomponent. This integration is no longer under active development and won’t receive further updates.
Other elements of the JavaScript SDK integration for direct merchants remain the same.
GitHub Codespaces are cloud-based developer containers that are ready right away. Use GitHub Codespaces to code and test your PayPal integration.
Integration video
Watch our video tutorial for this integration:
Know before you code
RequiredYou need a developer account to get sandbox credentials
RequiredYou need a combo of PayPal and third-party tools
- JavaScript SDK: Adds PayPal-supported payment methods.
- Orders REST API: Create, update, retrieve, authorize, and capture orders.
- npm: Registry used to install the necessary third-party libraries.
You can use Postman to explore and test PayPal APIs.
1
Before you begin your integration
1Check your account setup for advanced card payments
This integration requires a sandbox business account with the Advanced Credit and Debit Card Payments capability. Your account should automatically have this capability.
To confirm that Advanced Credit and Debit Card Payments are enabled for you, check your sandbox business account as follows:
- Log into the PayPal Developer Dashboard, toggle Sandbox, and go to Apps & Credentials.
- In REST API apps, select the name of your app.
- Go to Features > Accept payments.
- Select the Advanced Credit and Debit Card Payments checkbox and select Save Changes.
Note: If you created a sandbox business account through sandbox.paypal.com, and the Advanced Credit and Debit Card Payments status for the account is disabled, complete the sandbox onboarding steps.
2 Check 3D Secure requirements
Add 3D Secure to reduce the chance of fraud and improve the payment experience by authenticating a card holder through their card issuer.
Visit our 3D Secure page to see if 3D Secure is required in your region and learn more about implementing 3D Secure in your app.
3 Set up npm
One of the requirements to run this sample application is to have npm installed. For more info, visit npm’s documentation.
1. Install third-party libraries
Install the following third-party libraries to set up your integration. Here is a sample command to install them all at the same time:
1npm install dotenv ejs express node-fetch
Select any of the links below to see more detailed installation instructions for each library:
| Third-party libraries | Description |
|---|---|
| Dotenv | This zero-dependency module separates your configuration and code by loading environment variables from a .env file into process.env. |
| ejs | These templates help you deliver HTML markup using plain JavaScript. |
| express | This lean Node.js web application framework supports web and mobile applications. |
| node-fetch | This function helps you make API requests, similar to window.fetch. |
2. Verify package.json
A package.json file has a list of the packages and version numbers needed for your app. You can share your package.json file with other developers so they can use the same settings as you.
The following snippet is an example of a package.json file for a PayPal integration. Compare this sample to the package.json in your project:
1{2 "name": "@paypalcorp/advanced-integration",3 "version": "1.0.0",4 "description": "",5 "main": "YOUR-SERVER-NAME.js",6 "type": "module",7 "scripts": {8 "test": "echo "Error: no test specified" && exit 1",9 "start": "node YOUR-SERVER-NAME.js"10 },11 "author": "",12 "license": "Apache-2.0",13 "dependencies": {14 "dotenv": "^16.0.0",15 "ejs": "^3.1.6",16 "express": "^4.17.3",17 "node-fetch": "^3.2.1"18 }19}
- Pass the name of your server file using
mainby replacing the defaultYOUR-SERVER-NAME.json lines 5 and 9. - Use
scripts.testandscripts.startto customize how your app starts up.
If you're having trouble with your app, try reinstalling your local library and package files using npm install.
If you're getting the node error below, you need to include "type": "module" in your package.json file. This line isn't automatically added when package.json is created:
Warning: To load an ES module, set "type": "module" in the package.json or use the .mjs extension (Use `node --trace-warnings ...` to show where the warning was created)
See line 6 of the sample package.json file for an example.
3. Set up .env
A .env file is a line-delimited text file that sets your local working environment variables. Use this .env file to securely pass the client ID and app secret for your app.
This code shows an example .env file. Rename .env.example to .env and replace the PAYPAL_CLIENT_ID and PAYPAL_CLIENT_SECRET with values from your app:
Note: View your PAYPAL_CLIENT_ID and PAYPAL_CLIENT_SECRET in your PayPal Developer Dashboard under "Apps & Credentials".
1PAYPAL_CLIENT_ID="YOUR_CLIENT_ID_GOES_HERE"2PAYPAL_CLIENT_SECRET="YOUR_SECRET_GOES_HERE"
2
Integrate back end
This section explains how to set up your back end to integrate Expanded Checkout payments.
Back-end process
- Your app creates an order on the back-end by making a call to the Create order endpoint of the Orders v2 API.
- Your app makes a call to the Capture payment endpoint of the Orders v2 API to move the money when the buyer confirms the order.
Back-end code
The following example uses 2 files, /server/server.js and /server/views/checkout.ejs, to show how to set up the back end to integrate with Expanded Checkout.
/server/server.js
The /server/server.js file provides methods and functions for making the API calls and handling errors, and creates the endpoints that your app uses to:
- Generate an access token to use PayPal APIs.
- Create an order.
- Capture payment for the order.
- Simulate errors for negative testing.
You'll need to save the server.js file in a folder named /server.
/server/views/checkout.ejs
The /server/views/checkout.ejs file is an Embedded JavaScript (EJS) file that:
- Generate an access token to use PayPal APIs.
- Create an order.
- Capture payment for the order.
- Simulate errors for negative testing.
You'll need to save the checkout.ejs file in a folder named /server/views.
- /server/server.js
- /server/views/checkout.ejs
1import express from "express";2import fetch from "node-fetch";3import "dotenv/config";45const { PAYPAL_CLIENT_ID, PAYPAL_CLIENT_SECRET, PORT = 8888 } = process.env;6const base = "https://api-m.sandbox.paypal.com";7const app = express();8app.set("view engine", "ejs");9app.set("views", "./server/views");10app.use(express.static("client"));1112// parse post params sent in body in json format13app.use(express.json());1415/**16 * Generate an OAuth 2.0 access token for authenticating with PayPal REST APIs.17 * See https://developer.paypal.com/api/rest/authentication/18 */19const generateAccessToken = async () => {20 try {21 if (!PAYPAL_CLIENT_ID || !PAYPAL_CLIENT_SECRET) {22 throw new Error("MISSING_API_CREDENTIALS");23 }24 const auth = Buffer.from(25 PAYPAL_CLIENT_ID + ":" + PAYPAL_CLIENT_SECRET,26 ).toString("base64");27 const response = await fetch(`${base}/v1/oauth2/token`, {28 method: "POST",29 body: "grant_type=client_credentials",30 headers: {31 Authorization: `Basic ${auth}`,32 },33 });3435 const data = await response.json();36 return data.access_token;37 } catch (error) {38 console.error("Failed to generate Access Token:", error);39 }40};4142/**43 * Generate a client token for rendering the hosted card fields.44 * See https://developer.paypal.com/docs/checkout/advanced/sdk/v1/#link-integratebackend45 */46const generateClientToken = async () => {47 const accessToken = await generateAccessToken();48 const url = `${base}/v1/identity/generate-token`;49 const response = await fetch(url, {50 method: "POST",51 headers: {52 Authorization: `Bearer ${accessToken}`,53 "Accept-Language": "en_US",54 "Content-Type": "application/json",55 },56 });5758 return handleResponse(response);59};6061/**62 * Create an order to start the transaction.63 * See https://developer.paypal.com/docs/api/orders/v2/#orders_create64 */65const createOrder = async (cart) => {66 // use the cart information passed from the front-end to calculate the purchase unit details67 console.log(68 "shopping cart information passed from the frontend createOrder() callback:",69 cart,70 );7172 const accessToken = await generateAccessToken();73 const url = `${base}/v2/checkout/orders`;74 const payload = {75 intent: "CAPTURE",76 purchase_units: [77 {78 amount: {79 currency_code: "USD",80 value: "100.00",81 },82 },83 ],84 };8586 const response = await fetch(url, {87 headers: {88 "Content-Type": "application/json",89 Authorization: `Bearer ${accessToken}`,90 // Uncomment one of these to force an error for negative testing (in sandbox mode only). Documentation:91 // https://developer.paypal.com/tools/sandbox/negative-testing/request-headers/92 // "PayPal-Mock-Response": '{"mock_application_codes": "MISSING_REQUIRED_PARAMETER"}'93 // "PayPal-Mock-Response": '{"mock_application_codes": "PERMISSION_DENIED"}'94 // "PayPal-Mock-Response": '{"mock_application_codes": "INTERNAL_SERVER_ERROR"}'95 },96 method: "POST",97 body: JSON.stringify(payload),98 });99100 return handleResponse(response);101};102103/**104 * Capture payment for the created order to complete the transaction.105 * See https://developer.paypal.com/docs/api/orders/v2/#orders_capture106 */107const captureOrder = async (orderID) => {108 const accessToken = await generateAccessToken();109 const url = `${base}/v2/checkout/orders/${orderID}/capture`;110111 const response = await fetch(url, {112 method: "POST",113 headers: {114 "Content-Type": "application/json",115 Authorization: `Bearer ${accessToken}`,116 // Uncomment one of these to force an error for negative testing (in sandbox mode only). Documentation:117 // https://developer.paypal.com/tools/sandbox/negative-testing/request-headers/118 // "PayPal-Mock-Response": '{"mock_application_codes": "INSTRUMENT_DECLINED"}'119 // "PayPal-Mock-Response": '{"mock_application_codes": "TRANSACTION_REFUSED"}'120 // "PayPal-Mock-Response": '{"mock_application_codes": "INTERNAL_SERVER_ERROR"}'121 },122 });123124 return handleResponse(response);125};126127async function handleResponse(response) {128 try {129 const jsonResponse = await response.json();130 return {131 jsonResponse,132 httpStatusCode: response.status,133 };134 } catch (err) {135 const errorMessage = await response.text();136 throw new Error(errorMessage);137 }138}139140// render checkout page with client id & unique client token141app.get("/", async (req, res) => {142 try {143 const { jsonResponse } = await generateClientToken();144 res.render("checkout", {145 clientId: PAYPAL_CLIENT_ID,146 clientToken: jsonResponse.client_token,147 });148 } catch (err) {149 res.status(500).send(err.message);150 }151});152153app.post("/api/orders", async (req, res) => {154 try {155 // use the cart information passed from the front-end to calculate the order amount detals156 const { cart } = req.body;157 const { jsonResponse, httpStatusCode } = await createOrder(cart);158 res.status(httpStatusCode).json(jsonResponse);159 } catch (error) {160 console.error("Failed to create order:", error);161 res.status(500).json({ error: "Failed to create order." });162 }163});164165app.post("/api/orders/:orderID/capture", async (req, res) => {166 try {167 const { orderID } = req.params;168 const { jsonResponse, httpStatusCode } = await captureOrder(orderID);169 res.status(httpStatusCode).json(jsonResponse);170 } catch (error) {171 console.error("Failed to create order:", error);172 res.status(500).json({ error: "Failed to capture order." });173 }174});175176app.listen(PORT, () => {177 console.log(`Node server listening at http://localhost:${PORT}/`);178});
/server/server.js expanded
This is a breakdown of the /server/server.js code sample.
Declare imports
This section of code imports the dependencies for your Node.js application:
1import express from "express";2import fetch from "node-fetch";3import "dotenv/config";
- Line 1 imports the Express.js framework to get started with creating a web server.
- Line 2 imports a
node-fetchdependency needed to makehttprequests to PayPal REST APIs. - Line 3 imports the dotenv library needed for loading sensitive data from environment variables, such as a PayPal client secret.
Set up port and server
This section of code collects the environment variables, sets up the port to run your server, and sets the base sandbox URL:
1const { PAYPAL_CLIENT_ID, PAYPAL_CLIENT_SECRET, PORT = 8888 } = process.env;2const base = "https://api-m.sandbox.paypal.com";
Lines 7-10 start the express Node.js web application framework:
1const app = express();2app.set("view engine", "ejs");3app.set("views", "./server/views");4app.use(express.static("client"));
Line 8 declares that the rendering engine uses Embedded JavaScript templates.
Generate client token
A client token uniquely identifies your payer. You need a client token for the payer so your app can use the hosted card fields. The following code sample creates a client token for you by making a POST call to the /v1/identity/generate-token endpoint:
1/**2 * Generate a client token for rendering the hosted card fields.3 * See https://developer.paypal.com/docs/checkout/advanced/sdk/v1/#link-integratebackend4 */5const generateClientToken = async () => {6 const accessToken = await generateAccessToken();7 const url = `${base}/v1/identity/generate-token`;8 const response = await fetch(url, {9 method: "POST",10 headers: {11 Authorization: `Bearer ${accessToken}`,12 "Accept-Language": "en_US",13 "Content-Type": "application/json",14 },15 });1617 return handleResponse(response);18};
This code runs your app on localhost, using the port 8888 that you set up in line 5 of the API call:
1app.listen(PORT, () => {2 console.log(`Node server listening at http://localhost:${PORT}/`);3});
Render checkout page
Set up your app's checkout page to load this section of code when it's rendered by your server:
1// render checkout page with client id & unique client token2app.get("/", async (req, res) => {3 try {4 const { jsonResponse } = await generateClientToken();5 res.render("checkout", {6 clientId: PAYPAL_CLIENT_ID,7 clientToken: jsonResponse.client_token,8 });9 } catch (err) {10 res.status(500).send(err.message);11 }12});1314app.post("/api/orders", async (req, res) => {15 try {16 // use the cart information passed from the front-end to calculate the order amount details17 const { cart } = req.body;18 const { jsonResponse, httpStatusCode } = await createOrder(cart);19 res.status(httpStatusCode).json(jsonResponse);20 } catch (error) {21 console.error("Failed to create order:", error);22 res.status(500).json({ error: "Failed to create order." });23 }24});2526app.post("/api/orders/:orderID/capture", async (req, res) => {27 try {28 const { orderID } = req.params;29 const { jsonResponse, httpStatusCode } = await captureOrder(orderID);30 res.status(httpStatusCode).json(jsonResponse);31 } catch (error) {32 console.error("Failed to create order:", error);33 res.status(500).json({ error: "Failed to capture order." });34 }35});
- Line 143 generates a client token by calling the
generateClientToken()function. - Lines 144-147 render the checkout page, pass the
clientIdandclientTokento the page, and inject the value into the script tag.
Run createOrder()
This section of code defines a createOrder() callback function for the Create orders endpoint of the Orders v2 API. Call the function when the payment is submitted, for example, when the payer selects the PayPal button, or submits a card payment. See the /client/app.js section for more information.
This createOrder() callback returns a promise that contains the orderID. You can customize this callback for many use cases, such as a physical inventory for a cart, or a digital good with a fixed amount.
Important: To keep your integration secure, don't pass dollar amounts in your finished integration. Define your purchase_units payload on the server side and pass the cart array from the front-end to the server.
1/**2 * Create an order to start the transaction.3 * See https://developer.paypal.com/docs/api/orders/v2/#orders_create4 */5const createOrder = async (cart) => {6 // use the cart information passed from the front-end to calculate the purchase unit details7 console.log(8 "shopping cart information passed from the frontend createOrder() callback:",9 cart,10 );1112 const accessToken = await generateAccessToken();13 const url = `${base}/v2/checkout/orders`;14 const payload = {15 intent: "CAPTURE",16 purchase_units: [17 {18 amount: {19 currency_code: "USD",20 value: "100.00",21 },22 },23 ],24 };2526 const response = await fetch(url, {27 headers: {28 "Content-Type": "application/json",29 Authorization: `Bearer ${accessToken}`,30 // Uncomment one of these to force an error for negative testing (in sandbox mode only). Documentation:31 // https://developer.paypal.com/tools/sandbox/negative-testing/request-headers/32 // "PayPal-Mock-Response": '{"mock_application_codes": "MISSING_REQUIRED_PARAMETER"}'33 // "PayPal-Mock-Response": '{"mock_application_codes": "PERMISSION_DENIED"}'34 // "PayPal-Mock-Response": '{"mock_application_codes": "INTERNAL_SERVER_ERROR"}'35 },36 method: "POST",37 body: JSON.stringify(payload),38 });3940 return handleResponse(response);41};
- Line 65 passes information from the
cartinto thecreateOrderfunction. - Line 72 checks that you have the correct access token.
- Line 73 sets up the
urlfor the API call. - Lines 74-84 pass the
intentandpurchase_unitsto an object calledpayload. This gets passed to the API call. - Lines 86-98 create an order by sending a
POSTrequest to the Create orders endpoint of the Orders v2 API, usingaccessToken,url, and thepayloadfrom lines 74-84. - Line 97 converts the
payloadinformation into JSON format and passes it into thebodysection of the request.
Negative testing for createOrder()
This section of the createOrder() function provides 3 negative testing opportunities behind content tags:
MISSING_REQUIRED_PARAMETERPERMISSION_DENIEDINTERNAL_SERVER_ERROR
Remove the // from the beginning of a line to simulate that error. the createOrder() call will pass that line as a PayPal-Mock-Response header in the POST request to the Orders v2 API:
1// Uncomment one of these to force an error for negative testing (in sandbox mode only). Documentation:2// https://developer.paypal.com/tools/sandbox/negative-testing/request-headers/3// "PayPal-Mock-Response": '{"mock_application_codes": "MISSING_REQUIRED_PARAMETER"}'4// "PayPal-Mock-Response": '{"mock_application_codes": "PERMISSION_DENIED"}'5// "PayPal-Mock-Response": '{"mock_application_codes": "INTERNAL_SERVER_ERROR"}'
Run captureOrder()
This section of code defines the captureOrder() function. Call the function to capture the order and move money from the payer's payment method to the seller:
1/**2 * Capture payment for the created order to complete the transaction.3 * See https://developer.paypal.com/docs/api/orders/v2/#orders_capture4 */5const captureOrder = async (orderID) => {6 const accessToken = await generateAccessToken();7 const url = `${base}/v2/checkout/orders/${orderID}/capture`;89 const response = await fetch(url, {10 method: "POST",11 headers: {12 "Content-Type": "application/json",13 Authorization: `Bearer ${accessToken}`,14 // Uncomment one of these to force an error for negative testing (in sandbox mode only). Documentation:15 // https://developer.paypal.com/tools/sandbox/negative-testing/request-headers/16 // "PayPal-Mock-Response": '{"mock_application_codes": "INSTRUMENT_DECLINED"}'17 // "PayPal-Mock-Response": '{"mock_application_codes": "TRANSACTION_REFUSED"}'18 // "PayPal-Mock-Response": '{"mock_application_codes": "INTERNAL_SERVER_ERROR"}'19 },20 });2122 return handleResponse(response);23};
- Line 107 passes the
orderIDfrom the request parameters into thecreateOrderfunction. - Line 108 checks that you have the correct access token.
- Line 109 sets up the
urlfor the API call, which includes theorderID. - Lines 111-122 capture an order by sending a
POSTrequest to the Capture payment endpoint of the Orders v2 API, usingaccessTokenandurl.
See /client/app.js in the next section for more details on capturing payments from the front-end.
Negative testing for captureOrder()
This section of the captureOrder() function provides 3 negative testing opportunities behind content tags:
INSTRUMENT_DECLINEDTRANSACTION_REFUSEDINTERNAL_SERVER_ERROR
Remove the // from the beginning of a line to simulate that error. The captureOrder() call will pass that line as a PayPal-Mock-Response header in the POST request to the Capture payment endpoint of the Orders v2 API:
1// Uncomment one of these to force an error for negative testing (in sandbox mode only). Documentation:2// https://developer.paypal.com/tools/sandbox/negative-testing/request-headers/3// "PayPal-Mock-Response": '{"mock_application_codes": "INSTRUMENT_DECLINED"}'4// "PayPal-Mock-Response": '{"mock_application_codes": "TRANSACTION_REFUSED"}'5// "PayPal-Mock-Response": '{"mock_application_codes": "INTERNAL_SERVER_ERROR"}'
Test server
Run npm start to confirm your setup is correct.
This command starts the server on localhost:8888. You can specify a port number by modifying line 4 in the sample /server/server.js file.
/server/views/checkout.ejs expanded
This breakdown focuses on key lines from the /server/views/checkout.ejs code sample.
Import style sheet
This section calls the JavaScript SDK that defines the PayPal buttons:
1<link2 rel="stylesheet"3 type="text/css"4 href="https://www.paypalobjects.com/webstatic/en_US/developer/docs/css/cardfields.css"5>
- Lines 7-11 declare a sample CSS file for demonstration purposes. Replace these with styles that align with your brand using the CSS properties supported by this integration.
- Optional: The JavaScript SDK has configurations that you can override, such as
currencyandintent.
Add PayPal button
Include the PayPal Checkout button before you request the credit card fields, or on the same page that you request this information. For more information, see Section 8, Required Use of PayPal Checkout, PayPal Credit, in the PayPal Online Card Payments Services Agreement.
1<div id="paypal-button-container" class="paypal-button-container"></div>
Create your card form /docs/checkout/advanced/sdk/v1/
Create your card form
This section of code shows how to create the form fields and Submit button you need to take card payments:
1<div class="card_container">2 <form id="card-form">3 <label for="card-number">Card Number</label>4 <div id="card-number" class="card_field"></div>5 <div style="display: flex; flex-direction: row">6 <div>7 <label for="expiration-date">Expiration Date</label>8 <div id="expiration-date" class="card_field"></div>9 </div>10 <div style="margin-left: 10px">11 <label for="cvv">CVV</label>12 <div id="cvv" class="card_field"></div>13 </div>14 </div>15 <label for="card-holder-name">Name on Card</label>16 <input17 type="text"18 id="card-holder-name"19 name="card-holder-name"20 autocomplete="off"21 placeholder="card holder name"22 >23 <div>24 <label for="card-billing-address-street">Billing Address</label>25 <input26 type="text"27 id="card-billing-address-street"28 name="card-billing-address-street"29 autocomplete="off"30 placeholder="street address"31 >32 </div>33 <div>34 <label for="card-billing-address-unit"> </label>35 <input36 type="text"37 id="card-billing-address-unit"38 name="card-billing-address-unit"39 autocomplete="off"40 placeholder="unit"41 >42 </div>43 <div>44 <input45 type="text"46 id="card-billing-address-city"47 name="card-billing-address-city"48 autocomplete="off"49 placeholder="city"50 >51 </div>52 <div>53 <input54 type="text"55 id="card-billing-address-state"56 name="card-billing-address-state"57 autocomplete="off"58 placeholder="state"59 >60 </div>61 <div>62 <input63 type="text"64 id="card-billing-address-zip"65 name="card-billing-address-zip"66 autocomplete="off"67 placeholder="zip / postal code"68 >69 </div>70 <div>71 <input72 type="text"73 id="card-billing-address-country"74 name="card-billing-address-country"75 autocomplete="off"76 placeholder="country code"77 >78 </div>79 <br><br>80 <button value="submit" id="submit" class="btn">Pay</button>81 </form>82 <p id="result-message"></p>83</div>
- Lines 19-99 declare a
card-formobject with fields forcard-number,expiration-date,cvv,card-holder-name, and billing address information. See the Orders v2 API for details about billing address fields and other parameters. For example, use the 2-character country code to test the billing address. - Line 100 declares a
result-messageobject that displays the output of theresultMessagefunction from lines 107-110 of the/client/app.jsfile. - The fields in this example match up with fields from lines 145-169 of the Capture eligible payment code sample.
Import app.js
This code sample renders the hosted card fields for an eligible payment by importing the /client/app.js file that you created:
1<script src="app.js"></script>
3
Integrate front end
This section explains how to set up your front end to integrate Expanded Checkout payments.
Front-end process
- Your app displays the PayPal Checkout button and the card checkout form.
- Your app calls server endpoints to create the order and capture payment. The specific method depends on whether the buyer uses the PayPal button or checkout form.
Front-end code
The /client/app.js file handles the client-side logic and defines how the PayPal front-end components connect with the back-end. Use this file to set up the PayPal checkout using the PayPal JavaScript SDK, and handle the payer's interactions with the PayPal checkout button.
You'll need to save the app.js file in a folder named /client:
1async function createOrderCallback() {2 try {3 const response = await fetch("/api/orders", {4 method: "POST",5 headers: {6 "Content-Type": "application/json",7 },8 // use the "body" param to optionally pass additional order information9 // like product ids and quantities10 body: JSON.stringify({11 cart: [12 {13 id: "YOUR_PRODUCT_ID",14 quantity: "YOUR_PRODUCT_QUANTITY",15 },16 ],17 }),18 });1920 const orderData = await response.json();2122 if (orderData.id) {23 return orderData.id;24 } else {25 const errorDetail = orderData?.details?.[0];26 const errorMessage = errorDetail27 ? `${errorDetail.issue} ${errorDetail.description} (${orderData.debug_id})`28 : JSON.stringify(orderData);2930 throw new Error(errorMessage);31 }32 } catch (error) {33 console.error(error);34 resultMessage(`Could not initiate PayPal Checkout...<br><br>${error}`);35 }36}3738async function onApproveCallback(data, actions) {39 try {40 const response = await fetch(`/api/orders/${data.orderID}/capture`, {41 method: "POST",42 headers: {43 "Content-Type": "application/json",44 },45 });4647 const orderData = await response.json();48 // Three cases to handle:49 // (1) Recoverable INSTRUMENT_DECLINED -> call actions.restart()50 // (2) Other non-recoverable errors -> Show a failure message51 // (3) Successful transaction -> Show confirmation or thank you message5253 const transaction =54 orderData?.purchase_units?.[0]?.payments?.captures?.[0] ||55 orderData?.purchase_units?.[0]?.payments?.authorizations?.[0];56 const errorDetail = orderData?.details?.[0];5758 // this actions.restart() behavior only applies to the Buttons component59 if (errorDetail?.issue === "INSTRUMENT_DECLINED" && !data.card && actions) {60 // (1) Recoverable INSTRUMENT_DECLINED -> call actions.restart()61 // recoverable state, per https://developer.paypal.com/docs/checkout/standard/customize/handle-funding-failures/62 return actions.restart();63 } else if (64 errorDetail ||65 !transaction ||66 transaction.status === "DECLINED"67 ) {68 // (2) Other non-recoverable errors -> Show a failure message69 let errorMessage;70 if (transaction) {71 errorMessage = `Transaction ${transaction.status}: ${transaction.id}`;72 } else if (errorDetail) {73 errorMessage = `${errorDetail.description} (${orderData.debug_id})`;74 } else {75 errorMessage = JSON.stringify(orderData);76 }7778 throw new Error(errorMessage);79 } else {80 // (3) Successful transaction -> Show confirmation or thank you message81 // Or go to another URL: actions.redirect('thank_you.html');82 resultMessage(83 `Transaction ${transaction.status}: ${transaction.id}<br><br>See console for all available details`,84 );85 console.log(86 "Capture result",87 orderData,88 JSON.stringify(orderData, null, 2),89 );90 }91 } catch (error) {92 console.error(error);93 resultMessage(94 `Sorry, your transaction could not be processed...<br><br>${error}`,95 );96 }97}9899window.paypal100 .Buttons({101 createOrder: createOrderCallback,102 onApprove: onApproveCallback,103 })104 .render("#paypal-button-container");105106// Example function to show a result to the user. Your site's UI library can be used instead.107function resultMessage(message) {108 const container = document.querySelector("#result-message");109 container.innerHTML = message;110}111112// If this returns false or the card fields aren't visible, see Step #1.113if (window.paypal.HostedFields.isEligible()) {114 // Renders card fields115 window.paypal.HostedFields.render({116 // Call your server to set up the transaction117 createOrder: createOrderCallback,118 styles: {119 ".valid": {120 color: "green",121 },122 ".invalid": {123 color: "red",124 },125 },126 fields: {127 number: {128 selector: "#card-number",129 placeholder: "4111 1111 1111 1111",130 },131 cvv: {132 selector: "#cvv",133 placeholder: "123",134 },135 expirationDate: {136 selector: "#expiration-date",137 placeholder: "MM/YY",138 },139 },140 }).then((cardFields) => {141 document.querySelector("#card-form").addEventListener("submit", (event) => {142 event.preventDefault();143 cardFields144 .submit({145 // Cardholder's first and last name146 cardholderName: document.getElementById("card-holder-name").value,147 // Billing Address148 billingAddress: {149 // Street address, line 1150 streetAddress: document.getElementById(151 "card-billing-address-street",152 ).value,153 // Street address, line 2 (Ex: Unit, Apartment, etc.)154 extendedAddress: document.getElementById(155 "card-billing-address-unit",156 ).value,157 // State158 region: document.getElementById("card-billing-address-state").value,159 // City160 locality: document.getElementById("card-billing-address-city")161 .value,162 // Postal Code163 postalCode: document.getElementById("card-billing-address-zip")164 .value,165 // Country Code166 countryCodeAlpha2: document.getElementById(167 "card-billing-address-country",168 ).value,169 },170 })171 .then((data) => {172 return onApproveCallback(data);173 })174 .catch((orderData) => {175 resultMessage(176 `Sorry, your transaction could not be processed...<br><br>${JSON.stringify(177 orderData,178 )}`,179 );180 });181 });182 });183} else {184 // Hides card fields if the merchant isn't eligible185 document.querySelector("#card-form").style = "display: none";186}
Understand the front-end code
This section explains critical parts of the front-end code sample.
/client/app.js expanded
This breakdown focuses on key lines from the /client/app.js code sample.
Create order
This code sample defines the createOrder() function:
1async function createOrderCallback() {2 try {3 const response = await fetch("/api/orders", {4 method: "POST",5 headers: {6 "Content-Type": "application/json",7 },8 // use the "body" param to optionally pass additional order information9 // like product ids and quantities10 body: JSON.stringify({11 cart: [12 {13 id: "YOUR_PRODUCT_ID",14 quantity: "YOUR_PRODUCT_QUANTITY",15 },16 ],17 }),18 });1920 const orderData = await response.json();2122 if (orderData.id) {23 return orderData.id;24 } else {25 const errorDetail = orderData?.details?.[0];26 const errorMessage = errorDetail27 ? `${errorDetail.issue} ${errorDetail.description} (${orderData.debug_id})`28 : JSON.stringify(orderData);2930 throw new Error(errorMessage);31 }32 } catch (error) {33 console.error(error);34 resultMessage(`Could not initiate PayPal Checkout...<br><br>${error}`);35 }36}3738async function onApproveCallback(data, actions) {39 try {40 const response = await fetch(`/api/orders/${data.orderID}/capture`, {41 method: "POST",42 headers: {43 "Content-Type": "application/json",44 },45 });4647 const orderData = await response.json();48 // Three cases to handle:49 // (1) Recoverable INSTRUMENT_DECLINED -> call actions.restart()50 // (2) Other non-recoverable errors -> Show a failure message51 // (3) Successful transaction -> Show confirmation or thank you message5253 const transaction =54 orderData?.purchase_units?.[0]?.payments?.captures?.[0] ||55 orderData?.purchase_units?.[0]?.payments?.authorizations?.[0];56 const errorDetail = orderData?.details?.[0];5758 // this actions.restart() behavior only applies to the Buttons component59 if (errorDetail?.issue === "INSTRUMENT_DECLINED" && !data.card && actions) {60 // (1) Recoverable INSTRUMENT_DECLINED -> call actions.restart()61 // recoverable state, per https://developer.paypal.com/docs/checkout/standard/customize/handle-funding-failures/62 return actions.restart();63 } else if (64 errorDetail ||65 !transaction ||66 transaction.status === "DECLINED"67 ) {68 // (2) Other non-recoverable errors -> Show a failure message69 let errorMessage;70 if (transaction) {71 errorMessage = `Transaction ${transaction.status}: ${transaction.id}`;72 } else if (errorDetail) {73 errorMessage = `${errorDetail.description} (${orderData.debug_id})`;74 } else {75 errorMessage = JSON.stringify(orderData);76 }7778 throw new Error(errorMessage);79 } else {80 // (3) Successful transaction -> Show confirmation or thank you message81 // Or go to another URL: actions.redirect('thank_you.html');82 resultMessage(83 `Transaction ${transaction.status}: ${transaction.id}<br><br>See console for all available details`,84 );85 console.log(86 "Capture result",87 orderData,88 JSON.stringify(orderData, null, 2),89 );90 }91 } catch (error) {92 console.error(error);93 resultMessage(94 `Sorry, your transaction could not be processed...<br><br>${error}`,95 );96 }97}
- Line 40 calls your server's capture endpoint to capture the order.
- Lines 58-97 declare how to handle the payment capture response.
- Lines 59-79 declare what happens when the payer's instrument is declined.
- Lines 79-90 declare what happens when the payment is successfully captured. When you're ready to go live, you can remove the alert and either show a success message or redirect the payer to another URL.
- Lines 91-96 pass an error message to the
console.
PayPal Button JavaScript
This section calls the JavaScript SDK that defines the PayPal buttons:
1window.paypal2 .Buttons({3 createOrder: createOrderCallback,4 onApprove: onApproveCallback,5 })6 .render("#paypal-button-container");
Send results to user
This section declares a resultMessage function that shows a message to the user by passing data to the result-message HTML element container in line 100 of the /server/views/checkout.ejs:
1// Example function to show a result to the user. Your site's UI library can be used instead.2function resultMessage(message) {3 const container = document.querySelector("#result-message");4 container.innerHTML = message;
Lines 108-109 direct the message to the HTML element container.
Check for HostedFields eligibility
Hosted card fields use the JavaScript SDK to help non-PCI-compliant sellers save a payer's card data and create a token for future payments. During an eligible payment, the hosted fields show up in the payment experience and prompt the payer for consent to save their card data. For more information about hosted fields, see Hosted fields.
Note: You need to complete the account setup in sandbox to be eligible for testing hosted fields.
This code sample checks to see if a payment is eligible for hosted card fields. If not, the hosted card fields won’t show up during the payment flow:
1// If this returns false or the card fields aren't visible, see Step #1.2if (window.paypal.HostedFields.isEligible()) {3 // Renders card fields4 window.paypal.HostedFields.render(5 {...}6 } else {7 // Hides card fields if the merchant isn't eligible8 document.querySelector("#card-form").style = "display: none";9 }
You can modify this code to show a custom message for eligible or ineligible payments.
Render hosted card fields and create order
This code sample renders the hosted card fields for an eligible payment:
1// Renders card fields2 window.paypal.HostedFields.render({3 // Call your server to set up the transaction4 createOrder: createOrderCallback,5 styles: {6 ".valid": {7 color: "green",8 },9 ".invalid": {10 color: "red",11 },12 },13 fields: {14 number: {15 selector: "#card-number",16 placeholder: "4111 1111 1111 1111",17 },18 cvv: {19 selector: "#cvv",20 placeholder: "123",21 },22 expirationDate: {23 selector: "#expiration-date",24 placeholder: "MM/YY",25 },26 },27 })
- Line 117 creates the order by calling the
createOrderCallbackfunction. - Lines 118-125 define styles for the hosted card fields. You can change these styles as needed for your implementation.
- Lines 126-139 define the
selectorandplaceholdervalues for the input fields. You can edit this section as needed for your implementation, such as adding more fields. For more information about optional configurations, see Options in the JavaScript SDK reference.
Capture eligible payment
This code sample captures the payment when it is eligible for hosted card fields. Add this code to the PayPal button in /client/app.js, right after rendering the card fields:
1.then((cardFields) => {2 document.querySelector("#card-form").addEventListener("submit", (event) => {3 event.preventDefault();4 cardFields5 .submit({6 // Cardholder's first and last name7 cardholderName: document.getElementById("card-holder-name").value,8 // Billing Address9 billingAddress: {10 // Street address, line 111 streetAddress: document.getElementById(12 "card-billing-address-street",13 ).value,14 // Street address, line 2 (Ex: Unit, Apartment, etc.)15 extendedAddress: document.getElementById(16 "card-billing-address-unit",17 ).value,18 // State19 region: document.getElementById("card-billing-address-state").value,20 // City21 locality: document.getElementById("card-billing-address-city")22 .value,23 // Postal Code24 postalCode: document.getElementById("card-billing-address-zip")25 .value,26 // Country Code27 countryCodeAlpha2: document.getElementById(28 "card-billing-address-country",29 ).value,30 },31 })32 .then((data) => {33 return onApproveCallback(data);34 })35 .catch((orderData) => {36 resultMessage(37 `Sorry, your transaction could not be processed...<br><br>${JSON.stringify(38 orderData,39 )}`,40 );41 });42 });43 });
- Line 140 sets up an event listener for when the payer submits an eligible card payment.
- Lines 143-170 pass the hosted card field values, such as the cardholder's name and address, to the
POSTcall in lines 128-131. Anything you pass into the submit is sent to the iframe that communicates with the Orders API. The iframe retrieves the data and sends it along to thePOSTcall. See the Orders v2 API for details about billing address fields and other parameters. For example, use the 2-character country code to test the billing address. - Lines 171-173 call the
onApproveCallbackfunction from lines 38-97, which sends aPOSTcall to/v2/checkout/orders/{id}/capturethat captures the order using theorderIdin thedataobject in/server/server.js. - Lines 174-178 pass an error message if the payment isn't successful.
Run front end integration
- Run
npm startto run your server. - Open your browser and navigate to
localhost:8888. - When your server is running, proceed to the next section to test your integration.
4
Test integration
Before going live, test your integration in the sandbox environment.
Learn more about the following resources on the Card Testing page:
- Use test card numbers to simulate successful payments for Expanded Checkout integrations.
- Use rejection triggers to simulate card error scenarios.
- Test 3D Secure authentication scenarios.
- Test your integration by following these recommended use cases. See the Orders v2 API for details about billing address fields and other parameters. For example, use the 2-character country code to test the billing address.
Note: Use the credit card generator to generate additional test credit cards for sandbox testing.
5
Go live
If you have fulfilled the requirements for accepting Advanced Credit and Debit Card Payments for your business account, review the Move your app to production page to learn how to test and go live.
If this is your first time testing in a live environment, follow these steps:
- Log into the PayPal Developer Dashboard with your PayPal business account.
- Complete production oboarding so you can process card payments with your live PayPal business account.
- Request Advanced Credit and Debit Card Payments for your business account.
Important: The code for the integration checks eligibility requirements, so the payment card fields only display when the production request is successful.
Next steps & customizations
Add security to your checkout integration, or create customizations for your audience.
Optional
Payers buy now and pay in installments.
Optional
Add the Venmo button to your checkout integration.
Optional
Accept local payment methods across the globe.
Optional
Add Apple Pay as a payment button.
Security and customizations
Required
Authenticate card holders through card issuers.
Optional
Captures payment for an order.
Optional
Refund all or part of a captured payment.
Optional
Reduce declines by getting card updates from the issuer.