Upgrade your simple buy button integration

UpgradeCurrent

If you have a Simple Buy Button integration, PayPal recommends upgrading to Payment Links & Buttons using the Button Builder. The Payment Links & Buttons has the following benefits:

Accept Venmo, Apple Pay, Pay Later, and other alternative payment methods your customer prefer. *Availability may vary based on your region.
Mobile-optimized buyer experience that works seamlessly across all devices, capturing the growing mobile commerce market.
Enhanced fraud protection and PCI-DSS compliance with PayPal’s latest security infrastructure.
Hero Section Image

Get Started

What Your Current Button Looks Like

If you currently have a legacy Simple Buy Now integration, your PayPal button should look like the example below. If your button appears different, please refer to our Overview page to determine your specific Website Payments Standard use case.

image

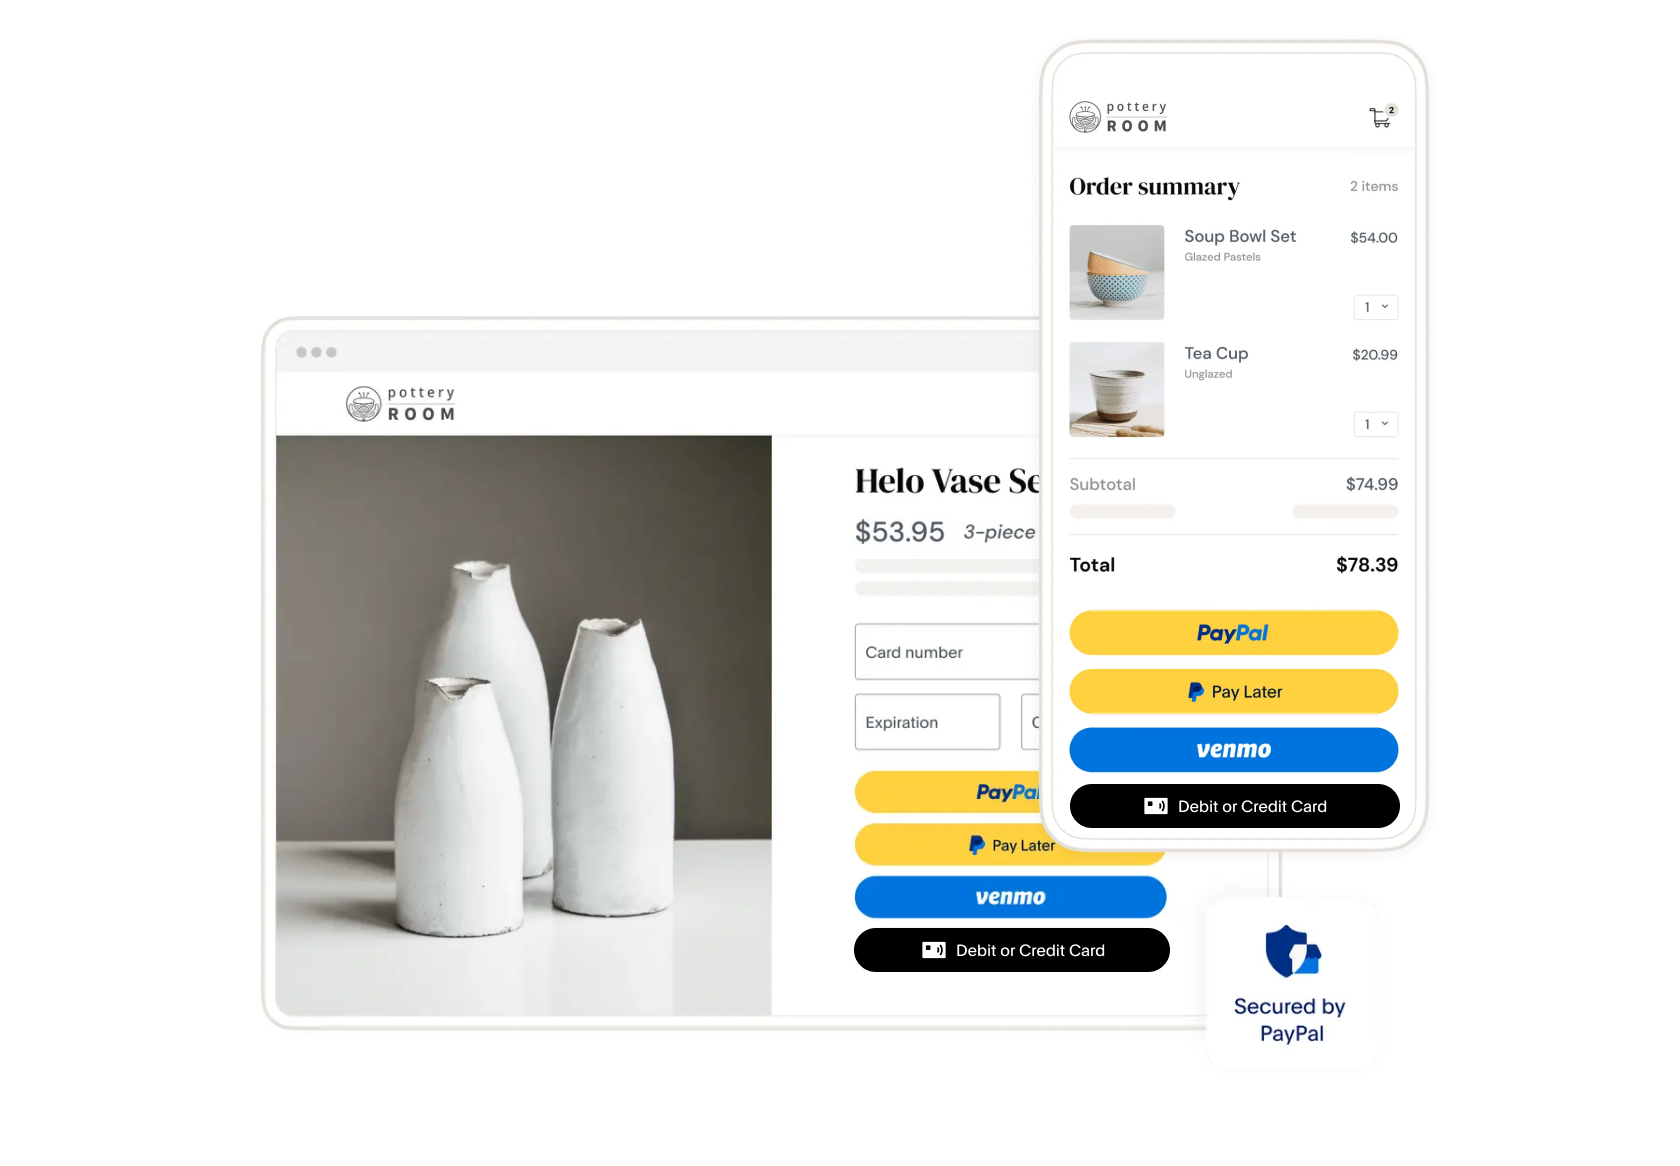
What Your Upgraded Button Looks Like

After upgrading from your legacy Website Payments Standard integration, your PayPal button will offer multiple payment methods in a modern, mobile-optimized interface. 

image

Key Considerations Before You Start
  1. One Button Per Product: If your website features multiple products, you will need to create a unique payment button for each one. This ensures that your customers are charged the correct amount and that your inventory is tracked accurately.
  2. Backup Your Website: Before making any changes to your website's code, we strongly recommend creating a full backup. This will allow you to restore your website to its previous state if you encounter any issues.

Choose Your First Product
  1. Select a product that currently uses a simple WPS “Buy Now” button
  2. Have product details ready
    • ex. Name, price, description, product images
  3. Note any variants (size, color) or quantity options

1

Set up Payment Buttons

Access Payment Links & Button Builder
  1. Navigate to Payment Button Builder
  2. Log into your PayPal business account
Configure Basic Settings
  1. Enter a “Item Name”
  2. Select “One set price” under Price Choose type drop down
  3. Enter your product price
Add Product Images
  1. Toggle on “Images”
  2. Upload up to 5 high-quality product images, while following guidelines.
Configure Quantity
  1. Toggle on “Quantity” if you would like to allow customers to buy multiple items
  2. Set maximum quantity limits
Configure Product Variants and Inventory

For products with size, color, or other options:

  1. Click “Show More Options” and toggle on “Variants”
  2. Add different variants type (ex. size, color)
  3. List up to 10 options per variant (ex. blue, red, green, black for the “Color” variant)
  4. You can add images and set different prices for your first variant. To set prices, check “Add price per variant”

Inventory Management (optional but recommended)

  1. Toggle on “Inventory”
  2. Enter current stock quantity and item ID
  3. Set low stock alert under “Alert quantity” (ex. 5 items)
What If I Have More Than One Product?

The steps you just completed created a payment button for a single product.

If you sell multiple products on your website, you must repeat the process above for each individual product. Every item needs its own unique payment button to ensure your customers are charged the correct price and see the right product details during checkout.

After creating your first button, simply return to the Payment Button Builder to start creating the next one.


2

Implement Payment Buttons

Now that you have created your new button(s), it's time to update your website. This process involves removing the old, outdated code and pasting in the new, secure code you generated in Step 1.

Locate Payment Button code
  1. Choose the right button code based on your website technology and needs
    1. Stacked Buttons (Recommended): Navigate to “Stacked Buttons” tab. This option lets you present all of your product information and PayPal payment method upfront on your website. Your customers can choose to pay with other payment methods by clicking on the third button (Checkout button).
    2. Single Button (embed a payment link): Navigate to “Single button” tab. This option lets you quickly paste a single button on your site. Once customers click the button, they will be redirected to a PayPal page with product information and PayPal payment method.
  2. To manage your button code later, go to “More Actions” > “Saved Links and Buttons.”

Understanding Your New Button Code

When you copy the code from the PayPal Payment Button Builder, you will notice it's provided in two parts. It's very important to understand what each part does.

Part 1: The PayPal Setup Script

This is a single line of code that loads PayPal's functionality onto your website. Think of it as the "engine" that powers all your new payment buttons.

  • You only need to add this script ONCE to your website, even if you have many buttons.
  • It looks something like this:
PayPal Setup Script Example Code
Upgraded
1
2
3
4
5
6
7
8
9
10

Part 2: The Unique Button Code

This block of code is what actually displays the payment button for a specific product. Each button you created in Step 1 has its own unique Part 2 code.

  • You must add this code for EACH product you want to sell.
  • It needs to be placed exactly where you want the button to appear on your page, usually next to the product's description.
  • It looks something like this (note the unique ID in the first line; this is different for each Payment Button):
Payment Button Code Part 2 Example
Upgraded
1
2
3
4
5
6
7
8
9
10
How to Replace the Code on Your Site

1. First, Find and Remove Your Old Legacy Code

Before adding anything new, you need to locate the old code. This legacy code is typically an HTML <form> block for each product.

  • How to Find It: Open your website editor and view the page containing your products in HTML or "code" mode.
  • What to Look For: Search for code that contains any of these keywords:
    • paypal.com/cgi-bin/webscr
    • cmd=_xclick
    • input type="hidden" name="business"

Here is a typical example of the old legacy code you need to delete:

Old Legacy WPS Code Example
Deprecated
1
2
3
4
5
6
7
8
9
10

Remove this entire <form>... </form> block for each product on your site.

2. Next, Add Your New Code

Now you'll paste in the new, two-part code.

  • Add Part 1 (The Setup Script) Once:
    • Copy the Part 1 "Setup Script" from the Button Builder. Paste it once in a central location on your website template, ideally just before the closing tag. Placing it here ensures the script is loaded on every page that might have a button.
  • Add Part 2 (The Unique Button Code) for Each Product:
    • Go back to the button you generated for your first product. Copy its unique Part 2 code. Paste this code into the space where you just deleted the old legacy
      block. Make sure you are pasting the button code that corresponds to the correct product.
    • If you have multiple products, repeat this step: Go to the next button you generated in the Button Builder, copy its unique Part 2 code, and paste it next to that corresponding product on your website. Do not use the same Part 2 code for different products.

Example: Upgrading a Page with Two Products

Your old code might look like this
Deprecated
1
2
3
4
5
6
7
8
9
10
Your new code should look like this
Upgraded
1
2
3
4
5
6
7
8
9
10

3

Test Integration

Before making your new button live to customers, complete this testing checklist for each product to ensure everything works perfectly.

Testing Checklist:
  1. Button appears correctly on the page
  2. Click the button
  3. PayPal checkout page opens
  4. Test in incognito/private browser mode to view the customer experience
  5. Have a friend test the transaction using their buyer account and refund the test payment afterward

4

Common Issues Troubleshooting

If you encounter any issues during migration, these solutions address the most common problems merchants face. Most issues can be resolved quickly without technical support.

Issues Solution
Button doesn't appear Check that JavaScript is enabled, Verify client-ID in your website code matches the client-ID in your code snippet.
Page looks broken Restore from backup, try to go through implementation process again
Payment doesn’t work Verify PayPal account is verified and in good standing
Mobile display issues Add this to your HTML: <meta name="viewport" content="width=device-width, initial-scale=1">

Need additional troubleshooting help? Check our detailed FAQ page.

Having Issues?

Contact a Payment Specialist who can guide you through the upgrade process or call us at (888) 429-3035.