Use filters to decide whether FPA approves, rejects, or puts a transaction into a review queue.
Manage lists
Last updated: Feb 5th, 11:12pm
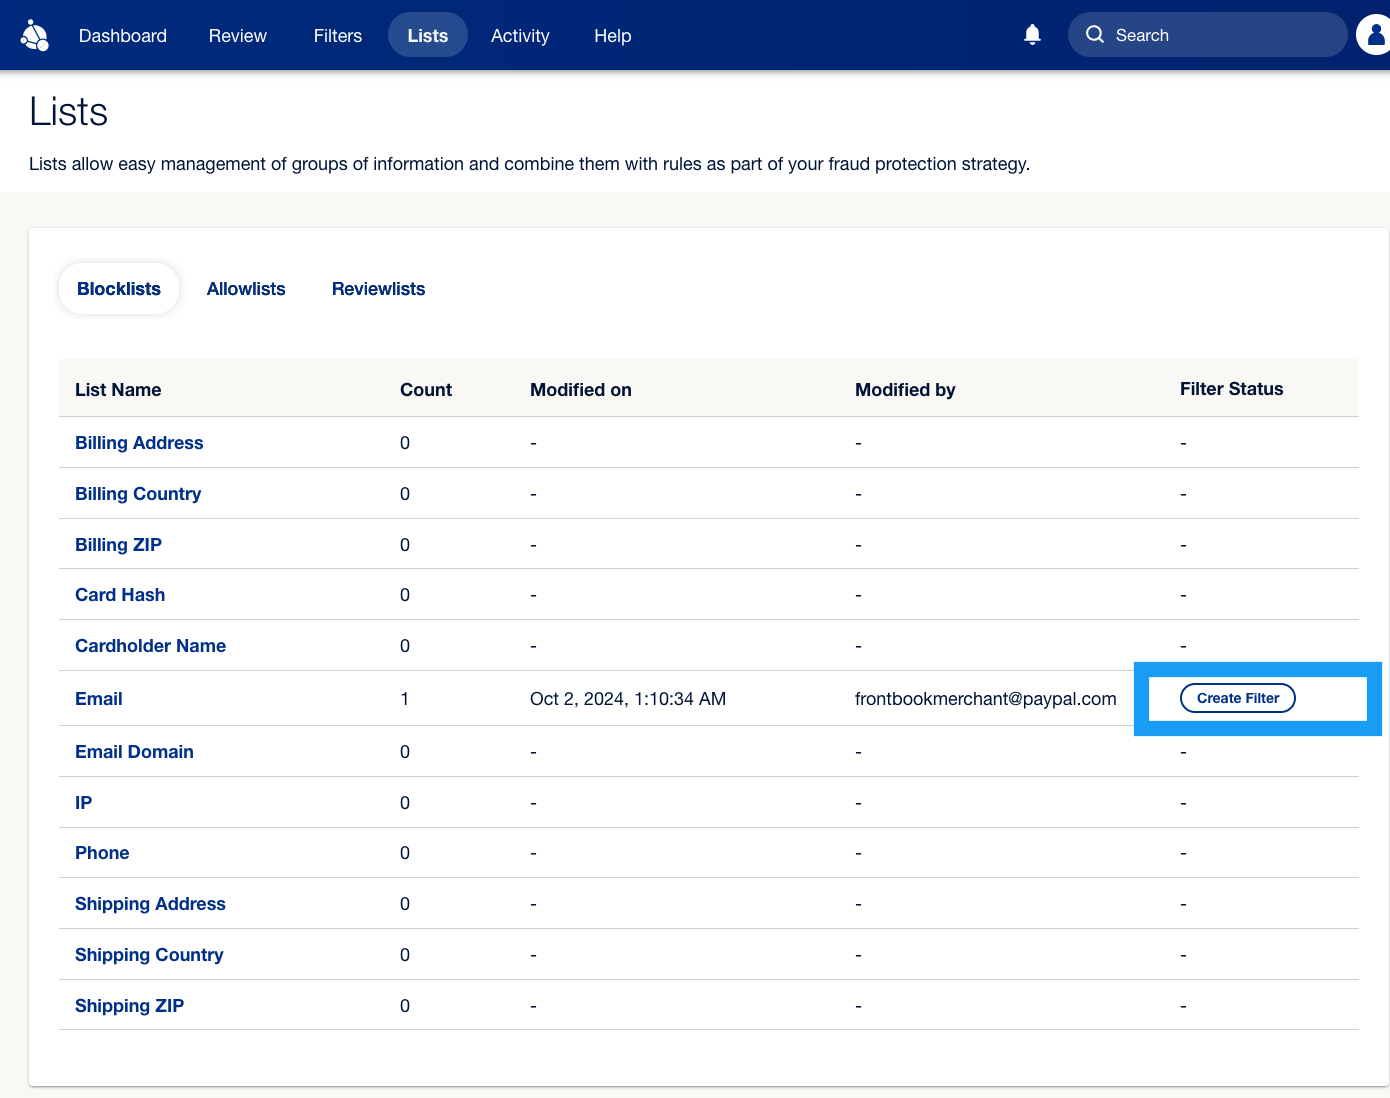
The Lists tab shows the attributes for which your merchants can create lists, the number of items on each attribute list, and whether an active filter is associated with each list.
Merchants can use Blocklists to prevent known bad actors and Allowlists to ensure their trusted customers can check out smoothly. Reviewlists automatically queue transactions with specific attributes for manual review, allowing the merchant’s team to decide whether to approve or reject them.
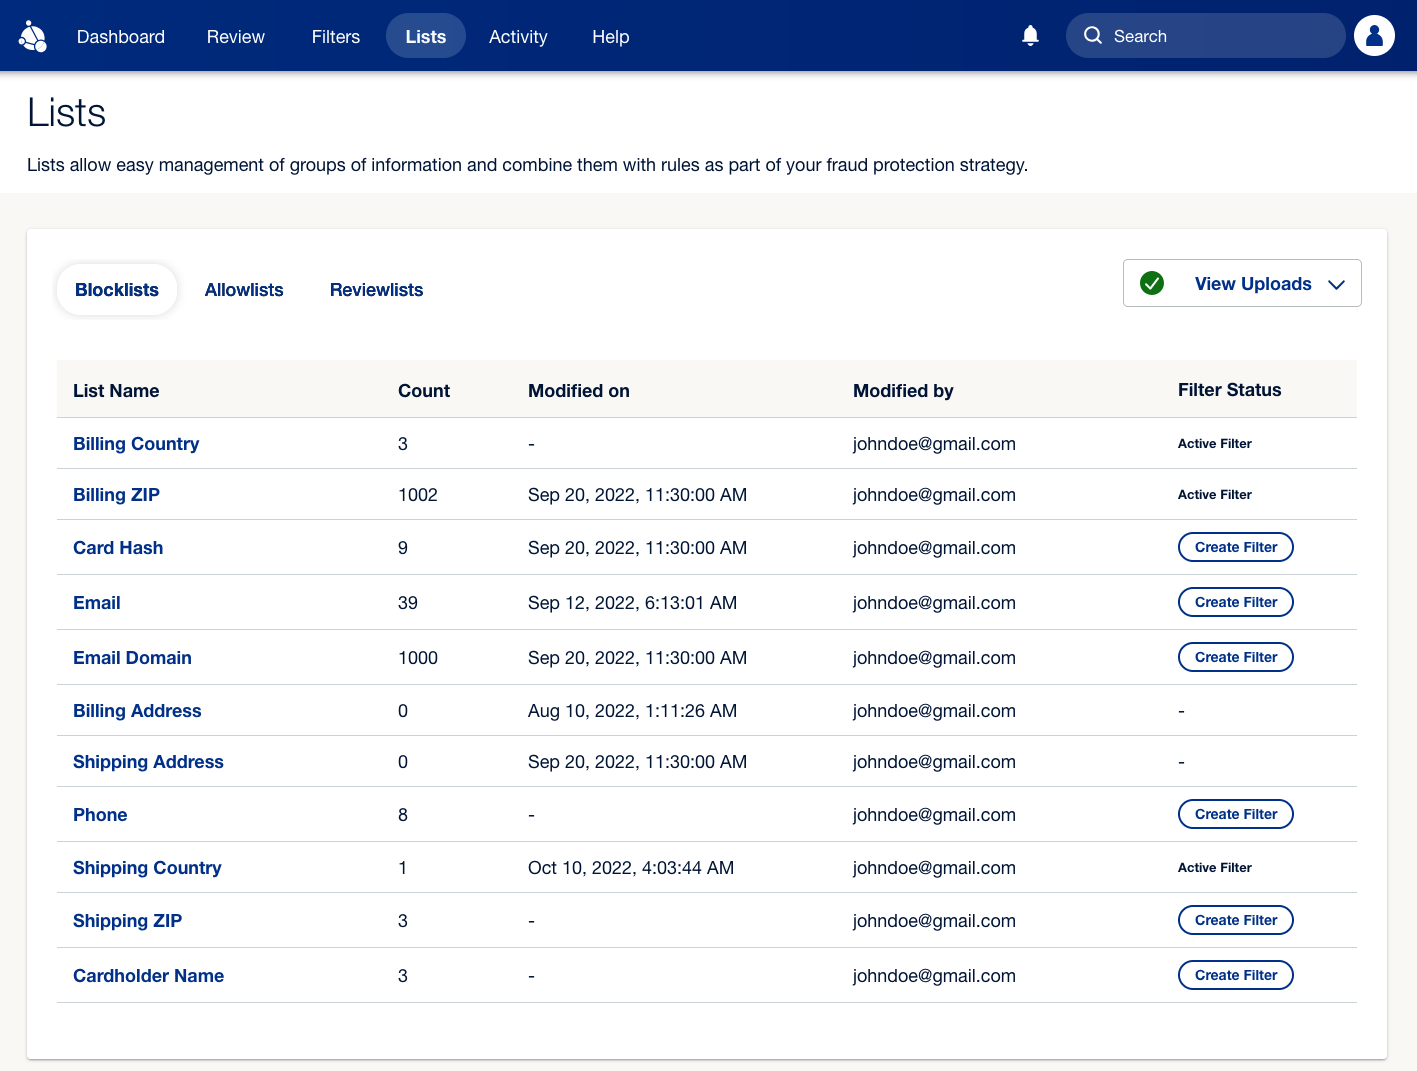
Default lists
Fraud Protection Advanced (FPA) provides Blocklists, Allowlists, and Reviewlists by default for each of the following attributes:
- Billing Country
- Billing ZIP
- Card Hash
- Email Domain
- Billing Address
- Shipping Address
- Phone
- Shipping Country
- Shipping ZIP
- Cardholder Name
Add items to lists
Your merchants can add items to lists using the following steps:
- On the Lists tab, select one of the following categories you want to add items to: Blocklists, Allowlists, or Reviewlists.
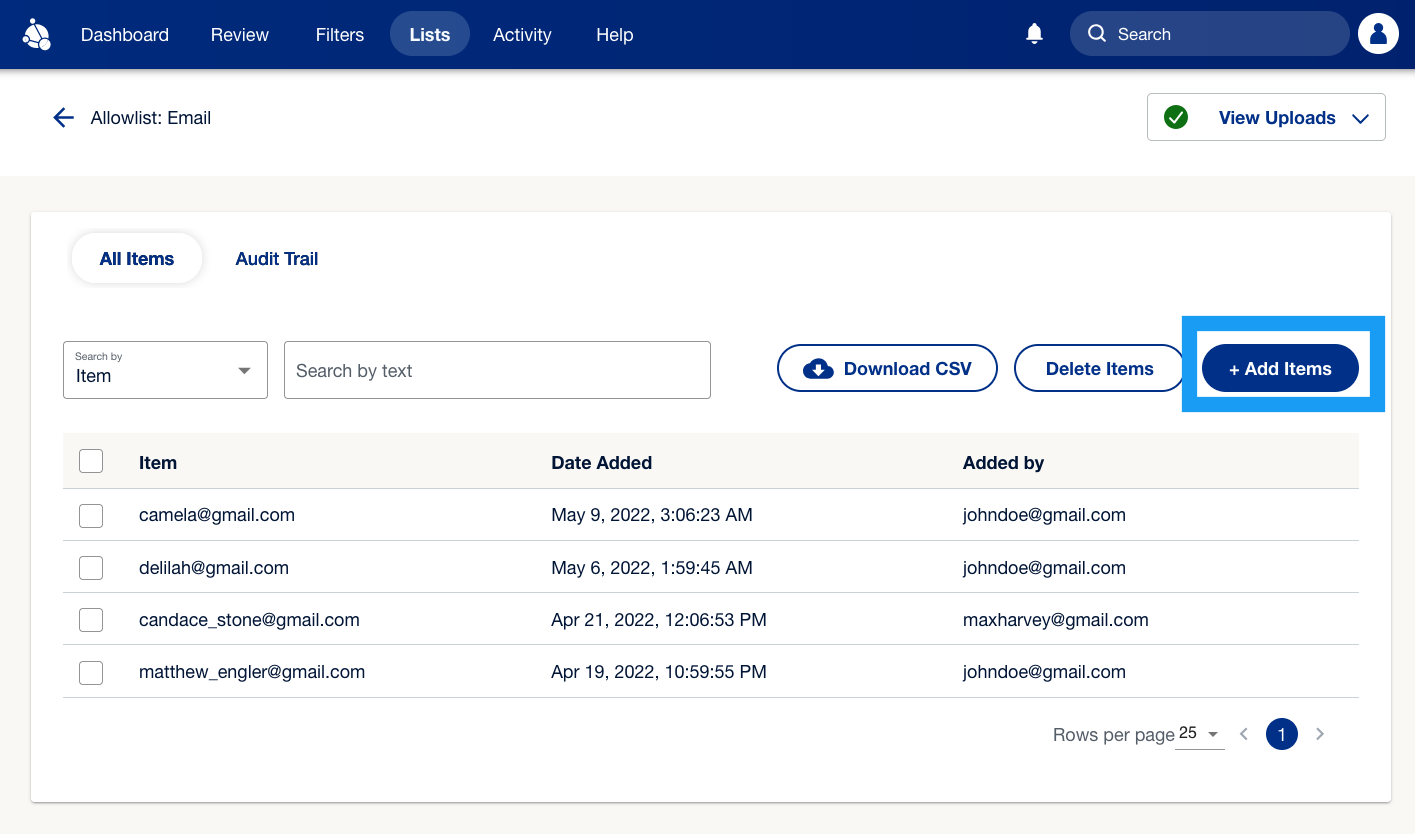
- Choose the specific list you want to add items to, such as Email, and then select +Add Items.
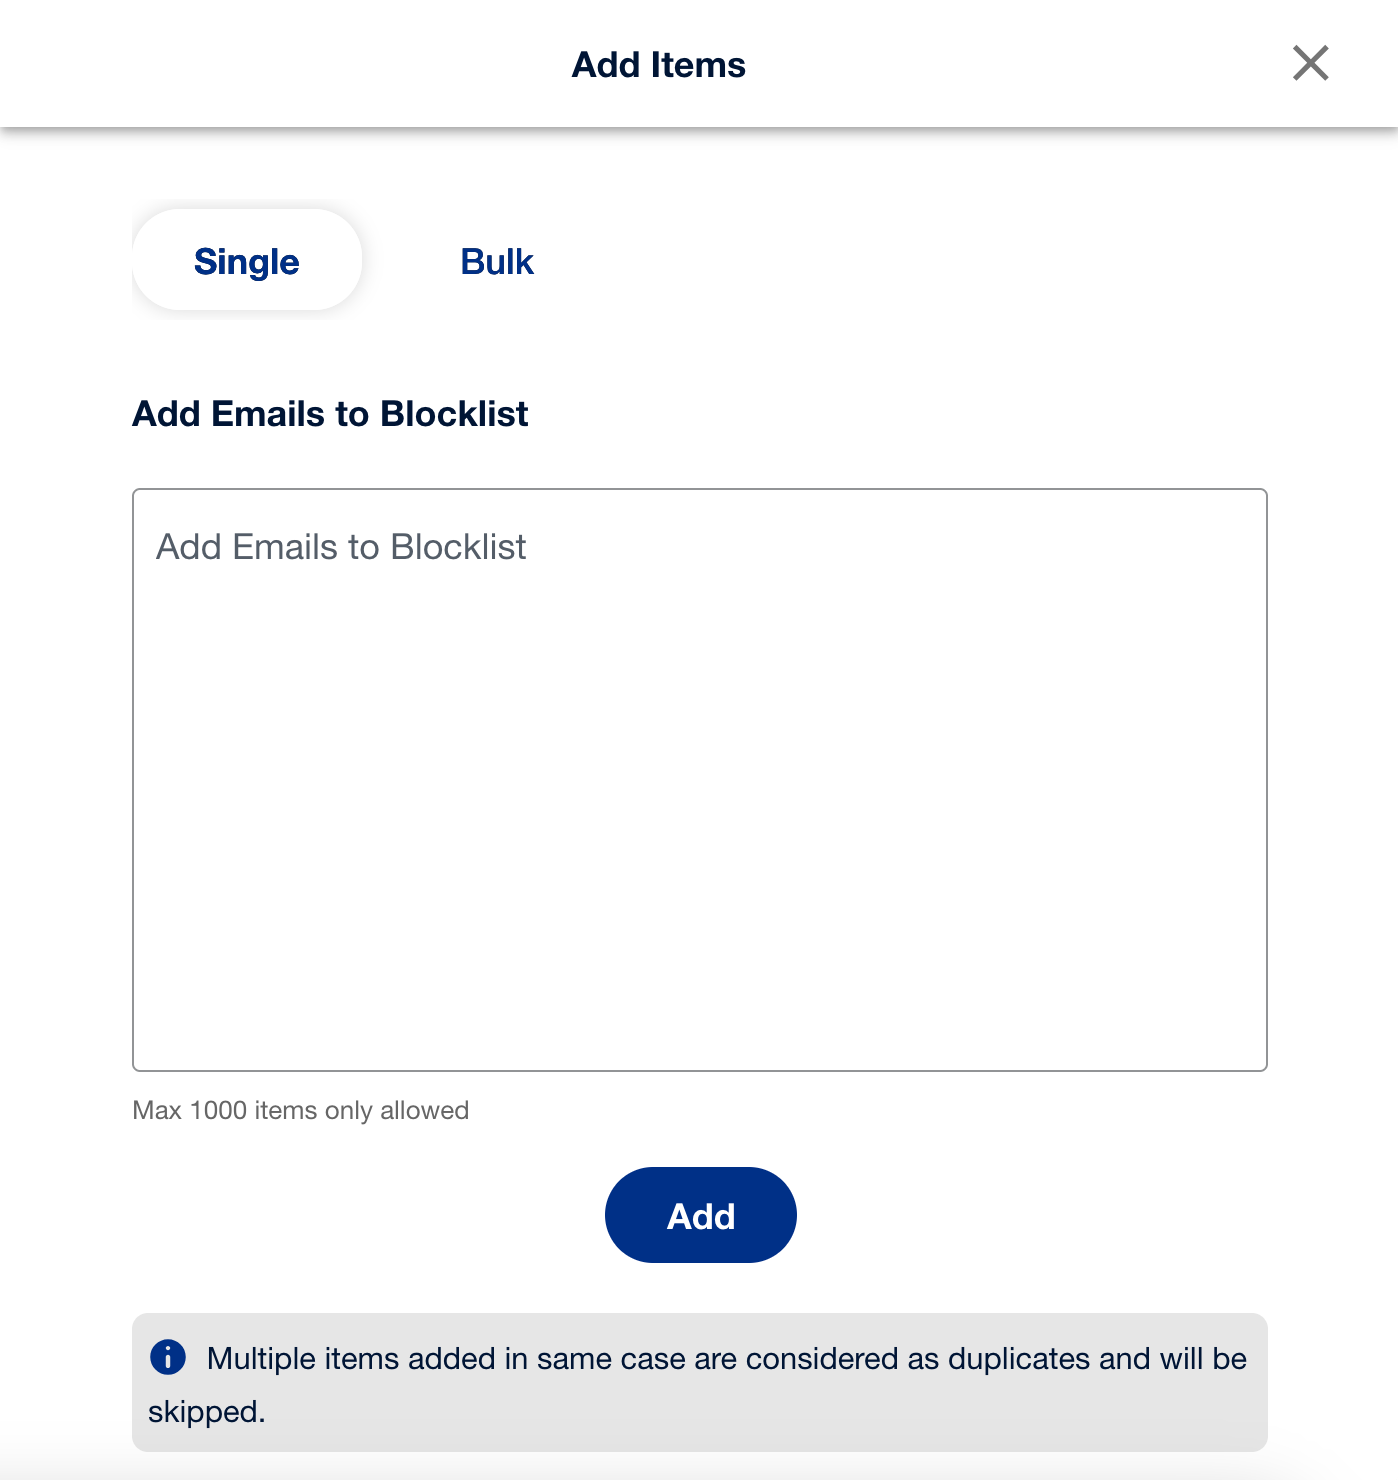
- A pop-up window will appear, where you can enter comma-separated individual email addresses or upload a
.csvfile to add multiple emails in bulk. Select Add to proceed.
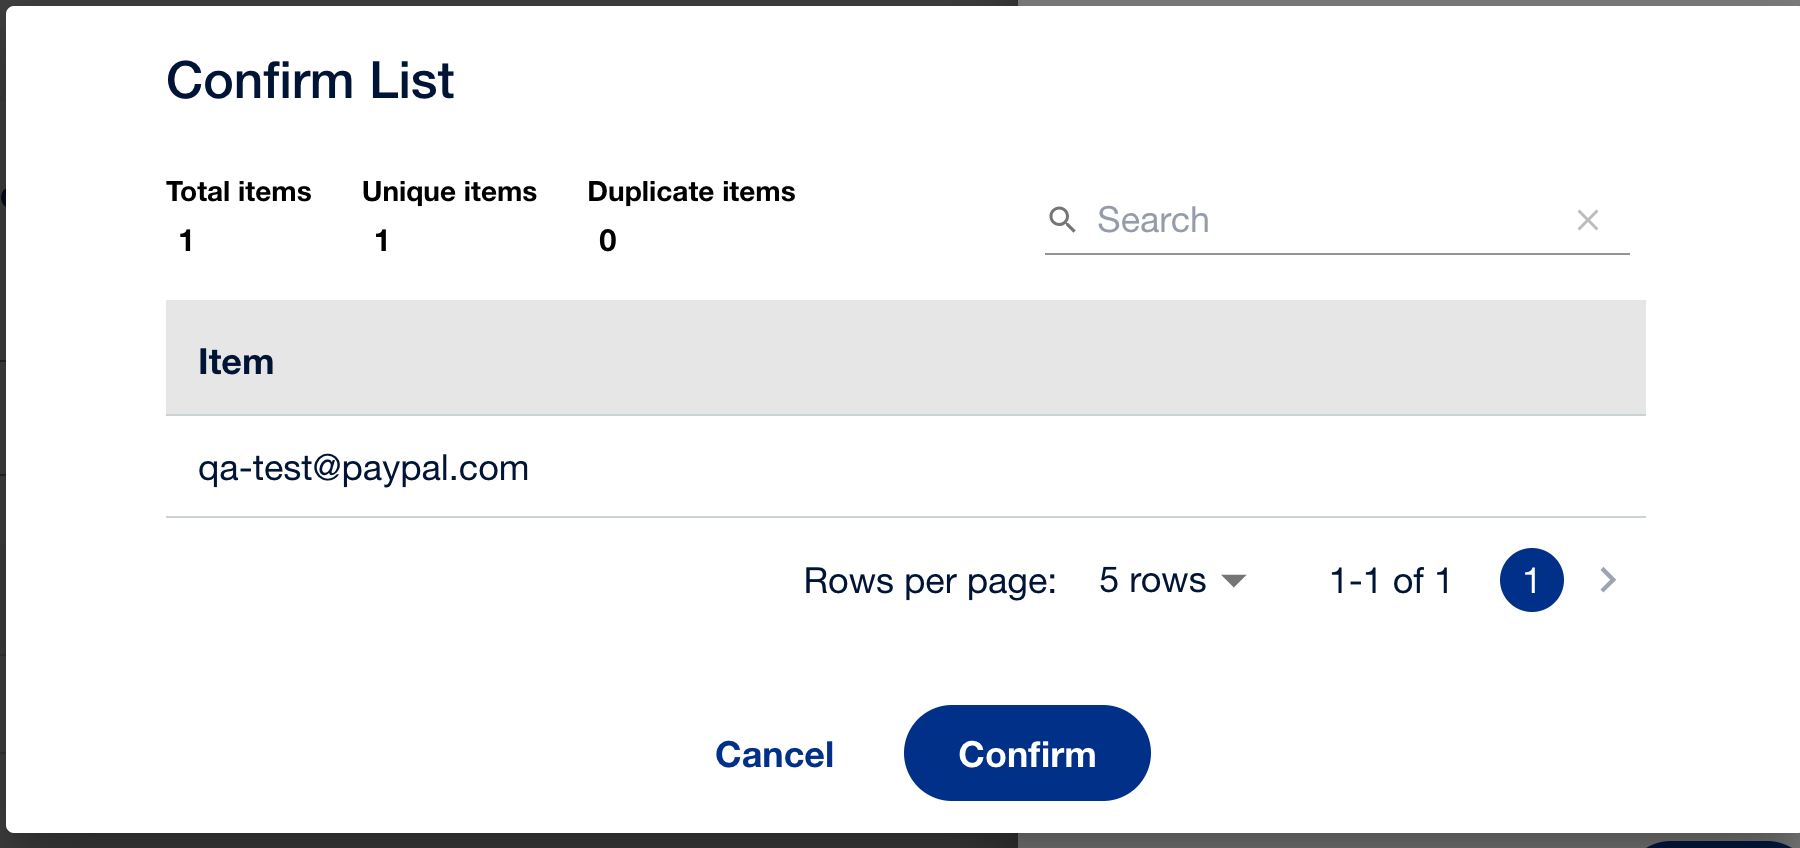
- You’ll see another pop-up window. Select Confirm. Your data will get added to your chosen list. You will then see the list updated on the Lists tab.
Adding an item to the list does not ensure that the filter for the list will work for the newly added item. You need to create a filter again and specify the necessary conditions. Select Create Filter to set up the filter as shown below.
Delete items from lists
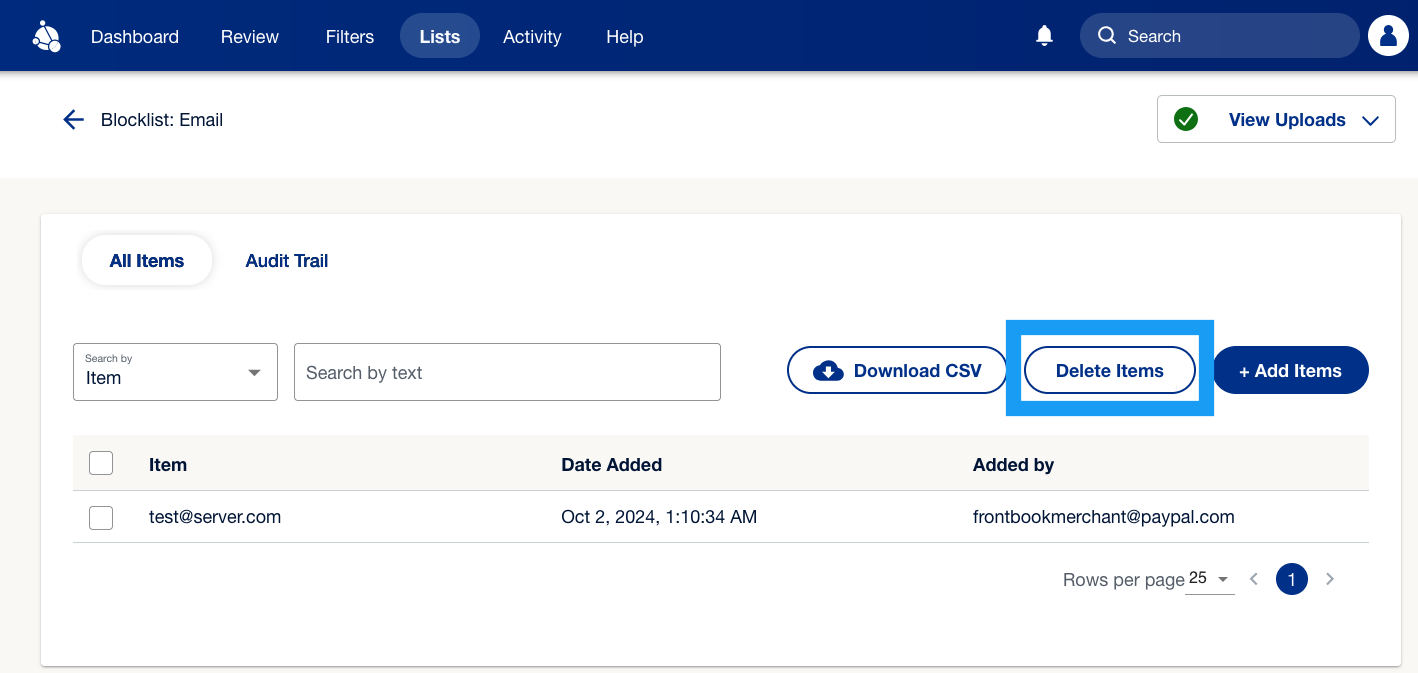
Merchants can delete items as well by selecting an item from the respective list and then selecting Delete Items.
